
The secret to chic wedding personalization is not adding more details, but creating a cohesive design language that tells your story with subtlety and intention.
- Effective personalization focuses on 2-3 core narrative touchpoints, not a chronological scrapbook of your relationship.
- A strategic Design Roadmap, created before any purchases are made, is the key to preventing impulse spending and achieving a polished, high-end look.
Recommendation: Instead of asking “What can we personalize?”, ask “What three elements best represent our story and how can we translate them into a consistent theme?”
Every couple wants a wedding that feels uniquely “theirs.” The fear, however, is a common one: that in the quest for personalization, the line between heartfelt and homemade, between chic and cheesy, becomes dangerously blurred. You’ve seen the advice columns suggesting you plaster your faces on everything and turn your reception into a museum of your relationship history. While well-intentioned, this approach often leads to a disjointed and overwhelming experience for guests, resembling a high-school craft project more than a sophisticated celebration.
The conventional wisdom focuses on *what* to personalize—napkins, signs, favors. But it rarely explains *how* to do so with restraint and elegance. It overlooks the power of thematic consistency and the importance of a professional finish. But what if the key to deeply personal wedding styling wasn’t about adding more, but about strategic editing? What if the goal wasn’t to tell your entire life story, but to evoke its feeling through a curated, cohesive design language?
This guide moves beyond the platitudes. We will explore the principles that high-end stylists use to translate a couple’s story into a tangible, elegant experience. You will learn how to select meaningful symbols, mix old with new, decide what is safe to DIY, and understand the logistics of custom orders. Ultimately, you’ll learn to build a design roadmap that ensures every personalized detail contributes to a beautiful, intentional, and unforgettable narrative.
To guide you through this process, this article is structured to build your confidence from specific elements to an overall strategy. Discover how to apply these professional principles to create a wedding that is authentically, beautifully, and unapologetically you.
Contents: Weaving Your Story into an Elegant Wedding Design
- How to design a wedding crest that works on napkins and dance floors?
- Grandmother’s china vs. Rental charger plates: mixing old and new
- Why trying to tell your whole life story creates a confusing guest experience?
- Which 3 items are safe to DIY vs what you must rent for a polished look?
- When to finalize custom neon signs to avoid rush fees and shipping delays?
- Creating a modern seating chart on acrylic without bubbles or peeling
- Stickers vs. Engraving: is it worth paying $2 extra for a name?
- How to Build a Design Roadmap That Prevents Impulse Spending?
How to design a wedding crest that works on napkins and dance floors?
A custom wedding crest is a powerful narrative tool, acting as a sophisticated monogram for your shared life. However, its effectiveness hinges on one critical factor: scalability. A design that looks beautiful on a large welcome sign can become an illegible smudge on a cocktail napkin. The goal is to create a symbol, not an illustration, by focusing on abstract representations of your story rather than literal depictions.
Successful crests often draw from meaningful places or shared passions. Think about incorporating symbols that represent your hometowns, the location of your first meeting, or even a beloved pet, translated into an elegant, simplified form. A designer can transform these ideas into a timeless typographic or illustrative mark. The key is to move away from complex scenes and towards a clean, memorable design that communicates your story symbolically.
To ensure your crest is versatile, follow a clear design and testing process. This ensures the final product is not only meaningful but also functional across every touchpoint of your wedding.
- Choose 2-3 Abstract Symbols: Select a few core ideas that represent key moments, like a mountain for your engagement location or a book if you share a profession.
- Test for Scalability: Before finalizing, mock up the design on the smallest item it will appear on (e.g., a cocktail napkin) and the largest (e.g., a dance floor projection).
- Simplify Relentlessly: If the design fails at either extreme size, remove intricate details. Less is always more for a crest’s legibility and impact.
- Create a Design Brief: Use the crest as a starting point for other elements. If your crest features a bee, consider honey-based cocktails or honeycomb patterns in your stationery to create a cohesive narrative.
- Apply Consistently: Use the final crest consistently across all planned touchpoints to build a strong, unified brand for your celebration.
By prioritizing simplicity and symbolic meaning, your crest becomes a sophisticated thread that ties your entire wedding design together, working beautifully at any scale.
Grandmother’s china vs. Rental charger plates: mixing old and new
Incorporating heirloom pieces, like a grandmother’s cherished china, is a beautiful way to infuse your wedding with history and personal meaning. The challenge lies in integrating these vintage items into a modern tablescape without creating a look that feels dated or disjointed. The secret is not to replace everything with heirlooms, but to use them as deliberate, high-impact accents. This is where the 80/20 proportion rule comes into play.
Aim for your table setting to be comprised of 80% modern, cohesive rental pieces (the anchor) and 20% heirloom items (the accent). For example, use rental dinner plates, flatware, and glassware, but top each setting with a vintage salad plate or use heirloom champagne flutes for the toast. This approach allows the special pieces to shine as “hero moments” without overwhelming the overall aesthetic. It creates a curated, collected look that feels intentional and deeply personal.
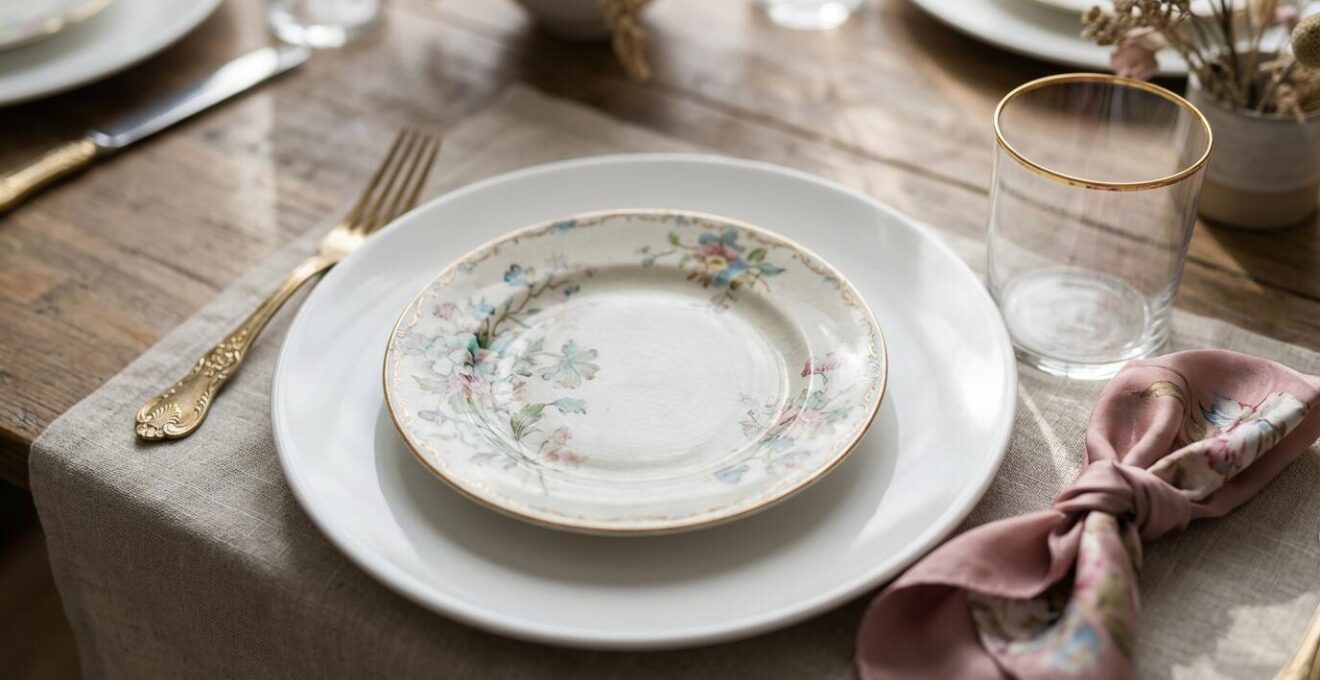
To unify the two styles, create a visual bridge. This could be a common color or material. If the heirloom china has a gold rim, pairing it with modern gold flatware instantly makes the combination feel deliberate. The goal is to balance sentiment with strategy, ensuring your tablescape tells a story of both your past and your present.
| Element | Heirloom Option | Rental Option | Best Use |
|---|---|---|---|
| Proportion Rule | 20% accent pieces | 80% anchor pieces | Creates a curated, not cluttered, look |
| Visual Bridge | Gold rim on china | Modern gold flatware | Unifies mixed styles seamlessly |
| Hero Moments | Champagne flutes for toast | Full dinner service | Spotlights special items for maximum impact |
| Cost Impact | $0 (sentimental value) | $8-15 per setting | Balances the budget with sentimental value |
Why trying to tell your whole life story creates a confusing guest experience?
There is a fine line between sharing your love story and overwhelming your guests with a flood of inside jokes and obscure references. The desire to include every meaningful moment—from your first date to your favorite vacation—is understandable, but it often results in a narrative that is confusing and unrelatable for anyone outside your immediate circle. The most elegant and impactful weddings practice thematic editing, choosing to tell one part of their story beautifully, rather than telling the whole story poorly.
As wedding expert Alyson Arnold notes, the key is to be selective and create a focused theme. She advises couples to identify a single high point in their relationship and use it as a foundation. As she explained in WeddingWire Expert Advice:
A couple’s desire to tell their love story at their wedding can quickly cross the line into mushy, cheesy, or even downright off-putting. Ceremony officiants recommend identifying a single high point, then using that to introduce a theme with three points that epitomize the romance – enough for insight without overwhelming guests with irrelevant details.
– Alyson Arnold
Instead of a chronological timeline, think of your personalization as a “Guest Discovery Path” with different levels of engagement. This framework allows you to share your story in a way that feels inclusive and intriguing. Some details are for everyone, while others are special “Easter eggs” for those who know you best. This layered approach makes guests feel like they are discovering your story, rather than having it dictated to them. By framing choices through the lens of hospitality—for example, changing a sign from “Our Favorite Drink” to “The Cocktail We Discovered in Italy – We Hope You Love It Too!”—you shift the focus from self-indulgence to a shared experience.
Which 3 items are safe to DIY vs what you must rent for a polished look?
The allure of DIY is strong, promising both cost savings and a personal touch. However, the reality is that many DIY projects fall short of a professional standard, ultimately undermining the elegant look you’re striving for. The key to successful DIY is not in manufacturing items from scratch, but in strategic assembly and smart sourcing. A discerning eye knows which battles to fight and which to leave to the professionals.
Items that are digital (photo slideshows), require simple assembly (welcome bags with high-quality purchased goods), or involve design-only work (creating a stationery layout before sending it to a professional printer) are generally safe to DIY. The quality in these areas depends on your skill and taste, not on complex equipment or technical expertise. Conversely, anything involving textiles, lighting, or structural elements should always be rented or purchased. Professional-grade linens, expert lighting, and structurally sound arches are non-negotiable for a polished and safe event. Attempting to DIY these often leads to a result that looks cheap and can even be hazardous.

Even custom decor can be achieved without full DIY. Many rental companies now offer customizable pieces, like seating chart walls, allowing you to get a personalized look with a professional finish. This hybrid approach offers the best of both worlds. The following guide helps distinguish where to apply your creative energy and where to invest in professional services.
| Category | Safe to DIY | Must Rent/Buy | Decision Factor |
|---|---|---|---|
| Digital | Photo slideshows, QR codes | – | Quality is not material-dependent |
| Assembly | Welcome bags with quality items | – | Focus on sourcing vs. manufacturing |
| Paper Goods | Design (then print professionally) | Printing services | Separate skill from production |
| Textiles | – | All linens | Professional quality is essential |
| Lighting | – | All lighting equipment | Technical expertise required |
| Structures | – | Arches, backdrops, furniture | Safety and proportion are critical |
When to finalize custom neon signs to avoid rush fees and shipping delays?
Custom neon signs have become a staple of modern wedding decor, offering a high-impact, personalized focal point. However, this trendy element comes with a logistical timeline that many couples underestimate. Unlike off-the-shelf decor, custom signs require a significant lead time for design, production, and shipping, especially from international vendors. Waiting too long to order is a recipe for rush fees, shipping anxiety, and potential disappointment.
The entire process, from initial concept to final delivery, can easily take several months. Most reputable international suppliers have a standard production time of six to eight weeks. Critically, wedding industry surveys show that 15% of custom orders experience shipping delays, making a built-in buffer non-negotiable. To avoid last-minute panic, you should be finalizing your neon sign design and placing your order no later than four to five months before your wedding date. This allows ample time for revisions, production, and any unforeseen hurdles in transit.
To manage this effectively, use a reverse timeline starting at least six months out from your wedding day. This strategic approach ensures your sign arrives on time and in perfect condition.
- 6 Months Out: Finalize your design concept (the phrase, font, and color) and gather initial quotes from several vendors.
- 5-4 Months Out: Work with your chosen vendor to complete design revisions and approve the final proof. This back-and-forth can take longer than expected.
- 3-2 Months Out: This period is dedicated to the 6-8 week production and international shipping window. Your sign should be in transit during this time.
- 1 Month Out: Build in a two-week buffer for the sign to arrive. This allows you to handle any potential shipping delays, damage claims, or errors without stress.
- Final Weeks: Once the sign arrives, test it with your venue’s power supply and coordinate with your planner on placement and installation plans.
By treating your custom neon sign as a major logistical component, not a last-minute decorative touch, you ensure it becomes a flawless highlight of your celebration.
Creating a modern seating chart on acrylic without bubbles or peeling
An acrylic seating chart is a hallmark of modern, minimalist wedding style. Its clean, “floating” aesthetic is undeniably chic, but achieving a flawless, professional finish requires precise technique. The most common pitfalls—air bubbles, crooked decals, and peeling vinyl—can quickly turn a sophisticated design element into a DIY disaster. The secret to a perfect application lies in a combination of meticulous preparation and the “wet method.”
This professional technique involves using a mild soap-and-water solution to temporarily reduce the vinyl’s adhesion, allowing you to slide it into the perfect position before squeegeeing it into place. This eliminates the high-stakes pressure of getting the placement right on the first try. Paired with a pristine, lint-free surface, this method guarantees a bubble-free result every time. For an even more elevated look, consider the reverse-painted technique, where you paint the back of the acrylic for color and apply the vinyl to the front for a look with incredible depth and durability.
Follow these steps for a flawless, professional-grade acrylic sign:
- Clean the Surface: Thoroughly wipe the acrylic sheet with isopropyl alcohol and a lint-free microfiber cloth to remove any dust, fingerprints, or residue.
- Prepare the Solution: Fill a spray bottle with water and add 2-3 drops of mild dish soap. Shake gently to mix.
- Apply the Solution: Lightly mist the surface of the acrylic. The surface should be damp, not dripping.
- Position the Decal: Carefully place your vinyl decal onto the wet surface. The solution allows you to gently slide it into the exact desired position.
- Squeegee Firmly: Starting from the center of the decal and working your way out, use a squeegee or a credit card to press the vinyl firmly onto the acrylic. This action pushes the water and any air bubbles out from under the decal.
- Let it Cure: Allow the decal to dry and cure for several hours before handling to ensure a strong, permanent bond.
Finally, when placing your sign, consider the guest experience. Ensure it is well-lit and not placed in a high-traffic bottleneck. A beautiful sign that’s hard to read or causes a traffic jam detracts from, rather than enhances, the celebration.
Stickers vs. Engraving: is it worth paying $2 extra for a name?
When it comes to personalizing favors or place cards, the method you choose sends a distinct message about quality and permanence. While a sticker is the most budget-friendly option, it often has a low perceived value, feeling temporary and disposable. Engraving, on the other hand, signifies permanence and a higher level of care. The question isn’t just about the $2 cost difference; it’s about the lasting impression you want to leave with your guests.
Think of it as an investment in the guest experience. According to wedding budget analyses, that small upgrade can make a huge difference. For a wedding of 150 guests, choosing engraving over a basic sticker might cost an additional $300. While that sounds significant, that extra $300 represents just 5-7% of the average decor budget, a small price for a significant upgrade in perceived value. It transforms a simple object into a cherished keepsake.
However, engraving isn’t the only way to achieve a high-end feel. High-quality paper tags, especially those made with letterpress printing, can offer a similarly artisanal and thoughtful touch at an intermediate price point. The right choice depends on the item being personalized and the role you want it to play—is it a disposable favor marker or a permanent memento?
| Method | Cost per Item | Best For | Perceived Value |
|---|---|---|---|
| Stickers | $0.20-$0.50 | Disposable favors, welcome bag seals | Low – feels temporary |
| High-quality tags | $1.00-$1.50 | Mid-range keepsakes, escort cards | High – a thoughtful, stylish alternative |
| Letterpress tags | $1.50-$2.00 | Luxury presentation, high-end favors | Very high – conveys artisan quality |
| Engraving | $2.00-$3.00 | Permanent keepsakes (glassware, etc.) | Highest – signifies permanence and value |
Ultimately, investing a small fraction more of your budget in a higher-quality personalization method elevates the entire guest experience, communicating thoughtfulness and an appreciation for lasting quality.
Key Takeaways
- Strategic personalization is about choosing 3 key touchpoints to tell your story, not overwhelming guests with details.
- A Design Roadmap and mood board are essential planning tools to prevent impulse spending and ensure a cohesive look.
- For a polished finish, understand what is safe to DIY (assembly, digital) versus what must be rented (linens, lighting, structures).
How to Build a Design Roadmap That Prevents Impulse Spending?
The single greatest threat to a cohesive and elegant wedding design is impulse spending. Without a clear plan, it’s easy to fall for disparate items that are beautiful on their own but create a chaotic look when combined. The solution is to create a Strategic Design Roadmap before you spend a single dollar. This roadmap is your North Star, a framework that guides every decision and ensures each element serves your core narrative.
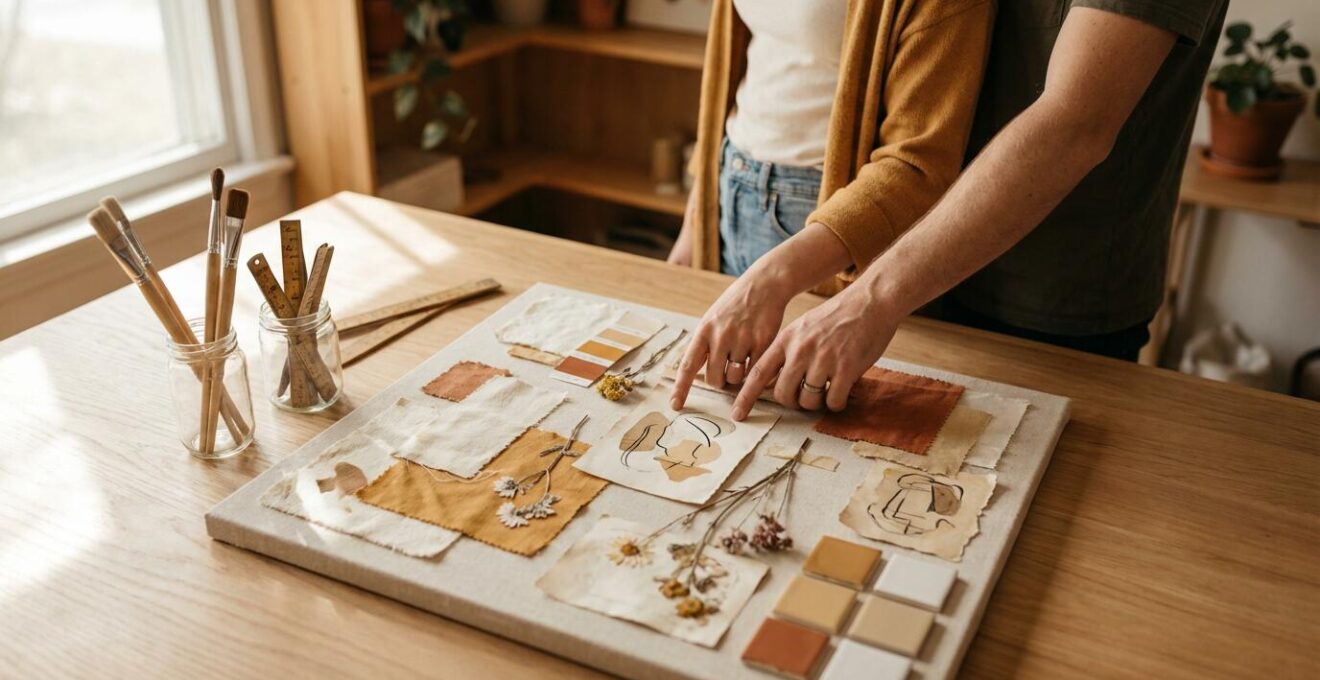
This process starts with a narrative mood board that goes beyond just colors. Define your theme with keywords like “nostalgic,” “literary,” or “warm,” and collect textures, patterns, and abstract images that evoke that feeling. As celebrated designer David Tutera emphasizes, planning is paramount. In a feature for Inside Weddings Magazine, he states:
Paper products provide the most information at the least cost. Wedding planners recommend locking down the overall look before going into design concepts, as these will dictate the style, etiquette, and vibe to the party.
– David Tutera
This “look” is your roadmap. Once established, every potential purchase—from linens to candle holders—must be tested against your mood board. If it doesn’t fit the established narrative and keywords, you don’t buy it. This discipline is what separates a professionally curated event from an amateur collection of nice things. Allocating a specific line item in your budget (around 5-7%) for “Personalization Details” also helps control spending while ensuring you have funds for the elements that matter most.
Your Action Plan: The Strategic Design Roadmap Framework
- Apply the Rule of Three: Select only three key touchpoints for personal story integration (e.g., the welcome drink, the table names, and the guest favor). This forces focus and prevents clutter.
- Create a Narrative Mood Board: Move beyond just colors. Define your theme with 3-5 keywords (e.g., “nostalgic,” “literary,” “warm”) and gather textures and abstract images that fit this feeling.
- Test Every Purchase: Before buying any decor item, hold it (physically or digitally) against your mood board. If it doesn’t align with your keywords and aesthetic, it’s a “no.”
- Establish a Budget Line Item: Formally allocate 5-7% of your total decor budget to “Personalization Details.” This creates a clear financial boundary for these special touches.
- Build a Priority Matrix: Rank your desired story elements on a matrix of Guest Impact vs. Cost. Invest in high-impact, low-to-mid-cost items first.
By building and adhering to this roadmap, you transform personalization from a series of random acts into a deliberate design process. This is the ultimate tool for creating a wedding that is not only deeply personal and beautiful but also thoughtfully budgeted and flawlessly executed.