
The key to transforming a gauze runner from a messy bunch of fabric into an elegant, flowy feature is not luck, but technique. It’s about understanding fabric physics—how to manipulate its weight, texture, and folds with intention. This guide provides the specific stylist methods, from the foundational “Pinch & Drop” technique to the strategic order of operations, ensuring your tablescape looks intentionally romantic, not accidentally sloppy.
You’ve seen the photos: ethereal gauze runners cascading effortlessly off the edge of a rustic table, pooling onto the floor in a cloud of romantic softness. You bought the fabric, you laid it on your dining table for a test run, and the result was… less than dreamy. Instead of “flowy,” it looks “floppy.” Instead of “bohemian,” it looks “bunched-up” and messy. This is a common frustration for couples aiming for that coveted romantic aesthetic. The problem isn’t the fabric; it’s the application.
Most advice simply suggests “bunching it up,” but this random approach often leads to a disorganized look. True fabric styling is a craft, a deliberate manipulation of textile to create a specific mood. It involves understanding concepts like visual weight, fabric memory, and structural anchoring, which are the keys to controlling the chaos. It’s the difference between throwing a blanket on a sofa and expertly draping a throw.
But if the secret isn’t just random bunching, what is it? The answer lies in treating the runner not as a passive decoration, but as a sculptural element. It’s about creating intentional folds, understanding the interplay between a steamed versus a crinkled texture, and knowing the precise order of setup to ensure the runner becomes the perfect canvas for your centerpieces, not an afterthought that gets in the way.
This guide will walk you through the professional techniques for manipulating gauze and other light fabrics. We will cover everything from the art of the perfect “puddle” on the floor to the critical safety rules for candles, giving you the confidence to execute a tablescape that looks as good in real life as it does in your inspiration photos.
To help you master this art, this article breaks down the essential skills and considerations into a clear, step-by-step guide. Below, the table of contents outlines each stage of the process, from creative customization to final execution.
Contents: Achieving the Perfect Gauze Runner Style
- Can you DIY dye cheesecloth runners to match your bridesmaids’ dresses?
- Which fabric holds a fold better for that “puddled” look on the floor?
- The distance rule: keeping gauze away from open flames to prevent disaster
- Steaming vs. Crinkled look: what is the intended aesthetic for gauze?
- Why you must lay runners before the florist arrives, not after?
- Chiffon runner vs. Naked wood: which creates a better frame for centerpieces?
- How to keep light silk runners from blowing into the food?
- How to Style Eucalyptus Runners That Look Lush and Don’t Dry Out?
Can you DIY dye cheesecloth runners to match your bridesmaids’ dresses?
Absolutely. DIY dyeing your cheesecloth or gauze runners is one of the most effective ways to achieve a truly custom and high-end look without the associated cost. It allows you to create the exact shade that complements your color palette, from the soft blush of a bridesmaid’s dress to the deep terracotta of your floral arrangements. The process is more accessible than it seems and offers a level of personalization that pre-made runners cannot match. The key is using the right grade of cheesecloth—Grade 90 is ideal for its soft, flowy texture and excellent dye absorption.
The true artistry comes from testing. Creating small test swatches with varying soak times will help you preview the color depth and achieve the perfect gradient. For richer, more saturated colors, you can simply repeat the dyeing process. This hands-on approach not only ensures a perfect color match but also connects you more deeply to the details of your wedding decor. In a compelling case study, a bride demonstrated that this approach is not just creatively fulfilling but also financially savvy. By DIY-ing her runners, she saved over $450 and even sold the custom runners after her wedding, recouping some of the cost.
Essential DIY Dyeing Steps for Cheesecloth Runners
- Pre-cut your cheesecloth to the desired length (add 2ft for shrinkage) before dyeing.
- Create test swatches with different timing (30 seconds to 10 minutes) to preview color depth.
- Pre-rinse fabric in cold water to ensure even dye absorption.
- Prepare the dye bath in a large container, ensuring the fabric can move freely.
- Soak for 10-12 minutes, stirring constantly for even color distribution.
- Rinse in cold water until the water runs clear, then hang to dry.
- Apply a vinegar or salt bath post-dye to set the color and prevent bleeding.
Which fabric holds a fold better for that “puddled” look on the floor?
While some fabrics have more “memory” than others, the secret to the perfect, artful “puddle” of fabric on the floor lies less in the specific material and more in the styling technique. The messy, accidental look you want to avoid comes from simply pushing fabric off the table. The intentional, romantic look comes from creating structure within the drape. Fabrics like Grade 90 cheesecloth are excellent because they are lightweight enough to flow but have enough body to hold a shape when manipulated correctly. The goal is to create defined folds before the fabric ever hits the floor.
Event professionals have perfected this, and one of the most effective methods is the ‘Pinch & Drop’ technique. Instead of letting the runner fall flat, you gather the fabric at the edge of the table, pinch it to create a series of accordion-like folds, and then let that structured section drop to the floor. This creates a column of texture that catches the light beautifully and has a deliberate, sculptural quality. The length is also crucial; for a generous puddle, your runner should be at least 4-6 feet longer than your table.
Professional Styling Techniques from Event Rentals
To achieve different effects, event rental professionals use distinct methods depending on the overall tablescape goals. The ‘Flatlay’ style keeps the runner smooth and is used to accent dominant centerpieces. For tables with more space between decor, the ‘Sweet In Between’ method creates gentle waves and visual interest. For maximum texture and a luxurious feel, the ‘Pinch & Drop’ technique is the go-to method for adding depth and dimension, turning the runner into a statement piece itself.
This control over texture is what separates a professional-looking tablescape from an amateur one. It’s about consciously adding visual weight and structure where you want it, ensuring the final result is one of effortless elegance, not untidy excess.
The distance rule: keeping gauze away from open flames to prevent disaster
The romantic glow of candlelight is a cornerstone of wedding ambiance, but when paired with lightweight, flowy fabrics like gauze or chiffon, it introduces a significant fire risk that cannot be ignored. The single most important rule is maintaining a safe distance. According to fire safety standards, a minimum of 12 inches must be kept between any open flame and any flammable material, including your table runners. This isn’t a suggestion; it’s a critical safety measure to prevent a beautiful moment from turning into a disaster.
Enforcing this rule requires proactive planning. When styling your runner, ensure its edges and any puddles on the floor are well clear of candle placements. The type of candle holder used is equally important. Opt for hurricane glass holders that extend at least 3 inches above the height of the flame. This acts as a protective barrier against both the heat and any breezes (especially outdoors) that could cause the fabric to blow toward the candle. For an even safer alternative, consider high-quality LED candles. Modern versions offer a warm-toned, realistic flicker that provides the ambiance without any of the risk.
For those committed to real flame, some professionals apply a temporary fire-retardant spray to the runners. However, this must always be tested on a small, unseen swatch first to ensure it doesn’t discolor or damage the fabric. Ultimately, safety must be the primary consideration that dictates your decor choices. As an official report on candle safety highlights, keeping a 12-inch minimum distance is a fundamental precaution in home and event fire prevention.
Checklist for Fire Safety with Wedding Fabrics
- Verify all fabric runners are at least 12 inches from any open flame.
- Use hurricane glass holders with tops extending 3+ inches above the flame.
- Test any fire-retardant sprays on a hidden fabric swatch before full application.
- Position candles only on stable, flat surfaces with 3-inch spacing between each.
- Consider high-quality LED candles with a warm-tone flicker as the safest alternative.
- Ensure all venue exits remain clear and fire extinguishers are accessible and known.
- Designate someone to monitor and never leave burning candles unattended.
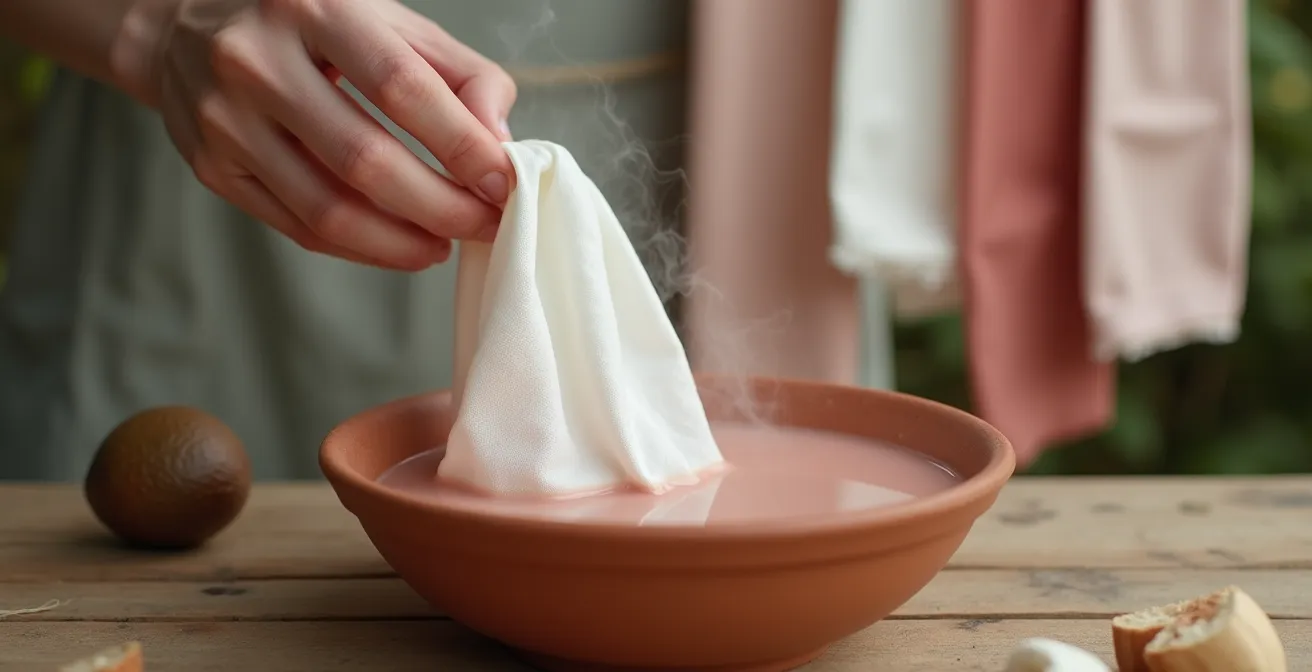
Steaming vs. Crinkled look: what is the intended aesthetic for gauze?
There is no single “correct” aesthetic for gauze; the choice between a smooth, steamed finish and a naturally crinkled texture depends entirely on the venue and the overall mood you wish to create. This decision is a powerful tool for a fabric stylist. A steamed, flat runner provides a clean, more formal look. It reflects more light, often appearing a shade paler, and lends an air of classic elegance perfect for a ballroom or a sophisticated hotel reception. It creates a smooth canvas that allows other table elements, like intricate china or crystal glassware, to stand out.
Conversely, the natural crinkled look is the heart of bohemian, rustic, or barn wedding aesthetics. The organic waves and folds create micro-shadows, which can make the fabric’s color appear deeper and richer. This texture adds a tactile, effortless dimension to the tablescape. For a versatile option, a hybrid approach works beautifully: steam only the top surface of the runner flat, allowing the ends that drape off the table to remain crinkled. This gives you controlled elegance on the table with a soft, flowing finish at the ends. As the CV Linens Design Team notes, layering textures can also enhance the effect.
Chiffon is a soft and flowing fabric that works well as a table runner. You can pair it with cheesecloth and arrange it in a way that’ll maximize the flowy decor.
– CV Linens Design Team, CV Linens Styling Tips
This pairing allows you to combine the smoothness of chiffon with the texture of crinkled gauze for a truly dynamic look. Understanding how each finish interacts with its environment is key to making an intentional design choice.
To help visualize this choice, this guide breaks down which aesthetic pairs best with your venue style.
| Finish Style | Visual Effect | Best Venue Type | Light Reflection |
|---|---|---|---|
| Steamed Flat | Clean, formal look | Ballroom, Classic | More light reflection, appears paler |
| Natural Crinkled | Effortless, organic | Bohemian, Rustic, Barn | Creates shadows, deeper color |
| Hybrid (Steamed top, crinkled ends) | Best of both worlds | Versatile, Modern | Controlled elegance with flow |
| Twisted/Trained | Deep, lasting folds | Outdoor, Garden | Maximum texture and dimension |
Why you must lay runners before the florist arrives, not after?
The order of operations during wedding setup is a carefully choreographed dance, and getting it wrong can lead to stress, delays, and a compromised design. A common mistake is treating the table runner as a final decorative flourish. In reality, the runner is the foundational canvas of the tablescape. It must be laid, styled, and finalized *before* the florist begins their work. This is a non-negotiable rule among professional event planners for a critical reason: the runner dictates the placement, balance, and visual weight of the floral arrangements.
When florists arrive to a pre-set runner, they can see the complete visual landscape. They can place a heavy centerpiece directly over a flat section of the runner to anchor it, or they can nestle smaller bud vases within the soft folds of a crinkled drape. The runner provides the context they need to build their design. If the runner is added afterward, the florist is working blind. Trying to snake a piece of fabric under and around delicate, water-filled arrangements is not only impractical but also risks toppling vases and ruining the entire setup. As one professional planner put it, the runner is the element that accentuates the theme and makes the table elegant, serving as the guide for all other decor.
Adhering to a strict timeline is crucial for a smooth setup. The linens team, including the placement and styling of runners, should complete their work at least an hour before the florist is scheduled to arrive. This gives them ample time for final adjustments and ensures a clean, prepared surface for the next stage of decoration. This systematic approach prevents vendors from working on top of each other and is the secret to a flawless and stress-free execution.
Vendor Coordination Timeline Checklist: The Order of Table Setup
- 2 hours before guest arrival: Venue team sets up all tables and chairs in their final positions.
- 90 minutes before: The linen team arrives to lay the base tablecloths and the primary table runners.
- 75 minutes before: A dedicated stylist or planner performs the final runner adjustments (e.g., creating the ‘Pinch & Drop’ drape).
- 60 minutes before: The florist arrives to a fully prepared surface to place all centerpieces and floral arrangements onto the runners.
- 45 minutes before: Place settings, chargers, and glassware are carefully positioned around the established floral decor.
- 30 minutes before: The final styling check is completed, including the placement and lighting of candles.
- 15 minutes before: The photographer is given a window to capture images of the completed, untouched tablescapes.
Chiffon runner vs. Naked wood: which creates a better frame for centerpieces?
The decision between using a runner or leaving a beautiful wood table bare is a strategic choice about framing and visual weight. Neither is inherently better; they simply serve different artistic purposes. A chiffon or gauze runner adds anchoring weight to a tablescape. It provides a soft, defined runway down the center of the table that guides the eye and connects the individual decor elements into a cohesive whole. For photography, a light-colored runner is incredibly effective as it softens the harsh lines of a dark wood table and bounces soft light back up, beautifully illuminating the centerpieces.
This added layer is particularly effective for masking imperfections on rental tables or for providing a solid visual base for tall or elaborate floral arrangements that might otherwise feel disconnected from the table. A runner also has an acoustic benefit, dampening the clatter of plates and cutlery, which can foster a more intimate atmosphere for conversation. However, recent trends reported by wedding professionals indicate that smaller centerpieces are gaining popularity, which changes the dynamic. With smaller arrangements, a runner can sometimes feel overpowering.
In contrast, a naked wood table utilizes high-contrast negative space to create a dramatic, often moody, effect. This approach only works if the table itself is a showpiece with a beautiful wood grain. Leaving the wood exposed allows the natural texture and color of the table to become an integral part of the decor. It is an excellent choice for minimalist or low-profile centerpieces, as the stark contrast makes the arrangements pop. For photography, this creates a more dramatic shot with deeper shadows and a rich, organic feel. The choice ultimately depends on whether you want the runner to be the frame or the table itself.
This table outlines the key differences in visual impact to help you decide which surface best suits your centerpiece style.
| Table Surface | Visual Weight | Photography Effect | Best Centerpiece Match |
|---|---|---|---|
| Chiffon Runner | Adds anchoring weight | Softens harsh lines, bounces light | Tall or elaborate arrangements |
| Naked Wood | High-contrast negative space | Creates dramatic, moody shots | Minimalist or low-profile pieces |
| Sound Impact | Dampens plate/cutlery noise | Natural acoustic echo | Better for intimate conversation |
| Table Quality Factor | Masks imperfections | Requires beautiful wood grain | Ideal for rental tables vs. premium wood |
How to keep light silk runners from blowing into the food?
Outdoor weddings offer stunning backdrops but come with one unpredictable guest: the wind. For couples using lightweight silk, chiffon, or gauze runners, preventing them from blowing into guests’ food and drinks is a major practical challenge. The solution is to employ structural anchoring techniques that are both functional and beautiful, integrating them seamlessly into your decor. Tacky tape and obvious weights can cheapen the look; the goal is to use elements that appear to be purely decorative but are secretly working to hold the fabric in place.
One of the most elegant methods is using the decor itself as an anchor. Small, heavy-based bud vases placed strategically along the runner’s edge can act as beautiful, functional clips. You can also incorporate single, dense fruits like figs, pomegranates, or kumquats into the tablescape, placing them on the fabric as styled anchoring elements. For a more organic approach, ask your florist to create a few dense posies of greenery to place along the length of the runner. Even small, polished river stones or miniature geodes can be scattered artfully to weigh the fabric down without detracting from the aesthetic. Another subtle pro technique is the ‘under-tuck’: slightly tucking the edges of the runner under the charger plates, which uses the weight of the place setting to secure the fabric.
In a pinch, small, discreet pieces of double-sided fashion tape (not regular tape, which can leave residue) can be applied at key points underneath the fabric. As the experts at CV Linens advise, the best approach often combines these methods.
Use floral centerpieces, charger plates, or discreet fabric tape at the ends to hold runners steady throughout the event.
– CV Linens Design Experts, Best Wedding Table Runner Ideas & Styles
By planning for the wind and incorporating these elegant anchoring solutions, you can ensure your beautiful, flowy runners remain gracefully in place throughout the entire event.
Elegant Anchoring Techniques for Outdoor Weddings
- Place small polished river stones or miniature geodes as decorative weights.
- Use the ‘under-tuck’ technique: tuck runner edges slightly under charger plates.
- Position heavy-based bud vases as beautiful functional ‘clips’ along the edges.
- Apply small pieces of double-sided fashion tape (not regular tape) at key points.
- Incorporate single fruits like figs or kumquats as styled anchoring elements.
- Request your florist to include dense greenery posies as weighted accents.
Key Takeaways
- The “flowy, not messy” look is achieved through intentional styling techniques, not random bunching.
- The order of operations is critical: runners must be laid and styled *before* the florist arrives to serve as the tablescape’s foundation.
- Choose your runner’s finish (steamed vs. crinkled) based on your venue and desired aesthetic—formal vs. organic.
How to Style Eucalyptus Runners That Look Lush and Don’t Dry Out?
While fabric runners create softness, fresh eucalyptus runners offer a lush, fragrant, and organic alternative that can be used alone or layered with gauze for added dimension. The key to a successful eucalyptus runner is twofold: selecting the right varieties for structure and flow, and ensuring it stays fresh and vibrant throughout your event. A common mistake is using only one type of eucalyptus, which can result in a flat, monotonous look. A professional-looking runner is all about layering different textures and shapes.
Start with a base layer of Silver Dollar eucalyptus, whose broad, flat leaves create a lush foundation. Then, weave in Seeded eucalyptus to add texture and a beautiful, cascading drape. For height and structure in the center of the runner, incorporate stems of the more rigid Baby Blue eucalyptus. Finally, add trailing stems of Willow eucalyptus at the ends of the table to create that sought-after flowy, cascading effect. This multi-variety approach creates a runner with depth, movement, and visual interest.
To keep the eucalyptus from drying out and looking brittle, timing and hydration are everything. The runner should be constructed as late as possible, ideally on the morning of the wedding. Misting it generously with water right after assembly and periodically throughout the setup process will help it retain moisture. If possible, store the completed runner in a cool, dark place until it’s time to place it on the table. Some florists also use a finishing spray like Crowning Glory to seal in moisture. By choosing the right mix of varieties and prioritizing hydration, you can ensure your eucalyptus runner looks lush and smells incredible from the first toast to the last dance.
This guide helps in selecting the right eucalyptus for your desired effect, considering its longevity.
| Eucalyptus Type | Characteristics | Layering Suitability | Longevity |
|---|---|---|---|
| Silver Dollar | Broad, flat leaves | Excellent base layer | 3-4 days fresh |
| Seeded | Adds texture and drape | Best for dimension | 2-3 days fresh |
| Baby Blue | Stiffer structure | Good for height | 4-5 days fresh |
| Willow | Long, cascading stems | Ideal for flow | 2-3 days fresh |
By moving beyond simple decoration and embracing the art of fabric styling, you can transform a simple piece of gauze into a breathtaking feature of your wedding day. The next step is to start practicing these techniques to build your confidence and perfect your vision.