In summary:
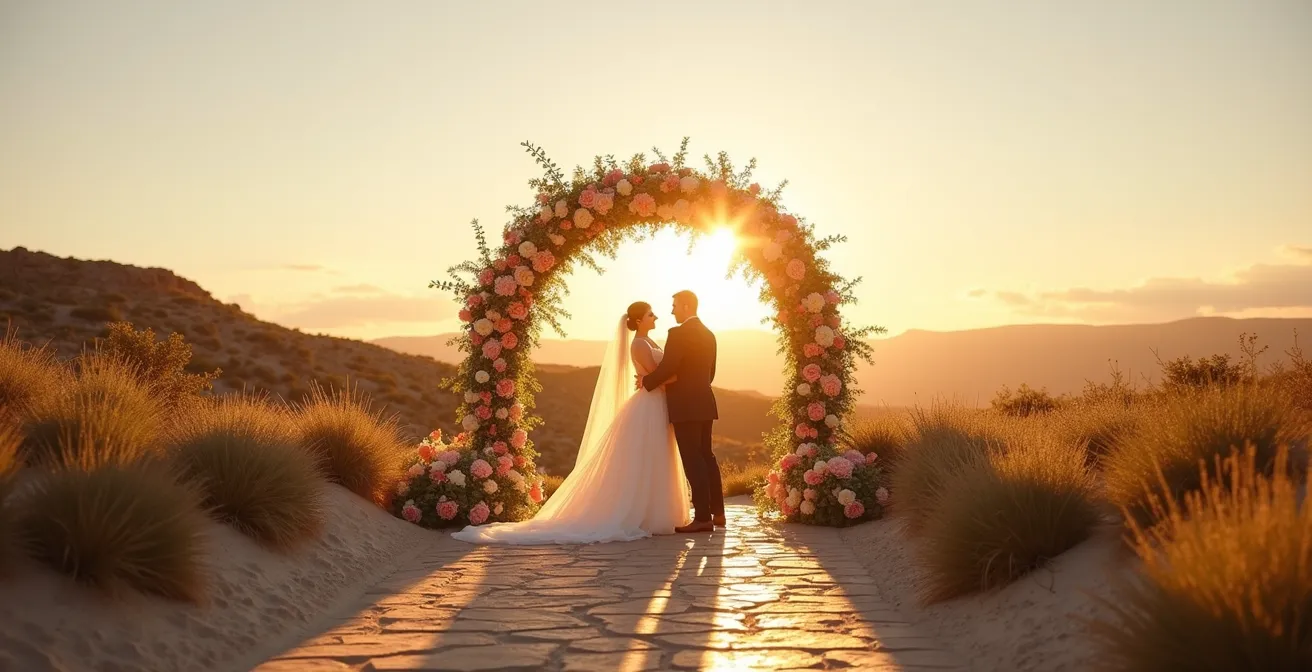
- Position your ceremony for backlighting by placing the sun behind your arch, ideally 1.5-2 hours before sunset.
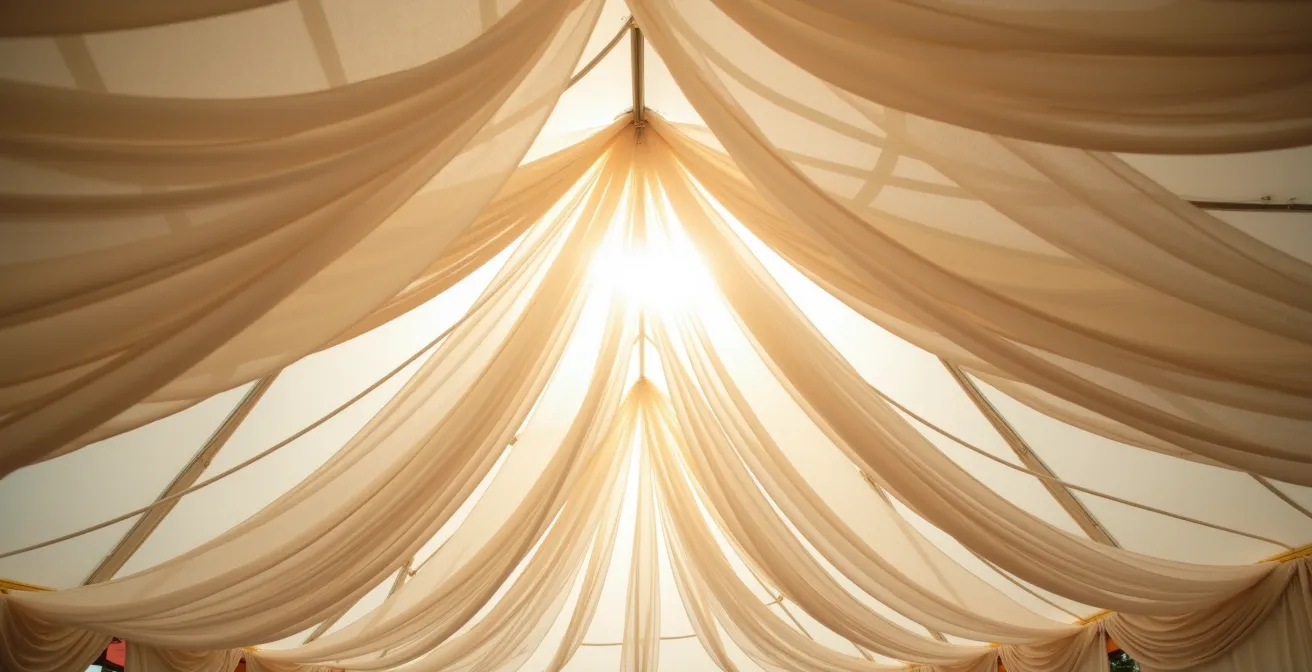
- Combat harsh midday sun by using sheer fabric draping or sailcloth tents to diffuse light and create a soft, even glow.
- Adapt makeup for daylight by focusing on light-scattering primers and cream products, avoiding heavy contour that creates “dirty” shadows.
- Manage light as heat by choosing cooler surfaces for guests and providing shade to prevent the “greenhouse effect.”
- Create a lighting timeline that transitions from warm, intimate light during dinner to cooler, dynamic colors for dancing to guide the night’s energy.
Every couple dreams of a sun-drenched wedding, with light streaming through the trees or filling a beautiful glass-walled venue. You’ve seen the photos: ethereal, glowing, and effortlessly romantic. But the reality of natural light is that it’s a powerful and wild element. Without a plan, that dreamy sunshine can quickly turn into squinting guests, unflattering shadows, and a sweltering reception space. The common advice is often to simply “wait for the golden hour,” but what about the other eight hours of your wedding day? Relying on one 30-minute window is a gamble, not a strategy.
The secret that photographers and high-end planners know is that you don’t have to be at the mercy of the sun. The key isn’t just finding good light; it’s about actively sculpting the light you have. It’s about understanding that daylight has properties—direction, quality, and temperature—that you can manipulate through strategic orientation, decor choices, and timing. By treating light as a tangible element of your decor, you can create a consistent, flattering, and comfortable atmosphere from the moment your first guest arrives to the final dance.
This guide will walk you through the art of mastering daylight. We’ll move beyond simple tips and into a cohesive strategy. You’ll learn how to position your ceremony to create breathtaking backlighting, diffuse the harshest sun, and even manage the transition from the cool glow of twilight to the warm energy of your reception. It’s time to stop chasing the light and start directing it.
To navigate this journey into light sculpting, here is a breakdown of the key areas we will explore. Each section builds upon the last, providing a complete framework for mastering your wedding day’s atmosphere and ensuring every photo is as beautiful as the moment itself.
Summary: How to Manage Natural Daylight to Ensure Flattering Photos?
- Backlit vs. Squinting: positioning your arch relative to the sun position
- Diffusing light: using overhead draping to soften midday sun in a tent
- Why “nighttime contour” looks dirty in full sun and what to change?
- The greenhouse effect: stopping the sun from roasting your guests
- The “blue hour” gap: mixing warm indoor light with cool outdoor twilight
- Orientation check: ensuring the sun isn’t in your guests’ eyes at 4 PM
- Warm white to Cool colors: when to switch the lighting temperature?
- How to Manage Lighting Intensity to Control the Energy of the Night?
Backlit vs. Squinting: positioning your arch relative to the sun position
The single most impactful decision you’ll make for your ceremony’s photography is where you stand in relation to the sun. The common instinct is to have the sun light up your faces, but this forces you and your guests to squint and creates harsh, flat lighting. The professional’s secret is to embrace backlighting. This means positioning your ceremony arch so that the sun is behind you. This technique wraps a beautiful, glowing rim of light around your silhouettes, separates you from the background, and gives your hair an ethereal halo. Your faces are then lit by the soft, reflected light from the open sky, which is universally flattering and eliminates squinting.
The perfect time for this is the “golden hour,” the period shortly before sunset. According to photography timing guides, the ideal window typically begins 30-60 minutes before sunset. By scheduling your ceremony to end within this timeframe, you ensure the sun is low, warm, and perfectly positioned. To achieve this, you need to become a sun tracker. Use sun-tracking apps during your venue tours to visualize the sun’s exact path on your wedding day and time. This allows you to orient your arch for that perfect, romantic glow instead of fighting against harsh frontal light.
Your Action Plan: Sun Tracking Checklist for Ceremony Positioning
- Scout in Advance: If possible, visit your venue exactly one year before your wedding date at the planned ceremony time to see the sun’s actual position.
- Use Technology: During venue tours, use an augmented reality sun-tracking app like Sun Seeker or PhotoPills to see the sun’s path on your specific date.
- Time for Backlight: Position your ceremony arch to take place approximately 1.5-2 hours before sunset for optimal backlighting conditions.
- Check the Backdrop: Ensure the backdrop behind the arch is color-neutral and non-distracting, like distant trees, a stone wall, or open sky.
- Mind the Ground: Scout for reflective surfaces like water or pale concrete that could bounce harsh light upwards and plan your aisle runner color accordingly.
- Consider Seating: For tricky sun angles, consider a semi-circle or ceremony-in-the-round seating arrangement to give all guests a comfortable view.
Diffusing light: using overhead draping to soften midday sun in a tent
What if your ceremony must happen at high noon? Midday sun is a photographer’s nemesis: it’s directly overhead, creating harsh, dark shadows under the eyes and nose. But you can combat this by creating your own “cloud.” The solution is diffusion. By placing a semi-translucent material between the sun and your subject, you scatter the light, softening its edges and creating a bright, even, and incredibly flattering glow. For tented or outdoor weddings, this is where fabric draping becomes your most powerful lighting tool.
Layers of sheer fabric, like chiffon or voile, hung overhead can transform a harsh, sun-beaten space into a giant softbox. This not only makes for beautiful photos but also cools the area for your guests. The material of your tent itself plays a crucial role. A clear vinyl tent creates a greenhouse, intensifying heat and offering no diffusion, while a traditional white vinyl tent provides some softening. However, for the most beautiful light, nothing compares to a sailcloth canvas tent, which acts as a massive, elegant diffuser, bathing the entire space in a soft, luminous light.
The choice of material directly impacts both the quality of light and the comfort of your guests. As this comparative analysis shows, what you place overhead is as important as the lights you set up on the ground.
| Material Type | Light Diffusion | Heat Retention | Photography Impact |
|---|---|---|---|
| Clear Vinyl | No diffusion | Highest (greenhouse effect) | Harsh shadows, overheating |
| White Vinyl | Moderate diffusion | Medium | Soft light, some heat |
| Sailcloth Canvas | Best diffusion | Lowest | Beautiful soft light, coolest |
| Chiffon Overlay | Light filter effect | Minimal impact | Subtle softening |
Why “nighttime contour” looks dirty in full sun and what to change?
The way light interacts with a surface is fundamental, and no surface is more important on your wedding day than your face. A common issue photographers see is makeup designed for evening events being worn in bright daylight, with disappointing results. Heavy contouring, which looks glamorous under soft indoor lighting, can appear “muddy” or “dirty” in direct sun. The reason lies in the physics of light. As one makeup artist brief in an expert guide explains, the problem is a clash of shadows.
Harsh, direct sun creates tiny, sharp-edged micro-shadows. Heavy contouring, which is essentially creating artificial shadows, clashes with these real micro-shadows, resulting in a ‘muddy’ or ‘dirty’ look.
– Makeup Artist Brief, Expert Photography Wedding Lighting Guide
Instead of creating dimension, the heavy pigment of the contour fights with the thousands of tiny, real shadows cast by the sun, resulting in a textured, uneven appearance. For a daytime wedding, the strategy must shift from creating artificial shadows (contouring) to enhancing how the skin reflects natural light (highlighting). The goal is a luminous, radiant finish that looks fresh and flawless both in person and on camera. This means choosing products that work with the sun, not against it.
To achieve this, focus on products that scatter and soften light. Here are the key swaps to discuss with your makeup artist for a sun-friendly look:
- Use light-scattering or blurring primers instead of heavy, mattifying ones to create a soft-focus effect.
- Choose cream or stain-based blushes, bronzers, and highlighters over heavy powders, as they meld with the skin for a more natural finish.
- Opt for multi-tonal bronzers that mimic the natural, varied patterns of a real tan.
- Focus on strobing (highlighting) the high points of the face—cheekbones, brow bone, bridge of the nose—to catch the light beautifully.
- Select chemical sunscreens over mineral-based ones to avoid the dreaded “white flashback” in photos.
The greenhouse effect: stopping the sun from roasting your guests
Managing daylight isn’t just about photography; it’s about hospitality. A beautiful sunny day can quickly become an uncomfortable ordeal for your guests if you don’t manage the heat. This is the “greenhouse effect,” where sunlight passes through glass or clear materials and the trapped heat raises the temperature dramatically. It’s a major concern for glass venues, clear-top tents, and even outdoor spaces with heat-absorbing surfaces like dark stone patios or asphalt.
A comfortable guest is a happy guest, and happy guests make for relaxed, joyful, and authentic photographs. When guests are fanning themselves, sweating, and squinting, it’s impossible to capture their genuine emotions. Thermal comfort is an aesthetic choice. Thoughtful planning can mitigate the heat and elevate the entire experience. This involves thinking about your venue in terms of its thermal properties. For instance, grass remains much cooler than stone or concrete. Scheduling a cocktail hour on a lawn instead of a sun-baked patio can make a world of difference in guest comfort and, consequently, the quality of your candid photos.
Case Study: Strategic Venue Layout for Temperature Management
A summer wedding at a venue with a large stone patio successfully managed guest comfort by making a simple change. Instead of holding the 2 PM cocktail hour on the patio, which absorbed and radiated intense heat, they moved it to an adjacent grassy lawn under the shade of a large oak tree. A photographer noted that guests were visibly more relaxed, mingled more, and appeared natural and happy in photos. This small logistical shift avoided the “squinting and sweating” look often seen in harsh sunlight, proving that managing heat is as crucial as managing light for great photography.
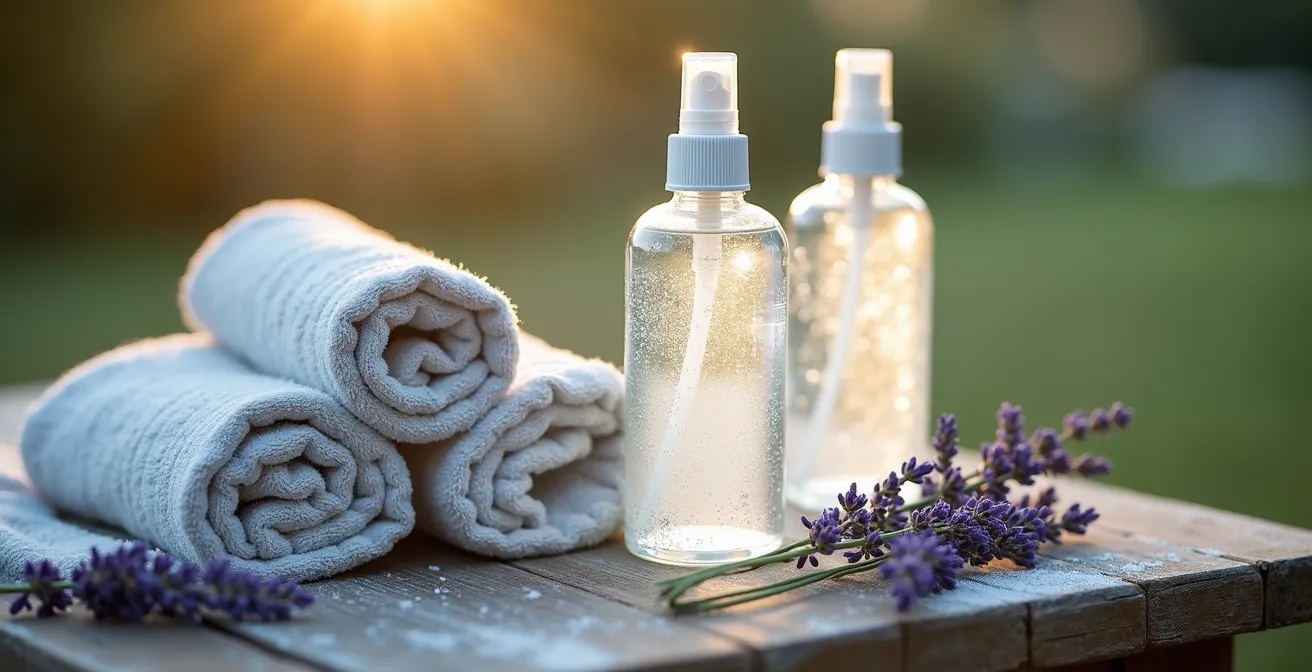
Beyond layout, consider providing “cooling stations” with chilled water, misting fans, or even elegant parasols. These functional details not only provide relief but also serve as beautiful, interactive elements of your decor, showing guests you’ve considered their comfort in every detail.
The “blue hour” gap: mixing warm indoor light with cool outdoor twilight
As the sun dips below the horizon, your wedding enters its most magical, and most challenging, lighting phase: twilight, often called the “blue hour.” The sky outside radiates a deep, cool blue, while the lights inside your venue begin to cast a warm, golden glow. This creates a “color temperature gap.” If your indoor lighting is too bright or too white, it will clash with the soft twilight, making your windows look like black, reflective voids instead of offering a beautiful view. The key is to balance the interior and exterior light.
To bridge this gap, start dimming your interior lights about 30 minutes before sunset. This allows the indoor ambiance to match the fading exterior light, keeping the windows transparent and connecting the indoor space with the beautiful twilight sky. For the most intimate and romantic atmosphere during dinner and speeches, your lighting should be exceptionally warm. For a truly professional touch, wedding lighting experts recommend setting all reception lighting to a very warm 2200K color temperature. This mimics the glow of candlelight and makes skin tones look healthy and vibrant, ensuring the atmosphere feels cozy, not clinical.
This is the perfect time for some of the most dramatic portraits of the day. By positioning yourselves in a doorway, under a veranda, or near a large window, your photographer can capture the stunning contrast between the warm light falling on you and the cool, deep blue of the sky behind you. Creating a minute-by-minute lighting timeline for your coordinator is crucial to nail this transition. It ensures that as the natural light fades, your artificial light rises to meet it in a seamless, atmospheric dance.
Orientation check: ensuring the sun isn’t in your guests’ eyes at 4 PM
We’ve discussed positioning your ceremony for perfect backlighting, but the sun’s position affects more than just the couple’s photos—it dictates the comfort of every single guest. An otherwise perfect ceremony can be ruined for attendees if they spend 30 minutes staring directly into the sun. A 4 PM ceremony in the summer can be particularly brutal, as the sun is beginning its descent but is still high and intense enough to cause significant glare and discomfort. This is where your sun-tracking homework becomes an act of hospitality.
When planning your ceremony layout, you must consider the guests’ line of sight. If a traditional layout with straight rows forces half your guests to face the sun, it’s time to get creative. A semi-circle or a “ceremony-in-the-round” arrangement can be a brilliant solution. This allows guests to have varied angles to the sun, ensuring no single group bears the full force of the glare. A creative seating plan not only solves a practical problem but can also create a more intimate and engaging ceremony atmosphere.
This is also where timing becomes a collaborative effort. By scheduling your ceremony to start a bit later, or by planning a short break for portraits during the best light, you can improve everyone’s experience. For instance, wedding photographers report that stepping away during golden hour for just 15-20 minutes is enough to capture a stunning gallery of portraits. This allows you to schedule the main events, like the ceremony, slightly outside the most intense sun, keeping guests comfortable while still ensuring you get those magical golden hour shots without compromise.
Warm white to Cool colors: when to switch the lighting temperature?
As day turns to night, you gain full control over your environment’s color. The color temperature of your lighting is one of the most powerful tools for shaping the energy of your reception. It’s a form of storytelling. Your lighting shouldn’t be static; it should follow an arc that mirrors the evening’s events, moving from intimate warmth to high-energy celebration. The key is knowing when to make the switch.
The first part of your reception—dinner and speeches—calls for warmth and intimacy. This is the time for candlelight, soft amber uplighting, and string lights, all within the 2200K to 2700K range. This ultra-warm light is inviting, makes food look appealing, and gives skin a healthy glow. However, a critical factor often overlooked is the Color Rendering Index (CRI) of your lights. As one specialist warns, cheap LEDs can ruin the look of everything.
A low CRI light, common with cheap DJ LEDs, makes skin tones look sickly and food unappetizing. Ask for lighting with a CRI of 90+ to ensure everything looks natural and vibrant.
– Wedding Lighting Specialist, Professional Wedding Photography Lighting Guide
The switch to cooler colors should be a deliberate, timed event. That moment is when the dance party kicks off. Switching the ambient lighting to dynamic cool blues, purples, and magentas signals a dramatic shift in energy. It tells everyone, “The formalities are over; it’s time to celebrate.” This transition should be sharp and intentional, transforming the room and inviting guests to the dance floor. The lighting plan should then arc back to warmth for the last dance, bringing the energy back to an intimate, romantic finale.
This guide illustrates how to map your lighting’s color and style to the energy you want to create at each stage of the reception.
| Event Phase | Color Temperature | Lighting Style | Energy Level |
|---|---|---|---|
| Dinner/Speeches | 2200K-2700K | Very warm, static | Intimate, calm |
| First Dance | 2700K with spotlight | Warm with focus | Romantic |
| Dance Party | Cool blues/purples | Dynamic, colored | High energy |
| Last Dance | Lowest possible dim | Ultra-warm | Intimate finale |
Key Takeaways
- Mastering light is not passive; it’s an active process of sculpting your environment through decor, timing, and technology.
- The quality of light directly impacts not only your photos but also the physical and emotional comfort of your guests.
- A cohesive lighting plan creates a narrative arc for your wedding day, guiding the energy from intimate and romantic to celebratory and high-energy.
How to Manage Lighting Intensity to Control the Energy of the Night?
The final layer of light sculpting, and perhaps the most dynamic, is intensity. The brightness of your lighting is a throttle for your reception’s energy. A room that is too bright during dinner feels like a cafeteria, while a dance floor that is too dark can feel empty and uninviting. Managing lighting levels throughout the night is essential for creating focus, directing attention, and curating the perfect party atmosphere. This requires a detailed plan, often called a lighting script, that your coordinator or DJ can execute.
Your grand entrance should be bright and celebratory, with lights at or near 100% brightness to create a high-impact moment. As soon as dinner service begins, the intensity should drop significantly, perhaps to 40%, to create a more relaxed and intimate dining experience. For speeches, the ideal setup uses a spotlight on the speaker while the house lights dim even further, focusing everyone’s attention. The first dance follows a similar principle, with a dedicated spotlight creating a romantic, cinematic moment for the couple.
When the dance floor opens, intensity joins color as a primary tool for building energy. Dynamic lighting that changes in brightness and color to the beat of the music is far more effective than static lights. The levels can build throughout the night, culminating in a high-energy peak before gracefully dimming for the final slow dance, bringing the evening to a gentle and memorable close. This meticulous control over brightness ensures that every phase of your reception has its own distinct and appropriate mood, creating a truly unforgettable experience for you and your guests.
By moving from the macro decisions of ceremony orientation to the micro-details of dimmer settings, you’ve built a complete framework for sculpting light. The next step is to take these principles and collaborate with your team of vendors—your planner, photographer, and lighting technician—to create a unified vision that ensures your wedding day is not only beautifully lit but also feels exactly as you imagined.