Most couples view wedding lighting as mere decoration. This is a fundamental misunderstanding. The truth is, light is the most powerful tool you have to direct your guests’ energy and choreograph the entire emotional arc of your reception. It’s not about what they see; it’s about what you make them feel and, ultimately, do—transforming a static room into a dynamic, multi-act performance.
As a theatrical lighting director, my world is built on a simple premise: light is a non-verbal cue that directs behavior. On stage, a single spotlight tells thousands of people where to look. A slow fade to blue tells them the mood is somber. A sudden flash of strobes signals chaos. Your wedding reception is no different. It is your stage, and your guests are the audience you must guide. The typical advice—”use uplighting” or “dim the lights for romance”—misses the point entirely. It treats lighting as a static backdrop when it should be your primary tool for storytelling and energy management.
The real question isn’t *if* you should use certain lights, but *how* and *when* you deploy them to craft a seamless experience. The goal is to create an “energy arc” that takes your guests from the warm intimacy of a candlelit dinner to the high-energy pulse of a packed dance floor, without any awkward pauses or jarring transitions. This requires thinking less like a decorator and more like a choreographer, using intensity, color, and even shadow to dictate the rhythm of the evening.
This guide will not give you a simple shopping list of fixtures. Instead, it will teach you the director’s mindset. We will deconstruct the evening into a series of acts, exploring the specific lighting techniques that cue the desired emotional and behavioral response at each stage. You will learn to control the flow, build momentum, and create a reception that feels alive, intuitive, and unforgettable.
Summary: A Director’s Playbook for Wedding Reception Lighting
- Why checking for dimmability is the first thing to do during a venue tour?
- Warm white to Cool colors: when to switch the lighting temperature?
- How to light plates so food looks appetizing without blinding guests?
- Negative space: why you shouldn’t light every corner of the room?
- The impact of sound-active lighting during the final dance set
- Why cool white bulbs kill the romance and how to fix it immediately?
- The “blue hour” gap: mixing warm indoor light with cool outdoor twilight
- How to Maximize Candlelight Impact Without Burning the Venue Down?
Why checking for dimmability is the first thing to do during a venue tour?
Before you fall in love with a venue’s architecture or view, you must ask the single most important technical question: “Can I see a full demonstration of your lighting dimmers?” This is not a minor detail; it is the foundation of your entire lighting strategy. Without precise and smooth control over intensity, you cannot choreograph the energy of the night. You are left with two blunt instruments: ON or OFF. True lighting direction lies in the infinite space between 0% and 100%.
A venue’s built-in lighting system is your primary tool. You need to know its capabilities and limitations intimately. Many modern venues have sophisticated systems, but older, charming ones might have outdated wiring or dimmers that only go down to 40%, which is still far too bright for an intimate dinner. As event professionals from Second Song have found after transforming over 6,000 venues, proper dimming capabilities are the key to what they call an “emotional journey control” throughout the event. If the venue’s system is lacking, you immediately know you’ll need to budget for external lighting vendors and, critically, ensure there are enough dedicated power circuits to support their gear.
The ability to control different areas independently—known as zone control—is the next level of inquiry. Can the bar area remain bright and energetic while the dining tables are cast in a soft, intimate glow? Can the dance floor be its own universe of light without affecting the lounge seating? This level of control is what separates a basic setup from a professional production. Verifying these technical specs is not just about logistics; it’s about confirming whether you will have the tools to be a true director of your event’s atmosphere.
Your Essential Venue Lighting Audit Checklist
- Full Dimming Test: Request a 100% to 0% dimming demonstration. Watch for smooth, fluid transitions versus abrupt, jarring “steps” in brightness.
- Zone Control Inquiry: Ask about independent control. Can the dance floor, dining tables, and bar areas be lit and dimmed separately?
- External Control Compatibility: Verify if the system has DMX inputs, allowing an external lighting technician to override and control the house lights for a fully integrated show.
- Power & Circuit Assessment: Locate all accessible power outlets, especially dedicated circuits for vendor equipment, and document their load capacity to prevent tripping breakers.
- Emergency Plan: Document the location of the circuit breaker panel. This is your backup plan if a specific zone of lighting needs to be disabled quickly.
Warm white to Cool colors: when to switch the lighting temperature?
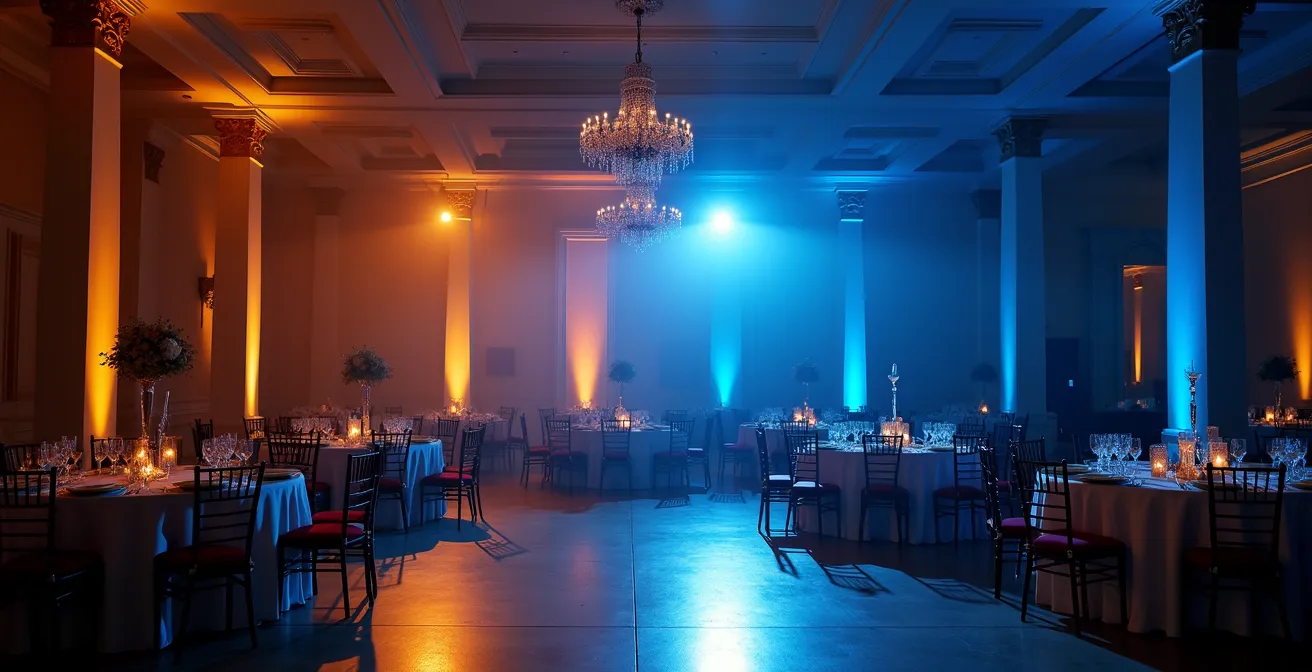
Color temperature is your most powerful tool for non-verbally communicating mood and intention. Measured in Kelvin (K), it’s the difference between the warm, cozy glow of a candle (around 2200K) and the cool, sterile light of a clinical office (4000K+). For a wedding, your palette should live almost exclusively in the warm-to-neutral range (2200K-3000K) for the majority of the evening. This is the temperature of romance, intimacy, and flattering skin tones. The critical question is not *if* you should introduce cooler colors, but *when* and *how* you make the transition to signal a shift in energy.
The transition from dinner to dancing is the most important lighting cue of the night. It’s the moment you tell your guests, “The formalities are over; it’s time to let loose.” This should not be a sudden flip of a switch. A masterful transition is a slow, almost imperceptible cross-fade over 5 to 10 minutes. As dinner plates are cleared and the music tempo begins to rise, you can slowly introduce saturated colors like deep ambers or blues into the warm white base. This gradual change allows guests to adjust, finish their conversations, and feel the building anticipation. The goal is to pull them to the dance floor with a magnetic shift in the room’s energy, not jolt them out of their seats.
Once the party is in full swing, you have more creative freedom. However, the best lighting choreographers use color with intention. Dynamic, beat-matched color changes are for the peak moments, not the entire night. And for the last dance, always bring the lighting back. Returning to a simple, warm white or candlelight wash is a powerful cue that the evening is winding down. It brings the energy back to a place of intimacy, leaving your guests with a final, romantic impression instead of an abrupt end to the party. This full-circle journey is the hallmark of thoughtful lighting design.
This timeline shows how a lighting director maps color temperature to the event’s energy arc. This deliberate progression is supported by industry guides which suggest a gradual shift over a 5-10 minute period for the dinner-to-dancing transition to ease guests into the new atmosphere.
| Event Moment | Temperature (Kelvin) | Color Scheme | Transition Duration |
|---|---|---|---|
| Guest Arrival | 3000K | Neutral-warm white | Static |
| Ceremony | 2700K | Warm white/candlelight | Static |
| Cocktail Hour | 2700-3000K | Warm white with amber accents | Static |
| Dinner Service | 2200-2700K | Very warm/intimate | Static |
| Dinner to Dancing | 2700K to Color | Warm to amber/blue wash | 5-10 minutes |
| First Dance | 2200K + Color | Romantic warm with subtle color | 3-5 minutes |
| Party Peak | RGB Mix | Dynamic color changes | Beat-matched |
| Last Dance | 2700K | Return to warm romantic | 2-3 minutes |
How to light plates so food looks appetizing without blinding guests?
During the dinner portion of your reception, the primary focus should be on two things: the food on the plate and the conversation across the table. Poor lighting can ruin both. Overhead lighting that is too broad or too cool can make even the most gourmet meal look unappetizing. Conversely, a light source that is too direct can create harsh glare on white plates or shine directly into guests’ eyes. The solution is a theatrical technique known as pinspotting.
As lighting specialists at Pro Lighting Rental explain, this technique provides a subtle and elegant effect. They offer a clear definition:
Pin spots are very small, battery-powered lights that you can set anywhere you want to put a more focused light. Commonly used at wedding receptions to light the wedding cake and table centerpieces.
– Pro Lighting Rental, DIY Wedding Lighting Guide
The key to effective pinspotting is precision and quality of light. Each beam must be carefully aimed to illuminate just the centerpiece or the place settings, creating a pool of light that makes the table feel like its own intimate world. The angle is critical; positioning the light source at a 45-60 degree angle from above is standard practice to avoid blinding guests as they look up or across the table. Furthermore, the quality of the light itself matters. Using a warm white light with a high Color Rendering Index (CRI 90+) ensures that the vibrant colors of the food—the red of a beet, the green of an herb—are rendered accurately and look delicious, not washed out.
For a truly polished look, the edge of the light beam should be soft. This is achieved by using diffusion filters, which soften the harsh lines and create a gentle glow rather than a hard-edged circle. For family-style platters, a single, wide, and heavily diffused overhead source is often better than multiple competing pinspots. The final test is always to sit in a guest’s chair during setup. If the light is in your eyes, it will be in theirs too. This attention to detail ensures your guests are comfortable, the food is highlighted, and the atmosphere remains intimate and conversational.
Negative space: why you shouldn’t light every corner of the room?
A common mistake in wedding lighting is the attempt to eliminate all shadows. The instinct is to flood the entire room with light and color, but a theatrical director knows that what you *don’t* light is just as important as what you do. This concept is called negative space. Shadow is not the enemy; it is a tool for creating depth, focus, and intimacy. By intentionally leaving certain areas of a venue unlit or dimly lit, you create a more dynamic and comfortable environment for your guests.
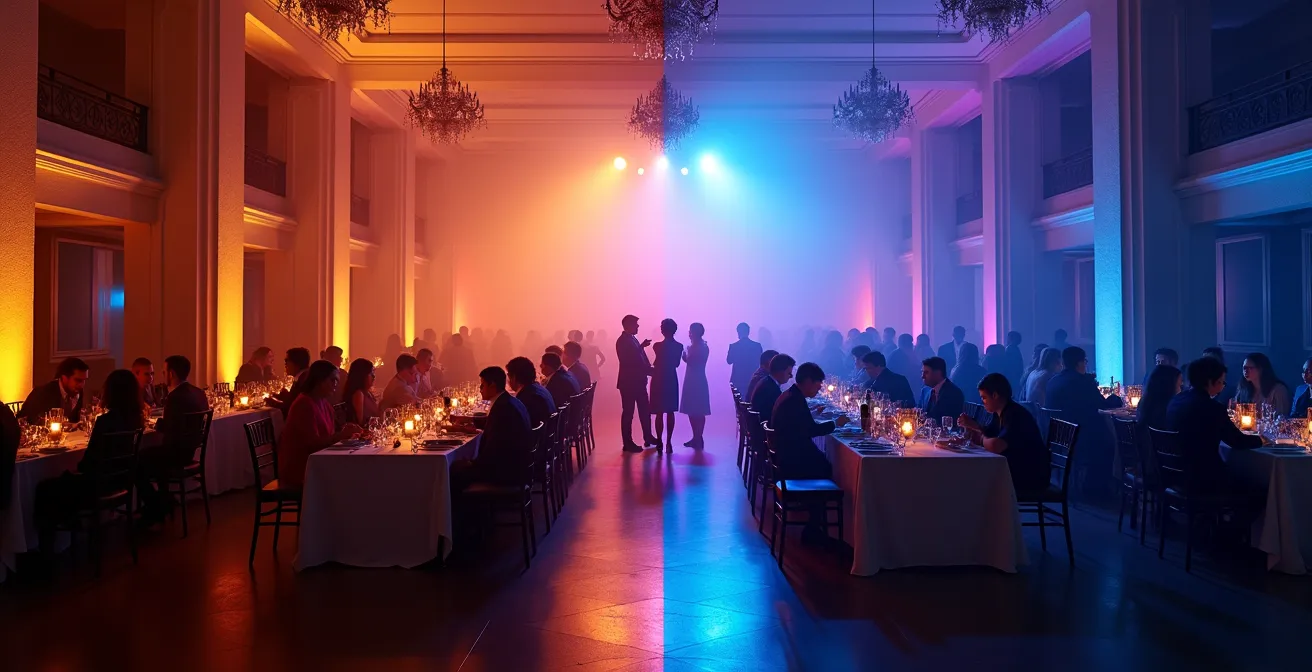
Think of your reception space as a stage with multiple scenes happening at once. The dance floor is the main stage, the dining tables are intimate sets, and the bar is a lively side scene. Using light to define these zones is crucial. By focusing uplighting on architectural features and concentrating brighter, more dynamic light on the dance floor, you naturally draw guests’ attention and energy toward these key areas. The darker spaces in between—the corners, the pathways, the areas behind the speakers—become essential “negative space.”
This strategic use of shadow serves a vital psychological purpose. Not every guest is an extrovert who wants to be in the spotlight all night. The unlit corners and dimly lit lounge areas become comfortable retreat spaces for guests who want to have a quiet conversation or simply take a break from the high energy of the dance floor. As the team at the Olio Peabody venue notes, this approach creates distinct energy zones, allowing for a more inclusive experience. Without these areas of lower intensity, a room can feel flat, over-exposed, and even overwhelming, leaving nowhere for guests to comfortably recede. Shadow gives a room its shape and directs the social flow of the evening.
The impact of sound-active lighting during the final dance set
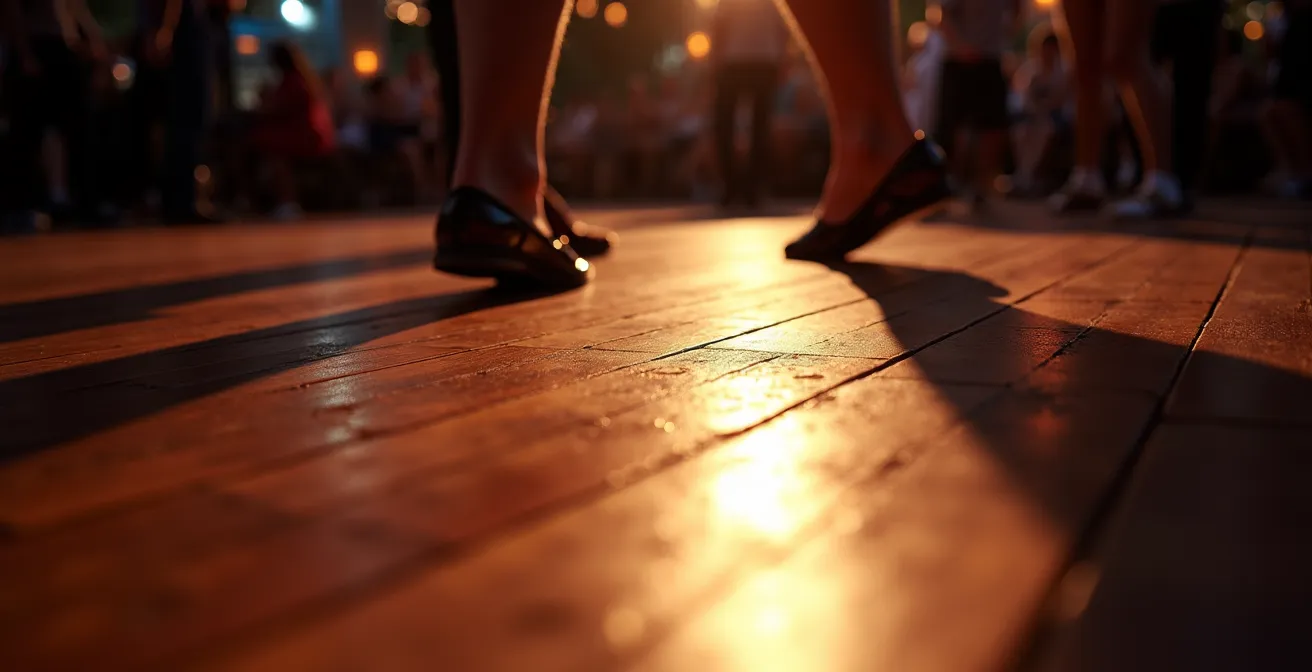
As the night reaches its climax, you need a tool that can match the peak energy of the music: sound-active lighting. This is where fixtures—like moving heads or color-changing wash lights—are programmed to react in real-time to the beat of the music. When used correctly, it’s a powerful way to create a euphoric, immersive dance floor experience. However, when used poorly, it can quickly become a chaotic, headache-inducing mess. The key, once again, is choreography and restraint.
A professional lighting director never puts sound-active lights on a random “auto” mode for the entire night. That’s the hallmark of an amateur setup. Instead, the final dance set is choreographed like a mini-concert. The lighting should build with the music. The set might start with slow color fades that match the tempo of the opening songs. As the energy builds, subtle, beat-matched movements can be introduced. Fast, chaotic effects like strobes should be reserved for a single, breathtaking moment—a major drop or a huge chorus—and last no more than 10-15 seconds. This makes the effect impactful rather than annoying.
One of the most effective professional techniques is the “freeze and release.” The lighting can be a static, beautiful scene during a song’s verse, then suddenly erupt into fast-moving, color-changing chaos for the chorus, before “freezing” again for the next verse. This creates incredible dynamics and anticipation. Most importantly, safety is paramount. Fast-moving effects should always be focused on the ceiling, walls, or floor—never directly into the crowd, to avoid discomfort and for the safety of guests with photosensitivity. By treating the final dance set as a deliberate performance, sound-active lighting becomes a tool of celebration, not a distraction.
Professional Dance Floor Lighting Choreography
- Warm-up: Start with slow color fades matching the tempo of the first few dance songs (a 3-5 minute warm-up period).
- Build Momentum: Introduce subtle, beat-matched movement and color changes for mid-tempo songs. Avoid constant, repetitive motion.
- Peak Moment: Reserve strobe effects for a single, 10-second peak moment only. Its power lies in its scarcity.
- Freeze and Release: Use a static scene during verses and erupt into controlled, dynamic effects for the chorus to build tension and release.
- Safety First: Keep all fast-moving or flashing effects focused on the ceiling and walls, never directly on the crowd.
- Cool-down: End the night with a static, romantic wash of light for the final slow dance to bring the energy back down smoothly.
Why cool white bulbs kill the romance and how to fix it immediately?
You’ve spent months planning every romantic detail, only to arrive at your venue and discover the built-in lighting is a harsh, cool-white fluorescent glare (4000K+). This is a code-red situation for any lighting director. Cool white light is the antithesis of romance; it feels clinical, unflattering, and completely kills the intimate atmosphere you’ve worked so hard to create. It can make skin tones look sickly and food unappetizing. But a prepared director always has an emergency kit to fix this on the spot.
Your first line of defense is not to fight the light, but to change its color. Professional photographers and lighting techs carry sheets of CTO (Color Temperature Orange) gels. These are inexpensive, heat-resistant films that can be taped over fixtures to instantly warm up their output. A full CTO gel can convert a harsh 4000K light into a pleasant 2700K glow. For accessible lamps or sconces, simply swapping the venue’s bulbs for your own amber-tinted or warm-white smart bulbs can be a quick and dramatic fix. A wedding photographer offers this expert tip:
A compact LED light is one of my favourite tools for evening receptions. I tend to keep the LED on a stand, hidden behind a pillar or tucked near the DJ booth, and I’ll use warm colour settings to match the vibe of the low interior lights or candles.
– Professional Wedding Photographer, Aftershoot Wedding Photography Guide
If you can’t change the light at the source, your next options are to overwhelm it or block it. Using your own powerful, warm-toned uplights can “overwhelm” the unwanted cool light, making your warmer tones the dominant color in the room. This is the “strategic overwhelm” technique. In a worst-case scenario where a bank of fluorescent lights cannot be dimmed or gelled, the most direct solution is to locate the circuit breaker and simply turn them off, provided it doesn’t kill power to essential areas. Using dark drapery to absorb light spill from hallways or kitchens is another effective strategy. These on-the-fly fixes can rescue the ambiance and ensure the room feels as romantic as you envisioned.
The ‘blue hour’ gap: mixing warm indoor light with cool outdoor twilight
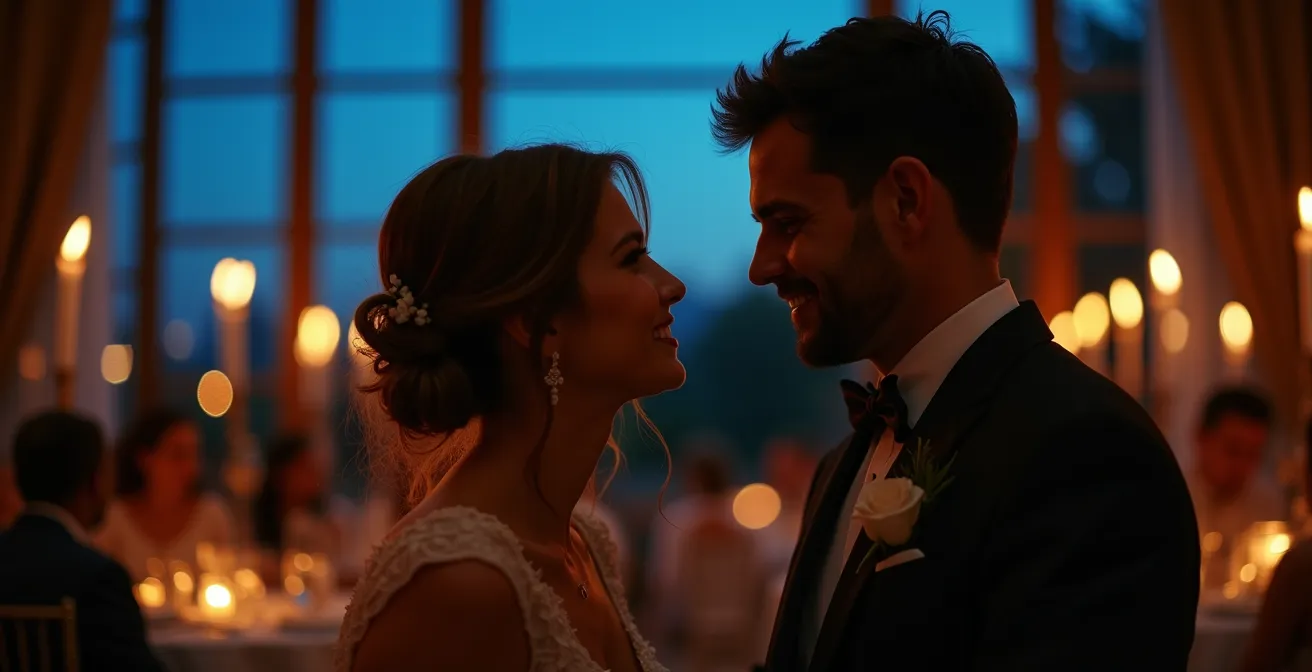
There is a magical, fleeting window of time just after sunset known as the “blue hour.” During these 15-20 minutes, the sky is a deep, rich blue, but there is still enough ambient light to see. This moment presents a unique challenge and opportunity for a lighting director: how to bridge the gap between the cool, dramatic outdoor twilight and the warm, inviting interior light of your reception. Getting this balance right is especially critical for your photographer, who lives for this cinematic light.
During this transition, the outdoor light temperature is very cool (often 9000K-12000K), while your interior should be very warm (around 2200K) to feel cozy and inviting. If your interior lighting is too bright or too cool, it will compete with the outdoor view, creating glare on the windows and washing out the beautiful blue sky. The key is to dim your interior lights significantly and keep them in the very warm, almost candlelight, range. This allows your guests’ eyes to see *through* the windows and appreciate the stunning twilight, creating a dramatic, layered effect.
Professionals call the lighting program for this period a “color temperature bridge.” As the sun sets (during the “golden hour”), your interior lights might be at a neutral-warm 3000K. As twilight deepens into the blue hour, you slowly fade the interior lights down to their dimmest, warmest level (2200K). This creates a beautiful contrast that is a dream for photographers, allowing them to capture stunning portraits where the subjects are warmly lit against a breathtaking blue backdrop. It’s a short but critical act in your evening’s performance, turning a simple window into a spectacular, naturally-occurring set piece.
Key takeaways
- Lighting is not decoration; it’s a tool to direct guest energy and choreograph the emotional arc of your reception.
- Master the transition from warm, intimate dinner lighting (2200K) to cooler, energetic dance floor colors with a slow, 5-10 minute cross-fade.
- Use shadow and “negative space” strategically to create focus, depth, and comfortable retreat zones for guests.
How to Maximize Candlelight Impact Without Burning the Venue Down?
Candlelight is the original source of romantic lighting. Its flicker is inherently organic, its 2200K temperature is universally flattering, and its presence signals intimacy. However, relying solely on real candles presents significant challenges with safety regulations, fire risk, and insufficient brightness. A modern lighting director employs a hybrid candle strategy, combining the impact of real flame with the safety and reliability of high-quality LEDs to create maximum effect without violating venue rules.
The key to impactful candlelight is concentration. A single, lonely candle on a large table gets lost. Instead, create what designers call “luminous objects” by clustering candles in groups of varying heights. This turns a few small flames into a significant light source and a beautiful decor element. To amplify their effect further, use the “rule of three”: place your candle clusters near reflective surfaces like mirrors, on metallic trays, or near water features to multiply their perceived brightness and create a mesmerizing, kinetic effect. This thoughtful placement is far more effective than simply scattering candles everywhere.
For safety and practicality, a hybrid approach is best. Use high-quality, flickering LED candles for individual table settings, pathways, and any area near flammable materials like drapery or where guests might bump into them. Reserve real, enclosed candles (in hurricane glasses of a height specified by the venue) for high-impact, low-risk focal points: a mantlepiece, the altar, the welcome table, or the cake display. Always verify the venue’s specific rules on open flames and designate a specific person responsible for lighting and safely extinguishing all real candles. This strategic blend gives you the undeniable romance of real flame where it counts most, and the worry-free ambiance of LEDs everywhere else.
By embracing this director’s mindset, you move beyond simple decoration and begin to truly choreograph your wedding reception. You are setting the stage, guiding your guests, and creating a dynamic, flowing experience that they will not only see but feel. This is the art of lighting.