Sustainable wedding decor isn’t about replacing cut flowers with potted plants; it’s about mastering architectural horticulture to create living art with a lasting legacy.
- Success lies in the engineering: lightweight frameworks, structural load calculations, and leak-proof water systems are non-negotiable.
- Visual impact depends on strategic lighting that respects plant biology, not just standard event uplighting.
Recommendation: Shift your mindset from decorating a space to cultivating an experience, planning for the artwork’s entire lifecycle from initial design to its post-event home.
For the eco-conscious couple, the floral industry’s footprint can cast a long shadow over wedding planning. The default solution often presented is simple: swap cut flowers for potted plants. While well-intentioned, this approach barely scratches the surface of what’s possible and often misses the mark on creating a truly dramatic, statement-making aesthetic. Placing a few ficus trees in a corner or dotting tables with succulents is a start, but it’s not a design strategy. It treats living plants as static objects, a direct substitute for something disposable, rather than embracing their true potential.
The common advice to “rent plants” or “use greenery” overlooks the fundamental shift in thinking required for truly impactful sustainable decor. But what if the key wasn’t just using plants, but building with them? The true art lies in architectural horticulture—a discipline where we design and construct living, breathing sculptures that not only transform a venue but are conceived with a life and purpose that extends far beyond your wedding day. This is not about decorating; it’s about building with roots, not just stems, and creating a powerful, immersive experience that is both breathtaking and fundamentally sustainable.
This guide moves beyond the platitudes of eco-friendly decor. We will deconstruct the craft of creating living installations, from the foundational framework and structural engineering to the nuances of lighting and the vital importance of planning a post-event legacy for your living art. It’s time to cultivate an unforgettable atmosphere.
To guide you through this creative process, we have structured this article to cover every critical stage of designing and implementing living sculptures for your event. Explore the topics below to master the art of architectural horticulture.
Summary: How to Design Living Plant Sculptures for a Wow-Factor Wedding
- Moss and wire: how to build a shape that holds plants without heavy pots?
- Renting 10-foot trees: are they better space fillers than table flowers?
- Ficus vs. Birch: which rental trees create the best forest effect indoors?
- Can your venue floor support a 500lb living tree installation?
- Preventing leaks: ensuring your living wall doesn’t drip on the carpet
- Why standard uplights make green leaves look brown and what to use instead?
- How to donate or replant your living decor after the event?
- How to Bring the Outdoors In for a Garden-Like Wedding Inside?
Moss and wire: how to build a shape that holds plants without heavy pots?
The secret to creating gravity-defying living sculptures without tonnes of soil and heavy containers is the living framework. This technique, a cornerstone of architectural horticulture, relies on a combination of a rigid wire structure and a moisture-retaining medium like sphagnum moss. By building a custom-shaped wire armature, you can define the form of your sculpture—be it an archway, an abstract shape, or a topiary—and then pack it tightly with pre-soaked moss. This creates a lightweight, soil-free environment that can securely hold and nourish plants.
The process involves building a sturdy internal skeleton, often from galvanized or stainless-steel wire, which is then filled and wrapped. A central cavity can be left and filled with potting mix to anchor larger plants, but for trailing species like ivy or creeping fig, the moss itself is sufficient. The entire structure is then secured with fishing line or florist’s wire, creating a solid but porous base. This method was perfected in large-scale exhibitions, as seen in the Montreal Mosaiculture Exhibition, where artists use this technique to create stunning collections made almost entirely of plants that appear to grow in mid-air.
Once the framework is built, holes are poked into the moss, and the roots of small plants are gently inserted. The moss provides both physical support and a constant source of moisture. This approach allows for incredible design freedom, enabling you to create flowing, organic shapes that would be impossible with traditional potting methods. It’s a method that is both structurally ingenious and deeply symbiotic with the plants it supports.
Renting 10-foot trees: are they better space fillers than table flowers?
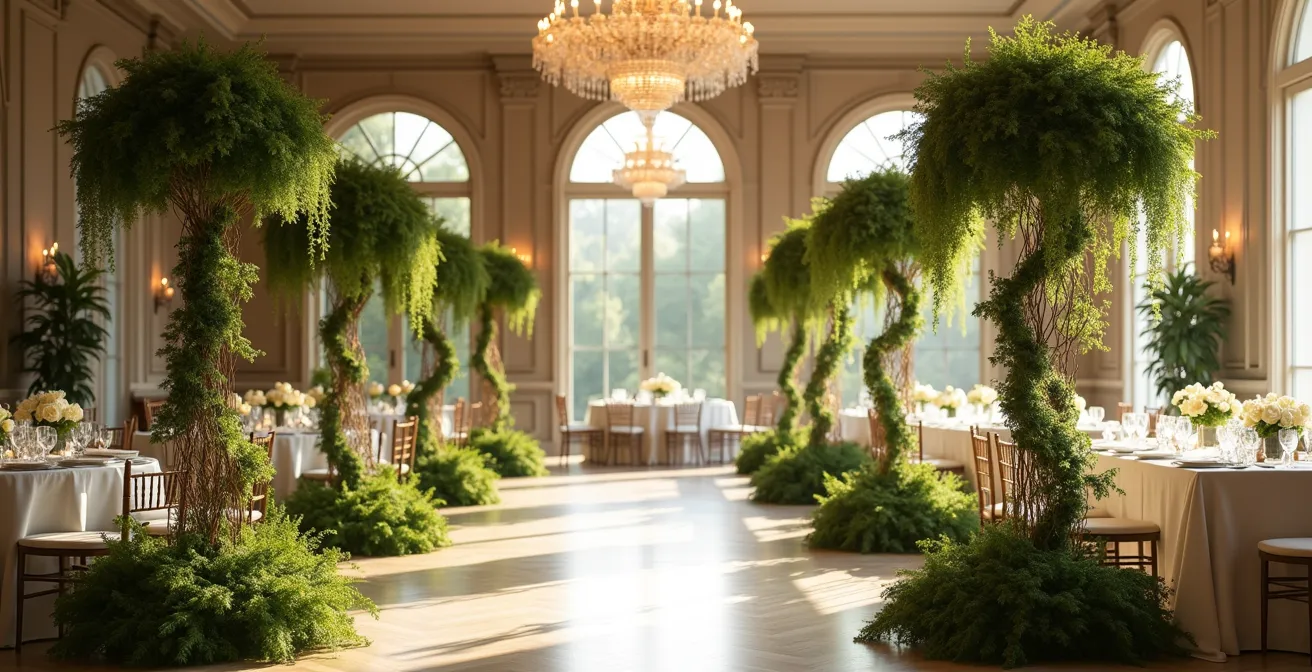
When allocating a decor budget, it’s easy to focus on what’s directly in front of guests: table centerpieces. However, this table-level approach can miss the opportunity for high-impact, space-defining statements. Renting a few large, 10-foot trees can often deliver a more dramatic transformation for a comparable, or even lower, cost than outfitting 15-20 tables with intricate floral arrangements. The key difference lies in their function and visual presence. While centerpieces create intimacy, large trees sculpt the entire volume of a room.
Tall, living elements fundamentally alter the perception of a space. They draw the eye upward, giving a venue a sense of grandeur and creating natural, elegant divisions within a large room. You can use them to frame an aisle, define a lounge area, or create a breathtaking backdrop for the ceremony. This verticality adds a layer of architectural interest that dozens of smaller arrangements cannot achieve. As one expert notes, this is a core principle of high-impact design.
Tall elements draw the eye upward, making a venue feel grander and more majestic.
– Garden Design Expert, Houzz Magazine – Consider Plants as Living Sculpture
From a logistical and financial standpoint, the comparison is compelling. The cost and labor involved in setting up numerous small arrangements—including transport and placement—can quickly exceed that of delivering and positioning a few large trees. The decision ultimately comes down to your design goal: are you aiming for intimate table-level beauty or a transformative, room-defining experience?
This analysis, based on a recent comparative study, breaks down the key differences in cost, impact, and logistics between these two popular decor strategies.
| Factor | 10-Foot Rental Trees (3-4 units) | Table Centerpieces (15-20 units) |
|---|---|---|
| Average Cost | $600-900 total | $750-1500 total |
| Visual Impact | Dramatic vertical presence, defines spaces | Intimate table-level beauty |
| Space Function | Creates natural room divisions | Enhances dining experience |
| Setup Time | 30 minutes with 2 people | 2 hours with 4 people |
| Transport Needs | Single box truck | Multiple vehicles/trips |
Ficus vs. Birch: which rental trees create the best forest effect indoors?
Creating an indoor forest is not as simple as placing as many trees as possible. The type of tree you choose dramatically influences the light, mood, and overall atmosphere of the space. It’s a decision that goes beyond simple aesthetics; it’s about light-scaping and mood creation. Two popular choices for indoor rentals, Ficus and Birch, offer completely opposite effects. A Ficus tree, with its dense, dark green canopy, tends to absorb light, creating pockets of shadow and a feeling of lush, mysterious intimacy. It’s perfect for crafting a secluded, grotto-like atmosphere for a ceremony.
In contrast, Birch trees, known for their pale, slender trunks and sparse foliage, do the opposite. Their leaves and white bark reflect light, brightening the space and contributing to a bright, airy, and almost fairytale-like ambiance. They work exceptionally well in large, open reception halls where you want to maintain a sense of spaciousness while still bringing nature indoors. The choice between them—or other options like Olive trees for a rustic Mediterranean glow or Kentia Palms for a touch of Art Deco glamour—defines the entire experience for your guests.
However, a truly authentic forest effect rarely relies on a single species. As landscape architecture experts advise, the key is diversity. By mixing different species, you can create a more natural and dynamic environment. For example, using dense Ficus trees to create a perimeter and then placing ethereal Birch trees in the center can guide guests’ eyes and craft a layered, multi-dimensional experience. The most successful indoor forests feel like curated ecosystems, not uniform plantations.
A truly natural forest effect is achieved by mixing tree species, heights, and foliage densities.
– Landscape Architecture Expert, Professional Garden Design Guide
This comparative guide outlines the atmospheric effects of different popular rental trees, helping you select the perfect species to achieve your desired indoor garden aesthetic.
| Tree Type | Light Effect | Atmosphere Created | Best For |
|---|---|---|---|
| Ficus | Dense canopy absorbs light | Lush, mysterious grotto | Intimate ceremonies |
| Birch | Sparse leaves reflect light | Bright, airy fairytale | Large open receptions |
| Olive | Filtered Mediterranean glow | Rustic elegance | Outdoor-themed indoors |
| Kentia Palm | Tropical dappled shade | Art deco glamour | Cocktail lounges |
Can your venue floor support a 500lb living tree installation?
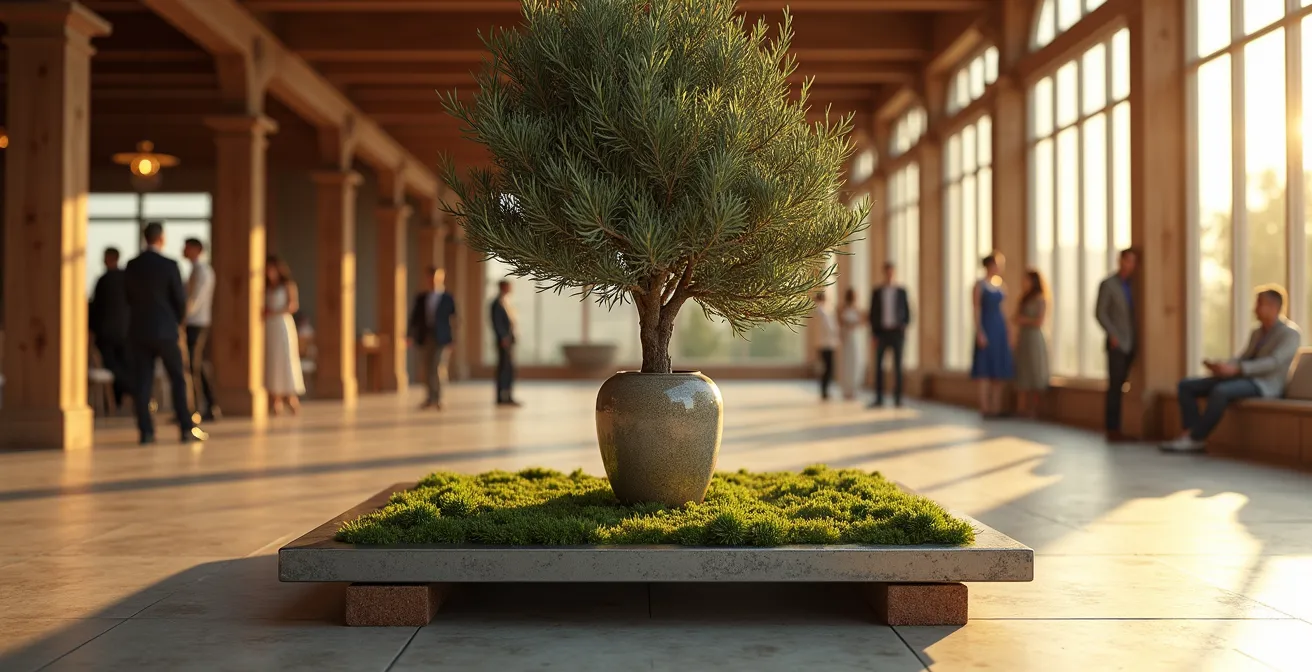
This is arguably the most critical and overlooked question in architectural horticulture. The romance of a 10-foot olive tree gracing your ceremony space quickly fades when faced with the realities of structural engineering. A large, potted tree, complete with soil, water, and a heavy container, can easily exceed 500 pounds (over 225 kg). Placing this concentrated load on a floor not designed for it poses a significant risk of damage or, in the worst case, collapse. This is where biophilic engineering becomes paramount; you must work with the venue, not against it.
Standard residential floors are typically rated for around 40 pounds per square foot (psf), while commercial venues might handle 75-100 psf. A 500lb tree in a 2-foot diameter pot exerts a pressure far greater than these limits. Before committing to any large-scale living installation, you must consult with the venue management to obtain their floor’s load capacity specifications. For any installation exceeding 300-400 lbs, a consultation with a structural engineer is not an optional luxury but a mandatory safety measure. They can assess the floor’s integrity and recommend solutions.
The most common solution for heavy installations is the use of weight distribution plates. These are typically steel plates placed underneath the planter, often concealed by moss or fabric. The plate spreads the concentrated point load of the planter over a much larger surface area, reducing the psf to a safe level that the floor can support. Visualizing this solution, as shown below, reveals the hidden engineering that makes such dramatic natural statements possible and safe.
The following guide provides a general assessment of weight ranges and floor requirements. However, it should only be used for initial planning. Always verify with professionals before installation.
| Installation Type | Weight Range | Floor Load Required (psf) | Safety Considerations |
|---|---|---|---|
| Small Moss Topiary (3ft) | 25-50 lbs | Standard residential (40 psf) | Minimal concern, use waterproof base |
| Medium Tree Installation (6ft) | 200-300 lbs | Commercial grade (75 psf) | Weight distribution plates recommended |
| Large Living Tree (10ft) | 400-600 lbs | Heavy commercial (100+ psf) | Structural engineer consultation required |
| Hanging/Suspended Option | 50-150 lbs | Ceiling rigging points | Professional rigging inspection needed |
Preventing leaks: ensuring your living wall doesn’t drip on the carpet
A living wall that slowly drips onto a venue’s priceless Persian rug is the stuff of wedding nightmares. Beyond structural weight, water management is the second pillar of biophilic engineering. A successful installation is a self-contained ecosystem that holds moisture where it’s needed—at the roots—and prevents it from escaping. Failure to design a robust waterproofing and drainage system is not just a risk to the plants; it’s a risk to your security deposit and the venue’s property.
For moss-based sculptures and living walls, the solution is a multi-layered approach. The primary defense is an impermeable waterproof membrane that forms the backing of the entire installation. This layer must be seamless and professionally sealed to create a watertight basin. Directly on top of this membrane sits a capillary mat, a felt-like material that wicks and distributes water evenly across the surface while also holding a reserve of moisture. Finally, a thin drainage layer of gravel or synthetic material at the very bottom provides a space for excess water to collect without waterlogging the roots, before it is reabsorbed by the capillary mat.
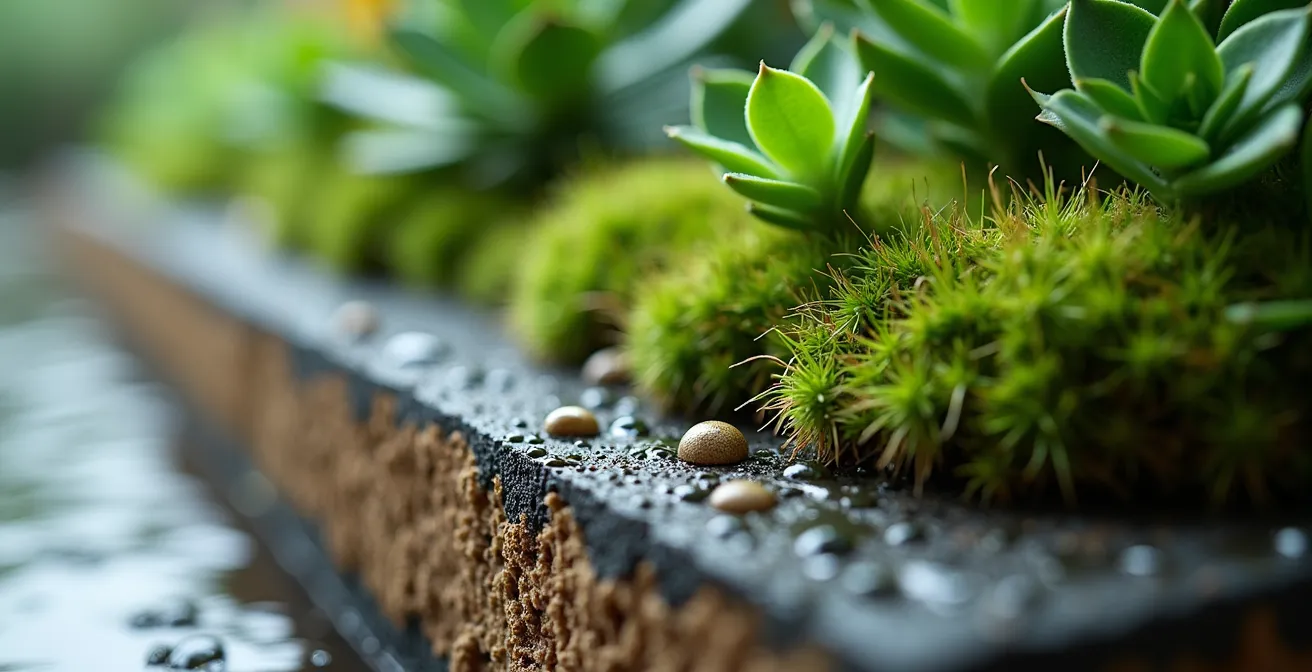
The watering method itself is also critical. Professional installations often employ a drip irrigation system with tubes running to the top of the structure, allowing water to trickle down slowly and be absorbed by the moss and matting. This prevents the over-saturation that comes from aggressive hand-watering. For sculptures using succulents, which store water in their leaves, the system is more forgiving. These plants can tolerate brief dry periods, making water management less intensive. However, the fundamental principle remains: every living installation must be designed with a fail-safe water containment strategy from the outset.
Why standard uplights make green leaves look brown and what to use instead?
You’ve invested in magnificent, lush green trees, only to have them appear sickly and brown in your wedding photos. The culprit is almost always the lighting. Standard event uplights, often using warm-toned bulbs, are designed to flatter skin tones and create a cozy ambiance. However, their light spectrum is devastating for plants. The yellow and orange-heavy light lacks the blue and full-spectrum frequencies that green leaves reflect, causing them to absorb the light and appear dull, brownish, or even black. This is where strategic light-scaping becomes crucial.
To make foliage pop with vibrant, natural color, you need light sources with a high Color Rendering Index (CRI) and a specific color temperature. The CRI measures a light’s ability to reveal the true colors of an object compared to natural sunlight. For plants, lighting experts recommend a CRI of 90+ to ensure the greens are rendered accurately and vibrantly. The color temperature, measured in Kelvin (K), should be in the neutral to cool-white range of 3000-4000K. This mimics natural daylight and contains the necessary blue spectrum to make green foliage look alive.
The best tools for this job are modern LED fixtures. They run cool, so they won’t scorch delicate leaves, and are available in high-CRI, adjustable-temperature models. A professional setup involves layering light: using narrow-beam spots to create dramatic highlights on specific leaves or branches, and wide-beam wash lights to fill in shadows and provide overall illumination. By positioning these lights at 45-degree angles, you can create depth and texture without casting harsh, unflattering shadows. The final, and most critical, step is to test your full lighting setup at the venue at least 48 hours before the event, allowing time to adjust angles and temperatures to eliminate any browning effects and perfect the look.
How to donate or replant your living decor after the event?
The final act of sustainable design is creating a post-event legacy for your living art. A truly zero-waste wedding doesn’t end when the last guest leaves; it ends when every element has been repurposed, replanted, or returned to the earth. The beautiful trees and sculptures that defined your space should not end up in a dumpster. Planning for their future life is an integral part of the design process, turning a one-day-wonder into a lasting contribution.
There are several powerful ways to ensure your living decor continues to thrive. The most direct method is guest adoption. For smaller centerpieces, especially those in individual pots, including a small card with care instructions and a “please take me home” message is a wonderful way to gift your guests a living memory. For larger installations, this requires more planning. You can partner with local organizations like schools, community gardens, hospitals, or nonprofits. Contact them months in advance to arrange a post-wedding donation. They are often thrilled to receive mature plants to beautify their spaces.
Another deeply personal approach is to replant the decor at your own home. Couples have used succulents from their centerpieces to create a living wreath for the front door of their first home, a beautiful and constant reminder of their wedding day. Larger trees can be planted in your garden to grow with your family over the years. This full-circle approach, where the botanicals that witnessed your union become a permanent part of your life, is the ultimate expression of sustainable, meaningful design. It transforms your decor from a temporary expense into a living, growing investment.
To execute this successfully, forward planning is key. Here are the essential steps:
- Pre-Event Outreach: Contact local schools, community gardens, and nonprofits 2-3 months before the wedding to arrange potential donation partnerships.
- Modular Design: When designing, use individual pots within larger arrangements to make disassembly and distribution easy.
- Guest Adoption Program: Create “adoption” tags with care instructions for any plants you’d like guests to take home.
- Arranged Pickup: Coordinate a day-after pickup service with a local botanical garden, urban farming initiative, or your chosen nonprofit.
- Document the Legacy: If you donate the plants, ask the receiving organization to send a photo of them in their new home for your wedding album.
Key takeaways
- Architectural Horticulture is a discipline of engineering and art; it requires planning for weight, water, and light, not just aesthetics.
- The greatest visual impact often comes from vertical elements like tall trees, which can be more cost-effective and transformative than dozens of table centerpieces.
- A successful living installation has a plan for its entire lifecycle, including a post-event legacy through donation, replanting, or guest adoption.
How to Bring the Outdoors In for a Garden-Like Wedding Inside?
Transforming an indoor venue into a garden-like oasis is about more than just filling it with plants. A truly immersive experience engages all the senses. It’s a holistic practice of biophilic design where you layer visual, auditory, and even olfactory elements to create the illusion of being outdoors. The goal is to make guests forget they are inside a building and instead feel enveloped by a living, breathing environment. This is the culmination of architectural horticulture—moving beyond individual sculptures to craft a complete, multi-sensory world.
The foundation is, of course, the greenery. Using a mix of large trees, as we’ve discussed, creates the forest canopy, while living walls provide lush backdrops. But the real magic happens in the details. Consider a subtle soundscape of recorded birdsong or a gentle breeze played at a very low volume throughout the venue. At key transition points, like the entrance, place diffusers with earthy scents like petrichor (the smell of rain on dry earth) or fresh pine. This immediately signals a shift in atmosphere from the moment guests arrive.
Tactile experiences are just as important. Instead of traditional linen, use table runners made of real moss. Choose wood-grain chargers and natural-fiber napkins. The bar itself can become a living installation, with a wall of herbs growing behind it, allowing guests to see their mint or rosemary being picked fresh for their cocktails. By layering these sensory details, you create an environment that feels deeply and authentically natural. It’s an approach where every element works in concert to support the central theme, proving that with imagination, you can create a functional and artistic garden that breathes and grows, even within four walls.
Your Action Plan: Biophilic Wedding Design Checklist
- Soundscapes: Install subtle sound systems playing recorded birdsong or rustling leaves at 15% volume throughout the venue to create ambient nature sounds.
- Scent-Scaping: Place earthy petrichor or pine diffusers at the entrance and other key transition points to create a memorable olfactory experience.
- Tactile Details: Use moss table runners, wood-grain chargers, and natural stone or wood elements to bring a tactile feel of the outdoors to the dining experience.
- Experiential Portals: Design a dense greenery archway at the main entrance, creating a symbolic “portal” that transports guests from the outside world into your indoor garden.
- Interactive Elements: Create a living bar with an herb wall where bartenders can pick fresh garnishes for cocktails, making the experience interactive and engaging.
Now that you have the framework for creating these living masterpieces, the next step is to apply these principles to your unique vision. Begin by assessing your venue’s potential and limitations, and start dreaming up the architectural forms that will define your unforgettable, sustainable celebration.