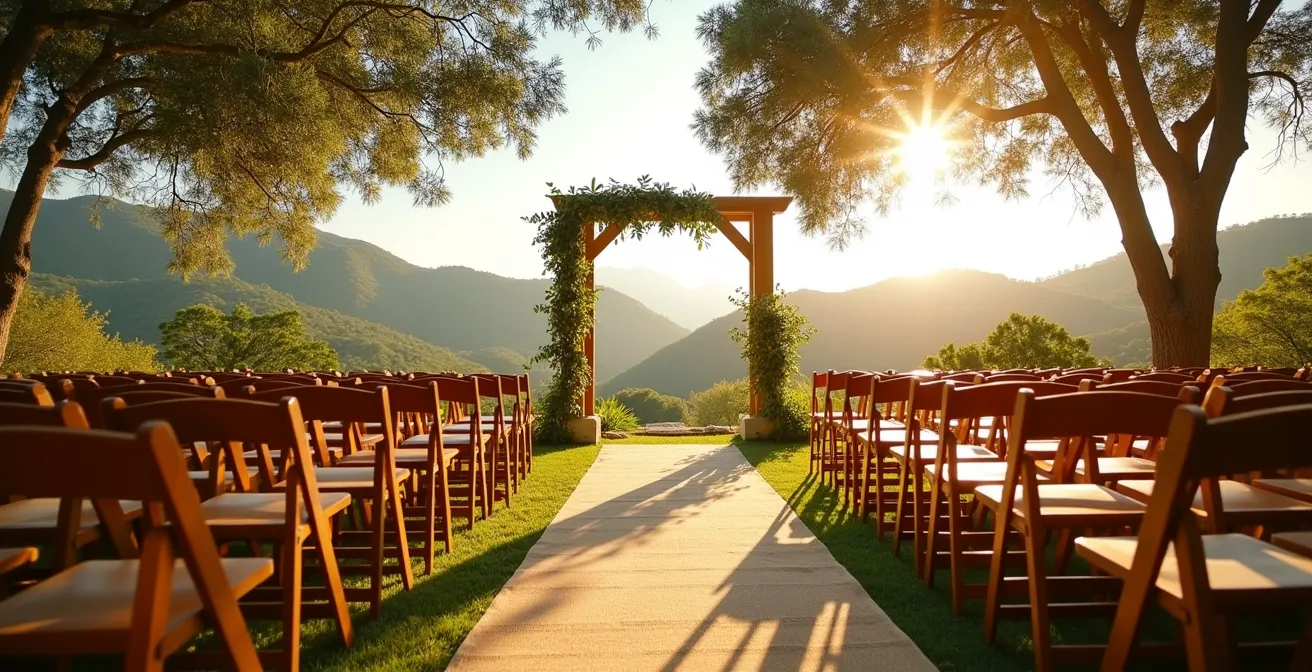
A truly memorable ceremony space is engineered for emotion and light, not just decorated.
- Prioritize functional design, like aisle width and sun orientation, to ensure comfort for guests and optimal conditions for photographers.
- Frame the couple intentionally with structures that enhance, rather than block, the view, creating a sacred focal point.
Recommendation: Think like a director, not a decorator. Plan your space by considering every guest’s sightline and the sun’s path throughout the ceremony.
The vision for your ceremony is clear: a moment suspended in time, filled with reverence, where the vows you exchange are the undeniable focal point. You want your guests to feel not just present, but deeply connected to the sanctity of the ritual. At the same time, you know these are the images that will define your wedding day, and you dream of photos that are breathtakingly beautiful, filled with emotion and glorious light. Often, the advice is to simply “choose a pretty backdrop” or “add more flowers.” This approach focuses on decoration, treating the space as a static set.
But what if the secret to a ceremony that is both sacred and photogenic lies not in what you add, but in how you direct the space? The most impactful ceremony areas are not just decorated; they are choreographed. They are stages engineered for emotion, with every element—from the width of the aisle to the angle of the sun—meticulously planned. This is about moving beyond aesthetics to embrace a philosophy of intentional design. It’s about understanding the subtle geometry of sightlines, the physics of an outdoor structure, and the choreography of light.
For those who value the ritual, this guide offers a new perspective. We will deconstruct the ceremony space to reveal how strategic decisions create an atmosphere of intimacy and reverence. We will explore how to frame your union without blocking the view, how to harness the sun for perfect photos without blinding your guests, and how to build structures that are as stable as they are stunning. This is your blueprint for creating a space that honors your vows and immortalizes your joy.
For those who prefer a hands-on approach, the following video offers a fantastic tutorial on creating a DIY backdrop, illustrating some of the principles of modular and adaptable design we’ll discuss.
This article breaks down the essential strategic considerations for designing your ceremony space. Each section addresses a critical question, providing the expert insights needed to transform your venue into a setting that is both profoundly meaningful and visually spectacular.
Summary: A Guide to Directing Your Ceremony Space
- Why a 5-foot aisle is too narrow for a dress with a train?
- Arch vs. Ground circle: framing the couple without blocking the view
- Orientation check: ensuring the sun isn’t in your guests’ eyes at 4 PM
- When to use a semi-circle layout to increase intimacy?
- Backlit vs. Squinting: positioning your arch relative to the sun position
- How to Build a Large-Scale Floral Arch That Won’t Topple Over in the Wind?
- The “sail effect”: how to prevent your floral backdrop from blowing away?
- The “flip”: how to hide the ceremony arch while guests are at cocktails?
Why a 5-foot aisle is too narrow for a dress with a train?
The processional is the opening scene of your ceremony, and the aisle is the path that leads to your union. Its design is often overlooked, treated as a simple walkway. However, its width is a critical element of functional design that directly impacts the grace of your entrance and the quality of your photographs. A standard 5-foot aisle might seem adequate, but for a bride with a voluminous dress or a long train, it can become a constricted corridor. The fabric can bunch up, get stepped on, or lose its intended shape, creating a stressful, rather than serene, walk.
Beyond the dress, consider the choreography. Are you being escorted by one or two people? Will your pets be part of the procession? A narrow aisle forces everyone into a single-file line, diminishing the visual impact. Most importantly, a narrow aisle handcuffs your photographer and videographer. They need space to move discreetly alongside and ahead of you to capture those priceless expressions and wide shots of the moment. Without adequate room, they are trapped at the end of the aisle, limited to a single, static perspective.
For this reason, many professionals advocate for a more generous width. Designing an aisle that is both grand and functional is a matter of simple measurements. It’s a foundational choice that ensures every element—the dress, the escorts, the photographers—can perform its role beautifully. According to professional wedding photographer Rob Greer, an 8+ feet minimum width is recommended for unrestricted movement and ideal photographic angles. This extra space is not a luxury; it’s a practical necessity for a flawless and well-documented ceremony.
- Standard aisle (4-5 feet): Best for solo walks or a slim-fitting dress, but can feel cramped.
- Wider aisle (6-7 feet): The ideal minimum, comfortably fitting two people walking side-by-side.
- Extra-wide aisle (8+ feet): Essential for large dresses, multiple escorts, or when photographers need to move freely.
Arch vs. Ground circle: framing the couple without blocking the view
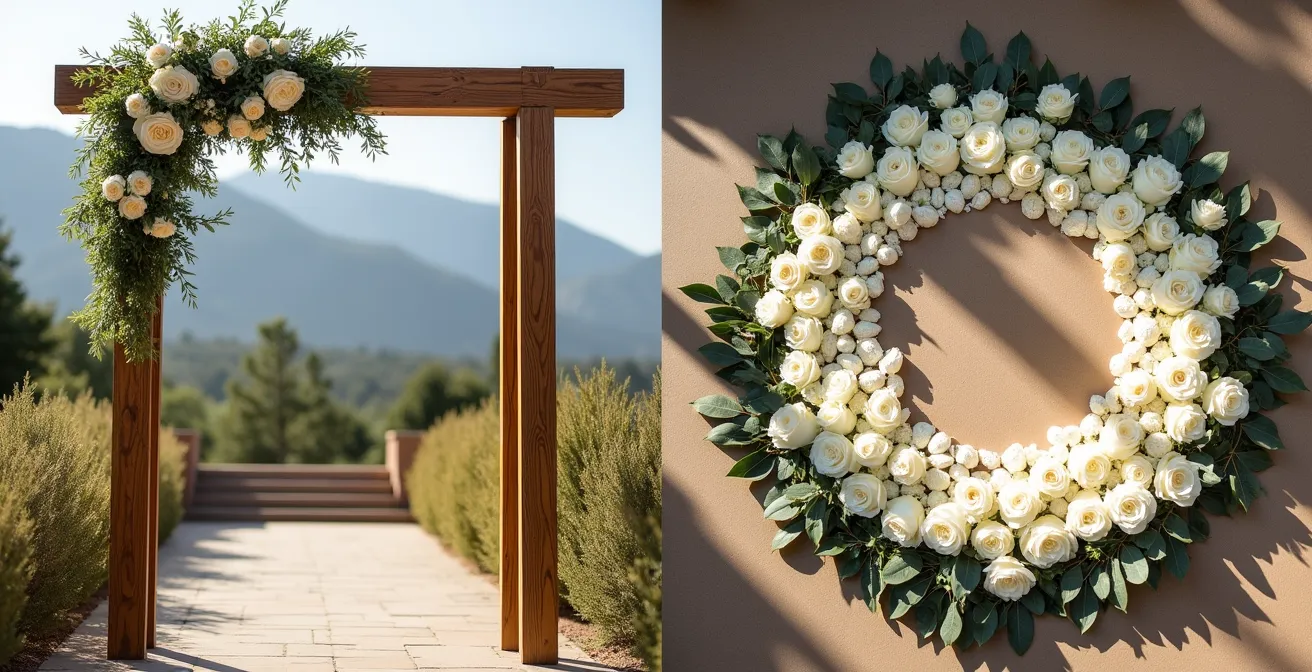
The spot where you exchange your vows is the heart of the ceremony space. The structure you choose for this location is not just a backdrop; it is a deliberate act of ritual framing. Its purpose is to draw every eye toward you, creating a sacred visual boundary that separates the ceremonial from the everyday. The two most common approaches, the vertical arch and the horizontal ground circle, serve this purpose in fundamentally different ways, each with its own impact on sightlines and intimacy.
A traditional wedding arch—be it floral, wooden, or metallic—acts as a portal. It frames the couple against the landscape, creating a classic, well-defined composition that is inherently photogenic. However, a poorly placed or oversized arch can easily obstruct the view for guests seated on the sides. The key is to ensure the structure elevates the focus without becoming a barrier. A ground circle, made of petals, greenery, or candles, offers a different kind of intimacy. It creates an inclusive, sacred boundary on the same plane as the guests, making them feel like they are part of the circle rather than spectators. This format guarantees that no guest’s view is blocked, offering a 360-degree perspective that is profoundly personal.
The choice is not purely aesthetic; it is a strategic decision about how you want your guests to experience the ceremony. The arch creates a formal stage, while the ground circle fosters a sense of communal participation. Both can be breathtakingly beautiful, but they shape the energy of the space in distinct ways. The goal is always to guide the gaze, not to gate it.
Case Study: The Elevated Mandap
For their traditional Indian wedding, Alyssa and Shan utilized a beautifully designed mandap, a four-pillared structure central to Hindu ceremonies. By placing the entire mandap on an elevated platform, they ensured it served as a stunning frame without impeding the view. The elevation guaranteed that every guest, even those in the back rows, could clearly witness the intricate rituals and vows. This demonstrated how architectural structures, when properly elevated, can masterfully frame a ceremony while preserving perfect sightline geometry for all attendees.
Orientation check: ensuring the sun isn’t in your guests’ eyes at 4 PM
Light is the most powerful tool in ceremony design, yet it’s the one you have the least control over. What you can control, however, is your orientation to it. The most common mistake in outdoor ceremony planning is positioning the guest seating without considering the sun’s path. Forcing your loved ones to squint directly into the afternoon sun for 30 minutes is not only uncomfortable but also disconnects them from the moment. They will be focused on their discomfort, not on your vows. This is the opposite of the sacred, intimate atmosphere you want to create.
This is where light choreography begins. Before finalizing your layout, you must perform an orientation check. Visit your venue at the exact time your ceremony is scheduled to take place. Stand where your guests will be seated and look toward the altar. Is the sun directly in your eyes? If so, you need to rotate the entire setup. Sometimes, a shift of just 45 degrees can move the sun from being a blinding nuisance to a beautiful source of sidelight or backlight.
This planning doesn’t have to be left to chance. Modern technology makes it easy to predict the sun’s location with precision. Using a sun-tracking app can remove all guesswork, allowing you to design your layout with confidence months in advance. These tools are indispensable for any couple planning an outdoor ceremony, ensuring the comfort of your guests and setting the stage for beautiful lighting.
To help with this crucial step, here is a comparison of some of the best sun-tracking apps available, as highlighted in a recent analysis of tools for photographers.
| App Name | Key Features | Best For | Price |
|---|---|---|---|
| PhotoPills | 3D Augmented Reality, Sun/Moon/Milky Way tracking, Calculator tools | Professional planning with AR visualization | $10.99 |
| Sun Seeker | Live view overlay, 3D compass, Annual sun paths | Quick on-site sun position checks | $9.99 |
| The Photographer’s Ephemeris | 2D/3D mapping, Shadow length calculator | Detailed landscape planning | Free (desktop) / $8.99 (mobile) |
When to use a semi-circle layout to increase intimacy?
The standard ceremony layout—straight rows of chairs facing forward—is a tradition born from convention, not from a consideration of intimacy. It creates a formal, presentational feel, much like a lecture hall. While efficient, it can also create a sense of distance, especially for guests in the back. For couples who want their ceremony to feel more like a heartfelt gathering and less like a performance, altering the sightline geometry with a semi-circle layout is a powerful choice.
Arranging guest chairs in gentle arcs around the ceremony spot instantly changes the dynamic of the space. It breaks down the rigid “us vs. them” barrier between the couple and the guests. This layout physically envelops the couple, making every guest feel closer to the action and more a part of the moment. The curved rows mean that guests are not just looking at the back of someone’s head; they can see the faces of other attendees, reinforcing the sense of a shared, communal experience. For smaller to medium-sized weddings, a semi-circle is one of the most effective ways to cultivate a warm and inclusive atmosphere.
For the ultimate connection, a “ceremony in the round” places the couple in the absolute center with guests surrounding them completely. This is best suited for smaller guest counts and requires careful planning with your officiant and photographer, but the emotional payoff is immense. Regardless of the layout, spacing is key. A common recommendation is to set the first row at least 72 inches from the ceremony structure to give participants and photographers room to maneuver without feeling crowded. This intentional spacing ensures comfort while maximizing the feeling of closeness.
Your checklist for a perfect semi-circle layout
- Assess your guest count: Is it small enough for a semi-circle or “in the round” layout to feel intimate rather than sprawling?
- Measure your space: Ensure there is enough width to create gentle arcs without cramping the aisle or walkways.
- Plan your rows: Maintain a minimum of 24 inches between chair rows to allow for comfortable seating and easy movement.
- Check your sightlines: Sit in the “worst” seats (far ends of the arcs) during your venue walkthrough to ensure everyone has a clear, acceptable view.
- Coordinate with vendors: Discuss the layout with your officiant, photographer, and videographer to plan their positioning and movement.
Backlit vs. Squinting: positioning your arch relative to the sun position
While the previous section focused on guest comfort, this is about the other half of the light choreography equation: creating iconic, romantic, and beautifully lit photographs. The position of your ceremony structure relative to the sun is the single most important decision you will make for your wedding photography. There are two primary scenarios: front-lit and back-lit. A front-lit ceremony, where the sun is shining directly onto your faces, is the number one cause of squinting. It creates harsh, unflattering shadows under your eyes and nose, and forces you to grimace rather than glow during your vows.
The ideal scenario, coveted by photographers, is backlighting. This involves positioning yourselves so that the sun is behind you. This orientation does two magical things. First, it envelops you in a soft, ethereal glow known as “rim lighting,” which beautifully separates you from the background. Second, it illuminates your guests’ faces with soft, even light, allowing your photographer to capture their emotional reactions perfectly. To achieve this, your altar and arch should be placed between your guests and the setting sun. This ensures you are bathed in that dreamy, golden-hour light without anyone having to squint.
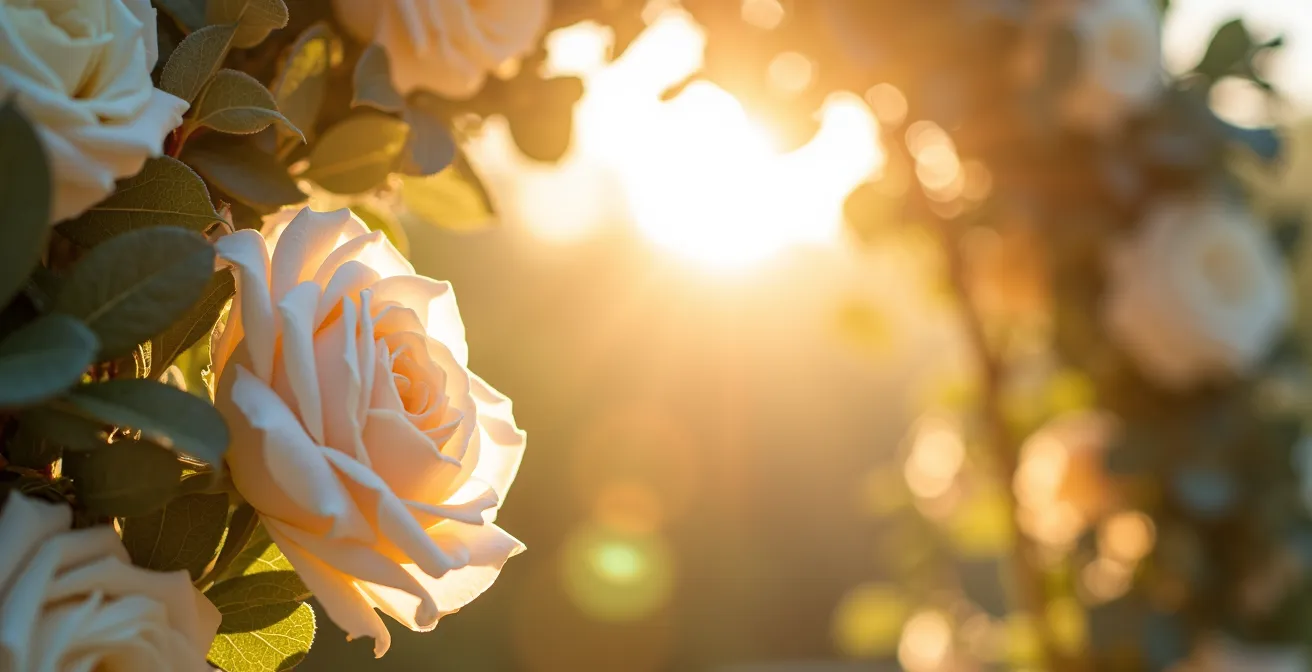
Timing is everything. The most magical light happens in the “golden hour.” To take full advantage of this, many photographers recommend starting ceremony photos about 1 hour before sunset. This gives you enough time for the ceremony and portraits as the light becomes progressively softer and warmer. Planning for this perfect light is an act of deliberate creation, as emphasized by a renowned expert.
PhotoPills is the single most useful photography app on the planet. It helps you plan your photos ahead of time so you’re always at the right place at the right time to capture the best photo possible.
– Mark Gee, Astronomy Photographer of the Year
How to Build a Large-Scale Floral Arch That Won’t Topple Over in the Wind?
A large, dramatic floral arch can be a breathtaking centerpiece for your ceremony. However, as the scale increases, so do the risks. An improperly built large-scale structure is not just a design failure; it’s a significant safety hazard. The key to creating a magnificent and stable arch lies in understanding kinetic stability—designing a structure that can withstand external forces like wind and its own weight. This starts with choosing the right foundation: the frame material.
The material of your arch’s internal structure is the primary determinant of its stability. While lightweight materials like 1/2 inch copper pipe or PVC are popular for DIY projects, they are strictly for indoor use. Outdoors, they lack the rigidity and weight to stand up to even a moderate breeze. For any outdoor installation, you must graduate to more robust materials. A 3/4 inch copper pipe offers more stability, but the gold standard for large or wind-prone structures is a wood frame or, even better, welded steel. These materials provide the necessary weight and structural integrity to support heavy floral arrangements and resist environmental pressures.
Equally important is the base. A large arch needs a wide, heavy base to anchor it securely. Professional florists and rental companies use heavy, welded steel plates that are often concealed by floral arrangements. If you are building your own, consider using sandbags, concrete blocks, or bolting the frame to a heavy wooden platform. Never underestimate the power of the wind. A large arch covered in flowers can act like a sail, and ensuring it is built with professional-grade materials and properly weighted is a non-negotiable aspect of event safety.
The choice of material involves a trade-off between cost, ease of assembly, and stability, as shown in this comparison of common arch frame materials.
| Material | Stability Rating | Cost | Assembly | Wind Resistance |
|---|---|---|---|---|
| 1/2 inch Copper | Low | $50-100 | No tools needed | Indoor only |
| 3/4 inch Copper | Medium | $100-200 | No tools needed | Light wind OK |
| PVC Pipe | Low-Medium | $30-80 | Easy assembly | Requires heavy weighting |
| Wood Frame | Medium-High | Good with proper base | Tools required | $150-300 |
| Welded Steel | High | $300+ | Professional assembly | Excellent stability |
If you are hiring a professional to build your arch, it is your right and responsibility to vet their safety practices. Here are key questions to ask:
- Do you carry liability insurance for your structures?
- What is your documented wind safety plan for this venue?
- At what wind speed do you require a backup indoor plan?
- What is the internal structure made of and how is it weighted?
- Can you provide references from other outdoor weddings?
The “sail effect”: how to prevent your floral backdrop from blowing away?
Even a well-built arch can be vulnerable to the “sail effect.” This happens when a large, solid surface—like a dense wall of flowers or a tightly draped piece of fabric—catches the wind like a ship’s sail, putting immense pressure on the structure and its anchor points. A strong gust can transform a beautiful backdrop into a dangerous projectile. Preventing the sail effect requires moving beyond simple weighting and incorporating principles of aerodynamic design into your floral plan. The goal is to reduce wind resistance by allowing air to pass through the structure.
One of the most effective strategies is to design for wind permeability. Instead of one massive, solid floral installation, consider breaking it up into separate panels with gaps in between. This allows wind to flow through the openings, drastically reducing the pressure. Similarly, using an open-weave greenery base, like smilax or eucalyptus, instead of dense floral foam, creates a more porous structure. The wind can filter through the foliage rather than pushing against it.
Another professional technique involves a combination of secure mechanics and clever material choices. One florist shared a successful method for creating wind-resistant designs using floral foam blocks securely zip-tied to the frame. The key was to arrange the flowers while the blocks were hanging to account for weight shifts. They then used a mix of clearance vines and filler flowers to create a lush look that was still permeable to wind. This combination of a strong core and a design that doesn’t fight the wind is a hallmark of expert kinetic stability. It’s a testament to the idea that working with nature, rather than against it, often yields the most beautiful and resilient results.
Key takeaways
- Function over form: The best ceremony design prioritizes movement, comfort, and sightlines first.
- Direct the light: Actively position your entire setup to harness the sun for guest comfort and perfect backlighting.
- Engineer for safety: For outdoor structures, choose robust materials and designs that are permeable to wind to ensure stability.
The “flip”: how to hide the ceremony arch while guests are at cocktails?
Your stunning ceremony arch is the centerpiece for 30 minutes, but what happens to it for the next five hours? In many venues, the ceremony and reception take place in the same area. The “flip” is the industry term for the rapid transformation of the space while guests are enjoying cocktail hour elsewhere. A large, stationary arch can be an awkward obstacle during this process, difficult to move and often ending up awkwardly pushed into a corner. A smarter approach is to design for modular transformation from the outset.
Instead of a single, monolithic structure, consider an arch that is designed to be easily disassembled, moved, or repurposed. This forward-thinking approach turns a single-use decorative item into a versatile element of your overall wedding design. A modular arch can be broken down and reconfigured as a dramatic backdrop for your cake table, a frame for your sweetheart table, or an entrance to the dance floor. This not only provides more value for your investment but also creates a cohesive design story that carries through the entire event.
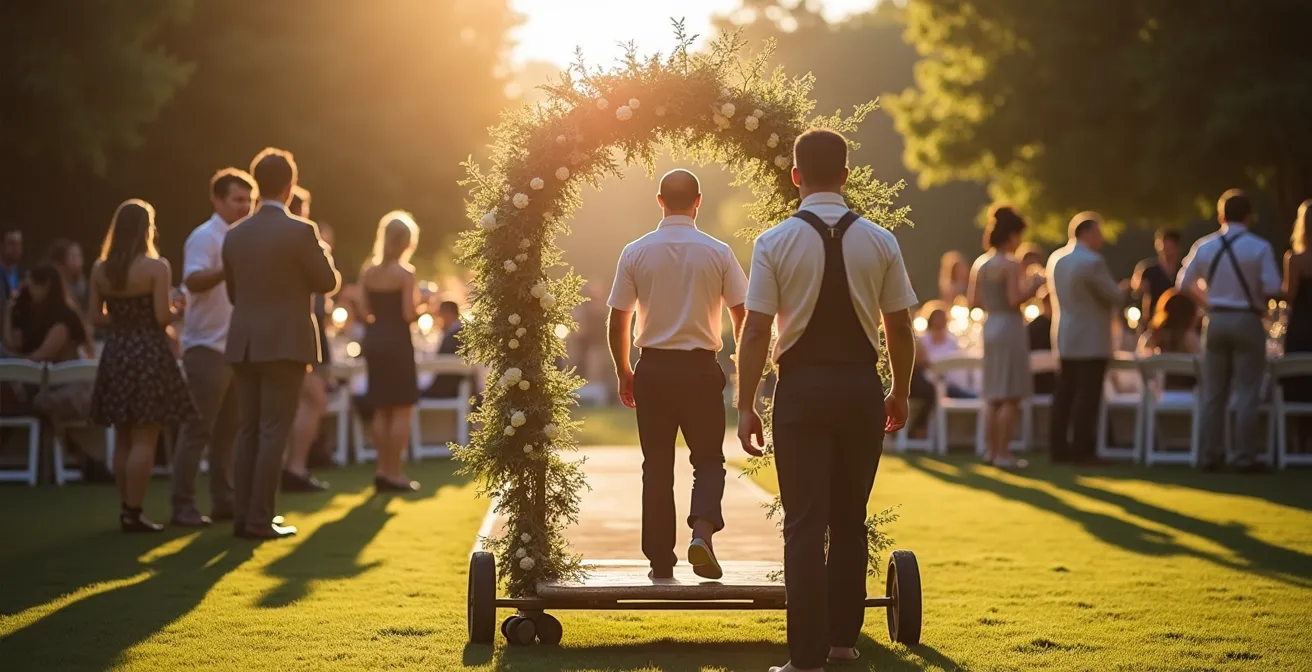
This concept is not limited to professional installations. Clever DIY solutions can be just as effective, allowing for creative reuse and a personal touch that extends beyond the ceremony itself.
Case Study: The Repurposed Copper Arch
A resourceful New York couple created a modular arch from 1/2 inch copper pipes and connectors, requiring no tools for assembly or breakdown. After the ceremony, the wedding coordinator quickly disassembled the structure. During the reception, it reappeared as an elegant backdrop for the cake cutting photos. The couple later used the same structure for their baby shower, demonstrating the incredible versatility and long-term value of a modular design. This is a perfect example of thinking beyond the ceremony to the entire event lifecycle.
By shifting your mindset from decorating a space to directing an experience, you create a ceremony that resonates on a deeper level. You honor the sanctity of your vows by ensuring every guest is comfortable and connected, and you capture the beauty of the moment by choreographing the light and framing the scene with intention. This thoughtful approach is the true art of ceremony design.