The energy of your wedding party is not random; it’s engineered by the layout of your reception space.
- Minimize “travel friction” by placing the bar close to the dance floor, creating a self-sustaining energy loop.
- Use lighting and decor to create “psychological enclosure,” making the dance floor feel intimate and safe for all guests.
- Manage the entire night’s momentum with a phased lighting plan that guides the party from dinner to the final dance.
Recommendation: Stop thinking about your floor plan as a seating chart and start treating it as the blueprint for your party’s energy flow.
You’ve seen it before: a beautiful wedding, a great DJ, and a cavernously empty dance floor. While guests huddle at a distant bar or retreat to their tables, the party’s heartbeat slowly fades. Many couples blame the music or the guests, but the real culprit is often invisible: the layout of the room itself. The common advice is to get a good DJ and hope for the best, but this leaves the most critical factor—the environment—to chance. The belief that a party’s energy is purely spontaneous is a myth that leads to predictable lulls and a fragmented experience for your guests.
But what if the key wasn’t just the playlist, but the physics of the party? The secret to a packed dance floor lies in treating your reception space not as a static room, but as a dynamic energy system. As a nightlife consultant, I see weddings through the lens of energy flow, bottlenecks, and momentum. The distance between the bar and the DJ, the height of the ceiling, and the placement of lounge furniture aren’t just decorative choices; they are strategic levers that control your party’s pulse. This isn’t about forcing people to dance; it’s about creating an environment where dancing feels like the most natural, effortless, and compelling option.
This guide will deconstruct the architecture of a great party. We will move beyond generic tips and delve into the principles of spatial psychology and energy management. You’ll learn how to design an “energy funnel” that channels guests toward the dance floor, create “psychological enclosures” that build dancing confidence, and orchestrate the night’s flow with the precision of a club designer. By mastering these concepts, you can architect a reception that doesn’t just have a dance party, but *becomes* the party.
To help you engineer the perfect party atmosphere, this article breaks down the essential strategies for optimizing your reception layout. Explore the detailed sections below to master each element of your event’s energy flow.
Summary: A Nightlife Consultant’s Guide to Wedding Reception Energy
- Why placing the bar too far from the DJ kills the party energy?
- How to lower the visual ceiling over the dance floor for better energy?
- Removing tables: how to clear space without making guests feel displaced?
- Vinyl vs. Parquet: which dance floor surface prevents slips in heels?
- How to create observation zones so grandma feels included but safe?
- How to zone audio so guests can talk in the lounge while the party rages?
- The impact of sound-active lighting during the final dance set
- How to Manage Lighting Intensity to Control the Energy of the Night?
Why placing the bar too far from the DJ kills the party energy?
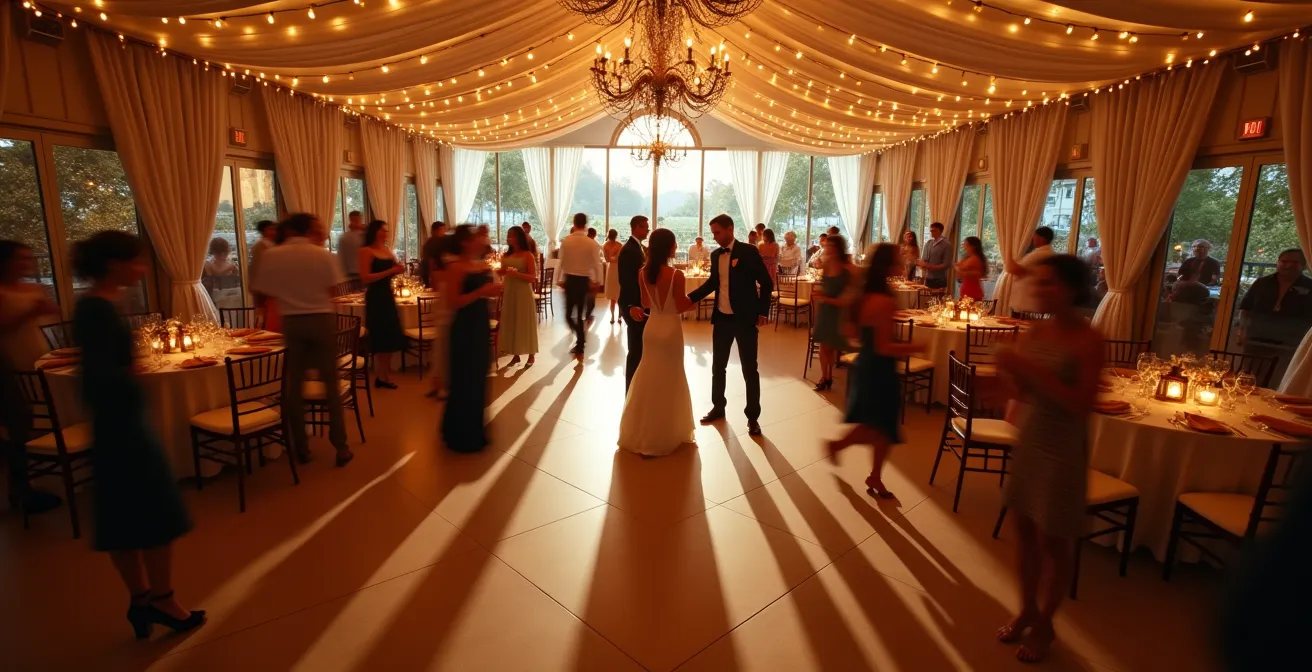
The single greatest killer of a wedding dance floor is distance. Specifically, the distance between the bar, the dance floor, and the DJ. When the bar is in a separate room or at the far end of the venue, it creates two distinct parties: the dancing party and the drinking party. This split is catastrophic for momentum. Guests leave the dance floor for a drink, get caught in a conversation, and the “travel friction”—the physical and psychological effort to return—becomes too high. The energy bleeds out with every trip for a refill, creating a constant drain on the central hub of your event.
The solution is to create a “Golden Triangle” of energy: Dance Floor, DJ, and Bar. These three elements must be in close proximity, ideally within a 15-20 foot radius. This layout creates a self-sustaining energy loop. Guests waiting for a drink can still see and feel the energy of the dance floor, making them spectators rather than absentees. The DJ can read the entire crowd, both dancers and drinkers, and tailor the music accordingly. This tight-knit configuration ensures that even when guests aren’t actively dancing, they are still part of the party’s core energy. While event planning experts confirm that on average only 40% of guests dance at any given time, a compact layout keeps the other 60% engaged and part of the collective atmosphere, preventing the dreaded “vibe drain.”
To achieve this, position the bar with its queue angled towards the dance floor, turning waiting time into watching time. Ensure you have one bartender per 50 guests to prevent bottlenecks, which can stall energy just as much as distance. If your venue has a fixed bar far away, consider bringing in mobile bar carts as secondary “energy stations” near the dance floor. This minimizes travel friction and keeps the party’s heart beating strong.
How to lower the visual ceiling over the dance floor for better energy?
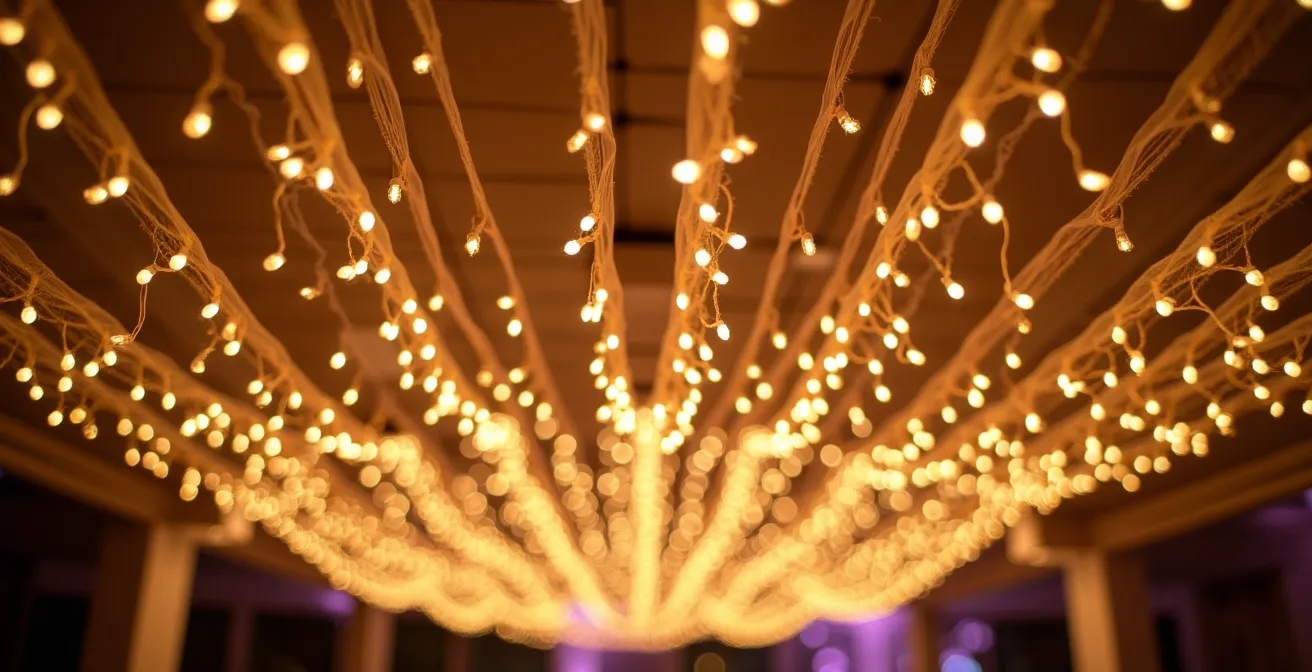
A dance floor in a grand ballroom with a 30-foot ceiling can feel intimidating and exposed. This vast overhead space diffuses energy and makes guests feel small and self-conscious. To create a vibrant, magnetic dance floor, you need to create “psychological enclosure.” This design principle involves lowering the *visual* ceiling over the dance area, making the space feel more intimate, contained, and safe. When dancers feel enclosed and protected, they lose their inhibitions more quickly, and the energy becomes concentrated instead of dissipating into the rafters.
This effect doesn’t require structural changes. It’s achieved through strategic decor and lighting. A canopy of fairy lights, fabric draping, or even a professional lighting truss system can effectively create a “ceiling within a ceiling.” This not only defines the dance space but also transforms it into a special, almost magical zone, distinct from the rest of the reception. The warm glow of string lights or the soft texture of draped fabric fosters a sense of closeness and encourages guests to join in. The goal is to make the dance floor the most alluring and comfortable place in the room.
The right technique depends on your budget, venue, and desired aesthetic. Each option offers a different balance of cost, setup time, and visual impact.
| Technique | Height Impact | Cost Range | Setup Time | Visual Effect |
|---|---|---|---|---|
| Fairy Light Canopy | 8-10ft ceiling | $500-1500 | 2-3 hours | Warm, intimate glow |
| Fabric Draping | 10-12ft ceiling | $800-2000 | 3-4 hours | Soft, elegant enclosure |
| Lighting Truss System | 9-11ft ceiling | $1200-3000 | 4-5 hours | Professional, dramatic |
| Gobo Projection | Visual only | $300-800 | 30 minutes | Patterned light ceiling |
Removing tables: how to clear space without making guests feel displaced?
As the night progresses from dinner to dancing, the formal seating arrangement can become an obstacle. Tables placed too close to the dance floor constrict the available space and create physical and psychological barriers to joining the party. However, simply removing tables without a plan can leave guests feeling unmoored, clutching their drinks and purses with nowhere to land. The key is a staged and communicated transition that makes the expansion of the dance floor feel like an exciting, planned evolution of the night, not a chaotic eviction.
The process should be managed by the venue staff in coordination with your DJ or MC. The goal is to create alternative “landing zones” before the primary tables are removed. Setting up high-top cocktail tables around the perimeter of the expanding dance floor gives guests a place to set down their drinks and congregate without retreating to the far corners of the room. This maintains the energy density around the dance floor. As the RoomSketcher Wedding Planning Team notes in their guide, poor planning can be disastrous: “A wedding floor plan will help you see any potential traffic jams – for example, if you place the bar too near the entry, you can end up with a crowd near the front door.” The same logic applies to removing tables; it must be done to improve flow, not create chaos.
The DJ should frame the moment positively, announcing something like, “Alright everyone, we’re opening up the main stage! The party is about to kick into high gear!” This transforms table removal from a logistical chore into the official start of the main event. By managing the process in waves, you allow guests to migrate naturally to the new high-tops or the dance floor itself.
Your Action Plan: Staged Table Removal Protocol
- Brief venue staff on the removal sequence, starting with tables adjacent to the dance floor.
- Set up alternative landing zones with high-top cocktail tables before removal begins.
- Have the DJ announce the transition with positive framing: “Opening up the dance floor for the party!”
- Remove tables in 2-3 waves, allowing guests to naturally migrate and adjust.
- Ensure clear pathways remain to the bar, restrooms, and lounge areas throughout the process.
Vinyl vs. Parquet: which dance floor surface prevents slips in heels?
The physical surface of the dance floor is a critical, yet often overlooked, component of party endurance. An overly sticky or slippery floor can be a nightmare for guests, especially those in heels. A bad surface increases fatigue, raises the risk of slips, and can make even the most enthusiastic dancers hesitant. The ideal dance floor strikes a perfect balance between grip and glide, allowing for safe movement without restricting dance moves. This isn’t just a comfort issue; it’s a fundamental factor in how long people are willing and able to stay on the dance floor.
For weddings, vinyl and traditional wood parquet are common choices, but they offer different experiences. Vinyl generally provides excellent grip, which is great for preventing slips in high heels, but can sometimes feel a bit “sticky” for more fluid dance styles. Parquet wood offers a better glide but can become slippery if not properly maintained or if drinks are spilled. The ultimate surface is often a professional-grade sprung wood subfloor, which provides shock absorption to reduce fatigue, though it comes at a higher cost. Research from Cornell University has even quantified the impact of getting this right, finding that properly sized and surfaced floors lead to 62% longer average dancing times among guests. This proves that the physical comfort of the floor is directly tied to the longevity of your party.
When selecting your dance floor, consider your guests and the style of your party. If you expect a high-energy, high-heeled crowd, prioritizing grip with a high-quality vinyl floor might be the safest bet. If your event is more of a formal ballroom style, a well-maintained parquet may be more appropriate.
This comparison shows how different surfaces perform across key metrics for a wedding reception.
| Surface Type | Heel Grip (1-10) | Dance Glide | Acoustic Impact | Fatigue Factor | Cost/sq ft |
|---|---|---|---|---|---|
| Vinyl | 8/10 | Moderate | Quiet | Low | $3-5 |
| Parquet | 7/10 | Good | Moderate | Medium | $4-7 |
| LED Floor | 6/10 | Limited | Quiet | High | $12-18 |
| Wood + Subfloor | 9/10 | Excellent | Low | Very Low | $6-10 |
How to create observation zones so grandma feels included but safe?
A successful party isn’t just about the dancers; it’s about the entire community of guests. Older relatives or quieter friends may not want to be in the middle of a packed dance floor, but they still want to feel connected to the celebration. Forcing them to choose between a faraway table or the chaotic edge of the dance floor is a recipe for exclusion. The solution is to design a dedicated “Golden Circle” or observation zone—a comfortable, safe, and slightly removed space with a prime view of the action.
This zone acts as a mid-energy buffer between the high-energy dance floor and the low-energy lounge areas. It should be furnished with comfortable seating, like armchairs instead of standard dining chairs, and positioned 10-15 feet from the dance floor’s edge. This proximity is key; it allows observers to see facial expressions and feel part of the joy without being jostled or overwhelmed by the volume. The addition of small side tables for drinks and personal items enhances comfort and encourages longer stays.
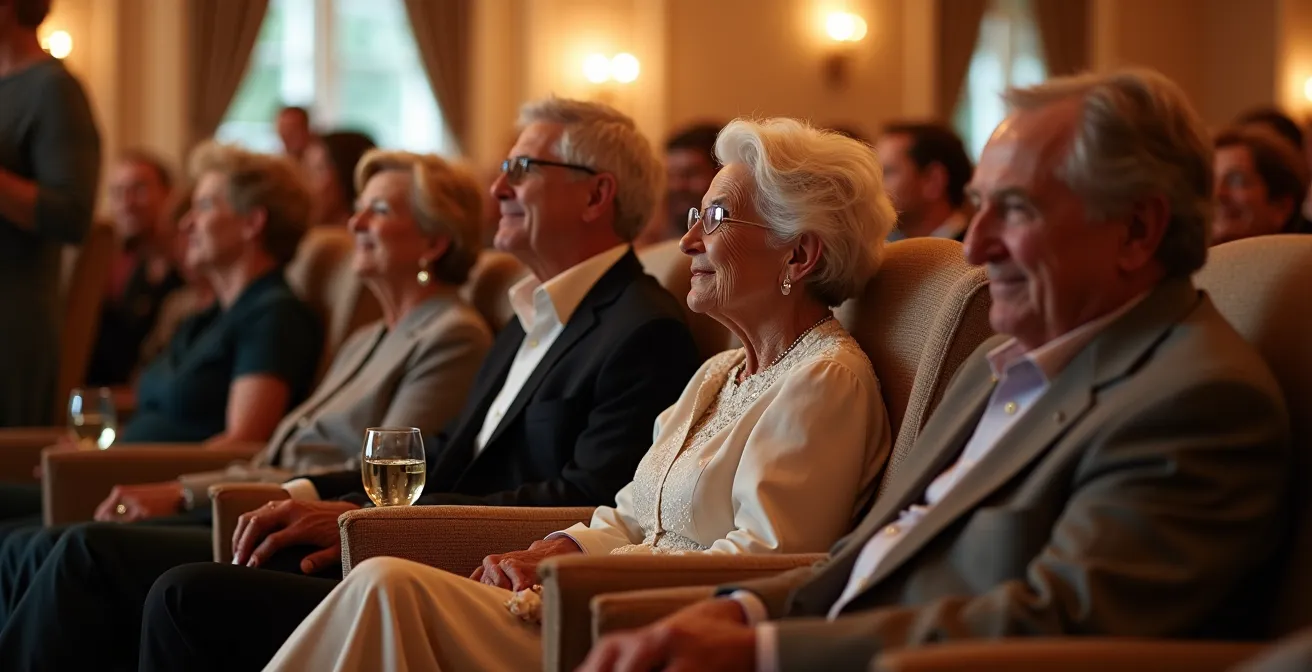
For optimal sightlines, consider placing this zone on a low riser, just 6 to 12 inches high, if the venue permits. This slight elevation provides an unobstructed view over the heads of standing guests. It’s also crucial to ensure the lighting is soft and adequate for visibility without being harsh, and that the area has clear, step-free pathways to restrooms that bypass the dance floor entirely. This thoughtful design communicates care and inclusivity, ensuring every guest, regardless of age or mobility, has the best seat in the house.
How to zone audio so guests can talk in the lounge while the party rages?
One of the most common wedding complaints is “the music was too loud.” This usually happens when a single, powerful sound system is used to blast music across the entire venue. While great for the dancers, it makes conversation impossible everywhere else, forcing guests who want to chat to either shout over the music or leave the room entirely. This creates a fractured experience. The professional solution is audio zoning: creating distinct areas with independent volume levels to cater to different activities. This allows the party to rage on the dance floor while guests can comfortably converse in a designated lounge area.
This concept is rooted in environmental psychology. As noted in event research, the environment directly shapes social behavior. A space that is acoustically comfortable for conversation will naturally encourage it. As one study highlights, “The physical environment can affect or interfere with the quality and frequency of social interaction.” By designing distinct audio zones, you facilitate different types of interaction simultaneously.
The layout of a space and social interaction reciprocally influence each other.
– Event Psychology Research, Hey Mister DJ Wedding Planning Guide
Practically, this is achieved by working with your DJ or AV provider to set up a system with multiple speaker zones. The main, high-energy speakers should be focused squarely on the dance floor. A separate set of smaller, “satellite” speakers can be placed in the lounge or seating areas, playing the same music at a significantly lower volume, almost as background ambiance. This creates a seamless acoustic gradient from loud to quiet, rather than an abrupt wall of sound. This allows guests to move between high-energy and low-energy zones without feeling disconnected from the event, ensuring everyone can enjoy the night in their preferred way.
The impact of sound-active lighting during the final dance set
As the night enters its final hour, you need a way to build to a memorable climax. This is where dynamic, sound-active lighting becomes your most powerful tool. While programmed lighting is perfect for creating elegant ambiance during dinner, the peak party hour calls for something more visceral and responsive. Sound-active lighting systems use built-in microphones to react to the music in real-time, pulsing, changing color, and moving in sync with the beat. This creates a powerful biofeedback loop: the music drives the lights, and the lights energize the dancers, who in turn give more energy back to the room.
This technology turns the dance floor into an immersive, concert-like experience. When the DJ drops a heavy bass line and the lights flash in perfect unison, it creates a moment of collective euphoria. This isn’t just decoration; it’s a key part of the “momentum architecture” of your party. Deploying this effect strategically—specifically during the last 45-60 minutes—serves as a powerful signal to guests that this is the peak of the night, the can’t-miss final set. It pulls anyone lingering on the sidelines onto the floor for the grand finale.
To maximize the impact, consider a multi-layered approach. Distribute LED foam sticks or glow sticks to guests, making them part of the light show. Have your DJ coordinate a “last dance” announcement with a full-throttle activation of all sound-active effects. The options for sound-active systems vary in complexity and cost, from basic units that react to bass to advanced systems that respond to multiple frequencies.
| System Type | Response Time | Cost | Setup Complexity | Effect Quality |
|---|---|---|---|---|
| Basic Sound-Active | Instant | $200-500 | Simple | Good for bass beats |
| Advanced Reactive | Real-time | $500-1500 | Moderate | Multi-frequency response |
| DMX Programmed | Pre-planned | $1500-5000 | Complex | Concert-level precision |
Key Takeaways
- The proximity of the bar, DJ, and dance floor (the “Golden Triangle”) is the single most important factor for maintaining party energy.
- Lowering the visual ceiling with lights or fabric creates “psychological enclosure,” making guests feel more comfortable and confident on the dance floor.
- A phased approach to lighting, moving from bright to dark and then dynamic, is essential for guiding the energy of the entire evening.
How to Manage Lighting Intensity to Control the Energy of the Night?
Lighting is the silent conductor of your wedding’s energy. More than just for visibility, its intensity, color, and movement dictate the mood of the room and guide your guests through the different phases of the evening. A common mistake is to set one static lighting look for the entire reception. This fails to build momentum and can leave the room feeling sterile during peak dancing time. A true nightlife approach involves a dynamic, phased lighting plan that evolves with the party, creating intimacy, energy, and a clear narrative arc for the night.
The core principle is simple: bright light encourages observation and conversation, while dim, colored light encourages movement and intimacy. An Event Psychology Study on the matter explains it well: “people need to have already built some type of comfort or connection with a space before they let their guard down.” The lighting plan’s job is to create that comfort. You start bright and warm during cocktails and dinner to facilitate social interaction. As the formal dances begin, you dim the ambient lights and use a spotlight to create focus and drama. Then, as the open dance floor heats up, you enter a “sunset” phase, gradually dimming the lights to a darker, more club-like level, where dynamic, colored lights can take over.
This progression is not accidental; it’s a deliberate strategy to build psychological comfort and signal transitions. The final phase, in the last 30 minutes, can involve a slow brightening to signal the night is winding down, preventing an abrupt end. This timeline transforms lighting from a utility into your primary tool for energy management and storytelling.
Here is a simple, effective timeline to share with your lighting technician or DJ:
- Phase 1 (Cocktails/Dinner): Bright, warm uplighting at 70% intensity to encourage mingling and conversation.
- Phase 2 (First Dance): A dramatic spotlight on the couple, with ambient lights dimmed to 30% to create a focal point.
- Phase 3 (Early Dancing): A gradual “sunset” dimming of house lights from 60% down to 40% as the party starts.
- Phase 4 (Peak Party): The dance floor area is dark, with ambient light at only 20%, allowing dynamic, sound-active lights to dominate.
- Phase 5 (Wind-Down): In the last 15-20 minutes, slowly and smoothly bring ambient light levels back up to 50% to signal the night’s end gracefully.
By applying these principles of spatial design and energy management, you are no longer leaving your party to chance. You are becoming the architect of an unforgettable experience. To put these strategies into practice, the next logical step is to create a detailed floor plan and have a strategic discussion with your venue coordinator and DJ.