In summary:
- Transform your moodboard into a strict “Design Constitution” to act as a decisive filter against tempting but mismatched decor ideas.
- Finalize all major design decisions and vendor bookings at least three months before the wedding to lock in costs, prevent scope creep, and reduce decision fatigue.
- Strategically allocate your decor budget based on maximum impact, prioritizing foundational elements like lighting or linens that transform the entire space.
- Embrace venue restrictions as creative challenges, not roadblocks, by planning approved alternatives from the very beginning.
The journey from a Pinterest board overflowing with beautiful ideas to a cohesive, breathtaking wedding reality is often fraught with peril. For many couples, the excitement of planning quickly gives way to a cycle of impulse buys—a charming set of vases here, a trendy sign there—that don’t quite fit together. This leads to a disjointed look and a budget that spirals out of control. The common advice is to simply “be disciplined” or “track your spending,” but these are reactive measures, not preventative strategies. They tell you after the fact that you’ve gone off course, but they don’t provide the framework to stay on track from the start.
What if the solution wasn’t about more willpower, but a better system? The key isn’t to create a rigid budget spreadsheet you’ll dread looking at. It’s about building a strategic Design Roadmap. This isn’t just a collection of pretty pictures; it’s a foundational document, a constitution for your wedding’s visual identity. It reframes the entire process from one of endless, overwhelming choices to a series of focused, high-impact decisions. It’s about learning to view limitations—whether budget, time, or venue rules—not as frustrations, but as powerful creative constraints that fuel ingenuity.
This guide provides a project manager’s approach to wedding design. We will dismantle the process into a clear, actionable framework. You will learn how to weaponize your moodboard to make decisive choices, understand the critical timelines for locking in vendors, allocate your budget for maximum visual return, and turn potential restrictions into your greatest design assets. By adopting this structured, strategic mindset, you can execute a wedding that looks opulent and deeply personal, all while maintaining financial control and creative sanity.
This article will guide you through the essential components of building that roadmap. The following sections break down each strategic step, providing the tools and timelines needed to execute your vision with precision and confidence.
Summary: A Strategic Roadmap to a Cohesive Wedding Design
- How to use your moodboard to say “no” to mismatched decor ideas?
- Why you should finalize design choices 3 months out to save your sanity?
- Where to spend 50% of your decor budget: linens, lights, or flowers?
- The risk of falling in love with a design that your venue explicitly forbids
- When to book the lighting tech relative to the florist for seamless setup?
- The 3 decor items you should cut to improve the overall visual impact
- Which 3 items are safe to DIY vs what you must rent for a polished look?
- How to Fake Opulent Luxury on a Mid-Range Wedding Budget?
How to use your moodboard to say “no” to mismatched decor ideas?
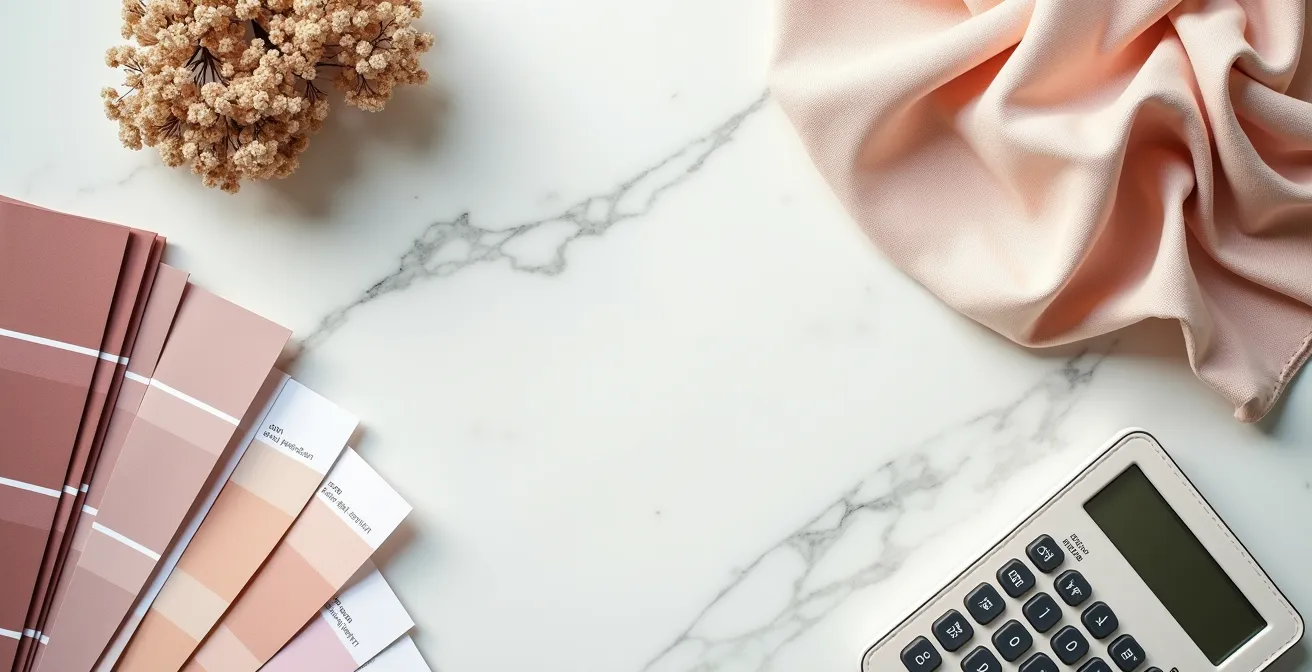
A moodboard is often seen as a collage of inspiration, but its true power lies in its function as a strategic filter. To prevent impulse spending, you must elevate it from a collection of “likes” to a binding “Design Constitution.” This document becomes the ultimate authority against which every potential purchase, rental, or DIY project is judged. If an item doesn’t align with the constitution, it’s an automatic “no.” This removes emotion and decision fatigue from the equation, replacing them with disciplined, strategic clarity. It’s the most effective tool for ensuring every element, from the largest installation to the smallest detail, serves a unified vision.
Creating this constitution involves distilling your broad inspiration into a concrete set of rules. This means defining a strict color palette (no more than three to four core colors), a “vibe mantra” (five keywords that describe the feeling you want to evoke, like “romantic, moody, organic, timeless, and warm”), and primary textures (e.g., velvet, raw wood, aged brass). When a new, tempting decor item appears, you don’t ask, “Do I like it?” You ask, “Does it conform to my color palette, my vibe mantra, and my texture profile?” This objective test makes it far easier to reject beautiful but discordant items.
Case Study: The ‘Design Constitution’ in Action
Stephanie, a real bride, effectively used this principle by creating a clear vision for her wedding. She identified four non-negotiable focal points: a circle ceremony arch, a carpet runner for the aisle, a “sweetheart jungle” dresser for the couple’s table, and an outdoor living room space. By defining these core elements, she established her design constitution. When faced with new ideas or trendy items, she could easily say no because they didn’t support her central “sweetheart jungle” concept. This clarity prevented wasteful spending on mismatched items and resulted in a perfectly cohesive design where even the plants used for decor were chosen to be later moved into her and her partner’s home.
Your Action Plan: The 5-Step Decision Filter
- Palette Police: Extract your 3-4 color maximum from the moodboard. Refuse any item that falls outside this strict range.
- Vibe Check: Define your 5-word “Vibe Mantra” (e.g., “Modern, Minimalist, Urban, Green, Crisp”). Test each new idea against at least three of these words.
- Texture Test: Identify your primary textures (e.g., velvet, wood, glass). Reject items with conflicting textures that would disrupt the tactile harmony.
- Visual Audit: Apply the “One In, One Out” rule. Before adding a tempting new piece, you must agree to remove an existing planned item of similar scale.
- Exclusion Zone: Create a visual “Not-To-Do List” of popular trends you’ve seen that directly contradict your core vision. Refer to it often.
Why you should finalize design choices 3 months out to save your sanity?
In the world of wedding project management, timing is everything. While the average planning timeline can stretch over a year, there is a critical window for decision-making. The “three-month mark” is the strategic deadline for locking in all major design elements. This isn’t an arbitrary date; it’s the point at which vendor availability narrows, custom orders require lead time, and rental inventory gets reserved. Waiting longer introduces immense risk: the perfect linen is out of stock, the custom-built arch can’t be made, and your first-choice vendors are booked. This forces last-minute compromises that are often more expensive and less aligned with your vision.
Finalizing your design three months out is a powerful strategy for saving your sanity and your budget. It halts “scope creep”—the endless addition of “just one more thing”—and protects you from late-stage decision fatigue. When the core design is locked, your mental energy can shift to execution and refinement rather than fundamental choices. According to industry best practices, professional planners recommend finalizing design details around this time, typically after an average of 12 to 18 months of initial planning. This structured approach moves you from a state of creative chaos to one of controlled, confident execution.

Of course, not every single detail needs to be set in stone. The key is to differentiate between foundational elements and flexible accents. Custom builds, major lighting installations, and furniture rentals are non-negotiable items to finalize. These require deposits, contracts, and significant lead time. In contrast, the exact number of bud vases or minor decor accents can often be adjusted closer to the date as your final guest count solidifies.
This table illustrates the items you should consider locked versus those that can remain flexible at the three-month mark.
| Finalized Items (Lock at 3 Months) | Flexible Items (Can Adjust) |
|---|---|
| Custom builds & installations | Exact quantity of bud vases |
| Furniture & linen rentals | Specific flower varieties (within color palette) |
| Major lighting design | Minor decor accents |
| Vendor bookings & orders | Seating arrangement details |
Where to spend 50% of your decor budget: linens, lights, or flowers?
Once your design constitution is set, the next strategic challenge is budget allocation. While wedding budget experts recommend allocating about 10% of the total wedding cost to decor and flowers, how you spend that 10% is what truly defines the event’s atmosphere. A common mistake is spreading the budget too thinly across dozens of small, unnoticeable details. The project manager’s approach is to concentrate funds on high-impact elements that deliver the greatest visual return on investment. The question is not “what can we afford?” but “what will transform the space?”
The answer to whether you should prioritize linens, lights, or flowers depends entirely on your venue’s existing strengths and weaknesses. There is no one-size-fits-all solution; there is only a venue-specific strategy. Your goal is to allocate at least 50% of your decor budget to the category that will most effectively solve your venue’s primary aesthetic problem or enhance its best feature. This is a targeted strike, not a scattered approach. For example, in a “blank slate” venue like a warehouse or loft, lighting is your most powerful tool. It’s not just illumination; it’s atmospheric architecture that can create intimacy, drama, and dimension from nothing.
Conversely, if your venue has beautiful architecture but is filled with dated or unsightly furniture, your priority becomes linens and rentals. High-quality, full-length linens can instantly elevate a room and hide a multitude of sins, while upgraded chairs can change the entire feel of the space. In this scenario, flowers become a secondary accent. If you’ve chosen a stunning outdoor setting, the strategy flips again. Here, you should invest heavily in floral designs that enhance and complement the natural beauty, rather than competing with it. The goal is to create one or two breathtaking floral moments—like a ceremony arch or a head table installation—that become the focal point.
A useful tool for this is the “Guest’s First Five Minutes” test. Walk through your venue as a guest would. What are the first things they see? The entryway, the path to the bar, and the overall ambient lighting. These areas often provide the highest impact for your investment. By concentrating your funds on these key touchpoints, you create a powerful first impression of luxury and cohesion that will define the entire guest experience.
The risk of falling in love with a design that your venue explicitly forbids
One of the most common—and heartbreaking—mistakes in wedding planning is designing your dream celebration in a vacuum, only to discover that your chosen venue has a long list of restrictions. Falling in love with the idea of a candlelit dinner before learning your historic venue forbids open flames, or designing a hanging floral installation before realizing nothing can be attached to the ceiling, leads to costly redesigns and immense frustration. The single most important step you can take before creating your moodboard is to get the venue’s complete list of rules and restrictions in writing. This document should become a foundational annex to your Design Constitution.
Instead of viewing these rules as roadblocks, a strategic mindset reframes them as creative constraints. Knowing you can’t use nails or tape forces you to explore elegant, freestanding backdrops. A ban on glitter or confetti pushes you toward more sophisticated and eco-friendly alternatives like dried flower petals. As one couple planning a beach wedding discovered, a strict rule against artificial flowers and flame candles led them to create beautiful, budget-friendly centerpieces using wooden plaques, mirrors, and high-quality LED candles, proving that limitations can be a catalyst for ingenuity. They successfully avoided disappointment by getting the “Forbidden List” before any creative work began.
Understanding these constraints upfront prevents wasted time, money, and emotional energy. It allows you to source and budget for approved alternatives from the very beginning. A smart approach is to create a “translation guide” that directly maps common restrictions to viable, stylish, and budget-friendly solutions. This proactive planning turns a list of “no’s” into a guide for “how-to’s,” ensuring your design is both beautiful and compliant.
This table serves as a practical translation tool for some of the most common venue restrictions.
| Common Venue Restriction | Budget-Friendly Alternative | Visual Impact |
|---|---|---|
| No open flames | High-quality LED candles with melted edges | 95% similar ambiance |
| No hanging installations | Freestanding structures or weighted displays | Same vertical impact |
| No confetti/glitter | Biodegradable dried petals or bubbles | Equal celebratory effect |
| No nails/adhesives on walls | Command strips or weighted backdrop stands | Full coverage possible |
When to book the lighting tech relative to the florist for seamless setup?
A seamless wedding design is a masterclass in project coordination. Two of the most visually impactful vendors are the lighting technician and the florist, yet their work is often booked and planned in isolation. This is a critical strategic error. To achieve a cohesive and high-end look, their efforts must be coordinated, and the booking sequence is paramount. The cardinal rule is this: lighting precedes florals. You should consult with and book your lighting designer either before or concurrently with your florist.
Why this order? Because lighting is the “atmospheric architecture” of your space. It dictates which areas will be highlighted and which will recede into shadow. It creates mood, directs focus, and determines how colors will be perceived. A florist can only design effectively once they know where the light will fall. Will the head table be bathed in a warm spotlight? Will the centerpieces be lit from above? Booking the lighting tech first allows you to create a foundational light plan that the florist can then use to strategically place their arrangements for maximum impact. A joint consultation with both vendors is the gold-standard approach, ensuring they can collaborate on a unified vision from the start.
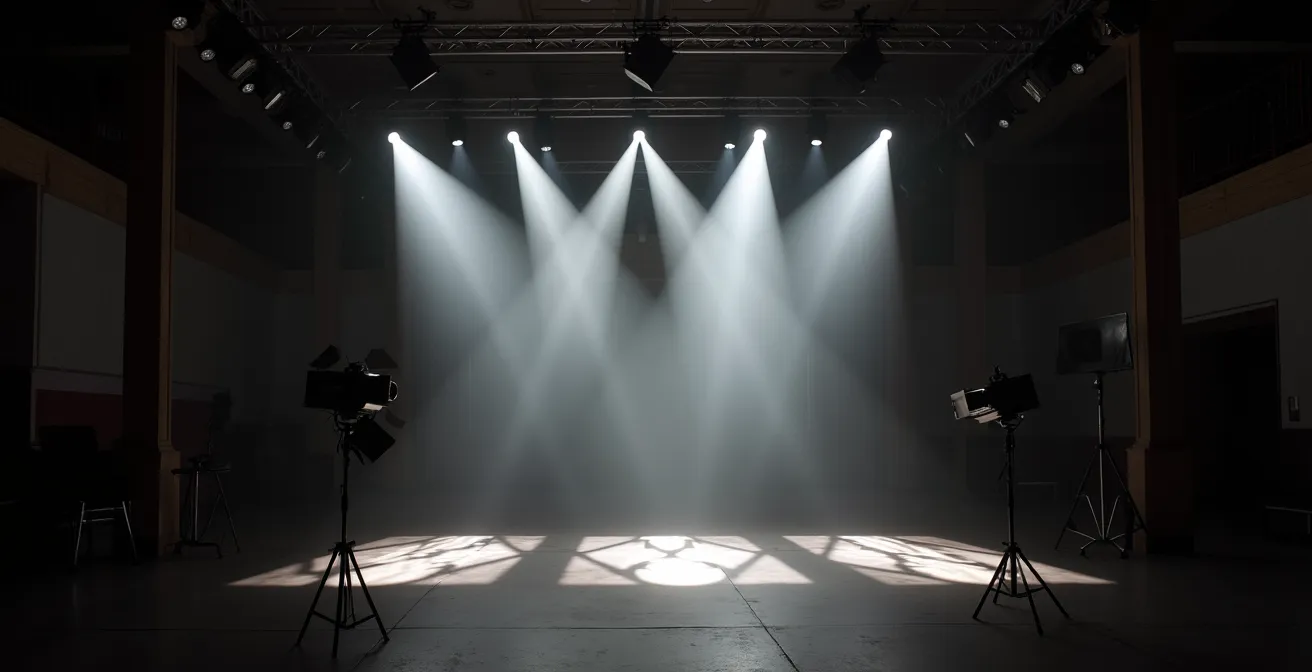
This coordinated approach extends to the wedding day itself. A precise setup schedule is non-negotiable for a smooth installation. The lighting team almost always needs to arrive first, typically 4-6 hours before the ceremony. They need an empty room to run cables, position uplights, and focus spotlights without navigating around tables, linens, and floral arrangements. The floral team then follows, usually 2-3 hours before the ceremony, to place their designs into a pre-lit environment. This sequence prevents damage to delicate flowers and allows the florist to make final adjustments based on the actual lighting conditions.
The vendor booking timeline is a critical path that begins the moment you secure your venue. The venue sets the constraints, the moodboard defines the vision, and the lighting designer provides the architectural framework. Only then can the florist come in to truly bring the space to life. Following this disciplined sequence ensures that each layer of your design builds logically upon the last, resulting in a flawless and harmonious final product.
The 3 decor items you should cut to improve the overall visual impact
In the pursuit of a beautiful wedding, the impulse is always to add more. However, a disciplined design strategy recognizes the power of visual subtraction. By strategically eliminating certain low-impact items, you free up budget and attention for elements that truly “wow” your guests. Many of the small, personalized details that seem essential during planning are rarely noticed in the celebratory blur of the actual event. The key is to cut the clutter and amplify what matters.
Three categories of decor consistently fall into the low-impact, high-cost trap. The first is intricate centerpieces on every single guest table. Instead of a large floral arrangement on all 15 tables, alternate between five elaborate ones and ten simple, elegant groupings of candles. The variation adds visual interest and dramatically cuts costs. The second item to cut is the ceremony aisle runner. It’s walked on once and is often more of a tripping hazard than a design feature. Reallocate that budget towards a truly stunning altar or ceremony backdrop, which will be the focal point of the ceremony and appear in the majority of your photos.
The third category includes hyper-personalized disposables like custom cocktail napkins, drink stirrers, and individual menu cards at each place setting. While charming in theory, these details are fleeting and rarely make a lasting impression on guests. A single, beautifully designed menu at the bar or on each table is far more effective and budget-friendly. In fact, wedding budget experts have calculated that over $1,000 can be saved by cutting items like favors, extensive aisle markers, and individual menu cards. This “found money” can then be reinvested into one or two high-impact moments, like dramatic dance floor lighting or an unforgettable entrance display.
To guide these decisions, apply the “Guest Photo Test.” Before signing off on a decor item, ask yourself: “Will this realistically appear in the background of my guests’ photos?” If the answer is no for 90% of the items, it’s a prime candidate for visual subtraction. By cutting the superfluous, you amplify the spectacular.
Which 3 items are safe to DIY vs what you must rent for a polished look?
The “do-it-yourself” route is often touted as the ultimate solution for a budget wedding, but it’s a path filled with hidden costs: time, stress, and the risk of an unprofessional finish. A strategic design roadmap doesn’t forbid DIY; it defines its role precisely. The key is to differentiate between items that are safe to DIY and those that are non-negotiable rentals for a polished look. A successful DIY project is one that can be completed weeks in advance, is not essential to the core guest experience, and does not require day-of perfection or assembly.
Three items are generally safe and effective to DIY. First, signage and paper goods. Welcome signs, seating charts, and table numbers can be designed digitally and printed professionally for a fraction of the cost of custom calligraphy. This can be done well ahead of time. Second, favors and welcome bags. Assembling these items can be a fun pre-wedding activity, and they don’t require flawless execution. Third, certain static decor elements, like a custom-built wedding arch, can be a major win, as one couple learned by building their own and saving hundreds. The key to their success was that it was a pre-assembled, photogenic item that didn’t require complex day-of setup.
Conversely, there are three categories you must rent or hire a professional for. First and foremost, linens. Renting ensures they arrive clean, pressed, and in the correct size. The failed attempt by a real couple to DIY their linens resulted in a wrinkled mess and immense day-of stress, a common pitfall. Second, lighting. Professional lighting involves technical expertise, proper equipment, and insurance that is simply beyond the scope of DIY. It is a foundational element that dictates the entire mood. Third, chairs and tableware. These items are seen and used by every single guest. Renting guarantees consistency, quality, and, most importantly, saves you from the logistical nightmare of transporting, setting up, and cleaning hundreds of individual pieces.
The ultimate rule for the DIY vs. Rent decision is this: if it impacts guest comfort (chairs), requires technical skill (lighting), or needs to look perfect on the day (linens), you must rent it. Reserve your valuable time and energy for creative, low-stakes projects that add a personal touch without risking the overall polish and execution of your event.
Key takeaways
- Strategy Over Spending: A cohesive design comes from a disciplined roadmap, not an unlimited budget. Use a “Design Constitution” to guide every choice.
- Time is a Tool: Lock in major design decisions and vendors 3 months out to prevent stress, control costs, and move from planning to execution.
- Impactful Allocation: Concentrate at least 50% of your decor budget on foundational elements like lighting or linens that transform your specific venue.
How to Fake Opulent Luxury on a Mid-Range Wedding Budget?
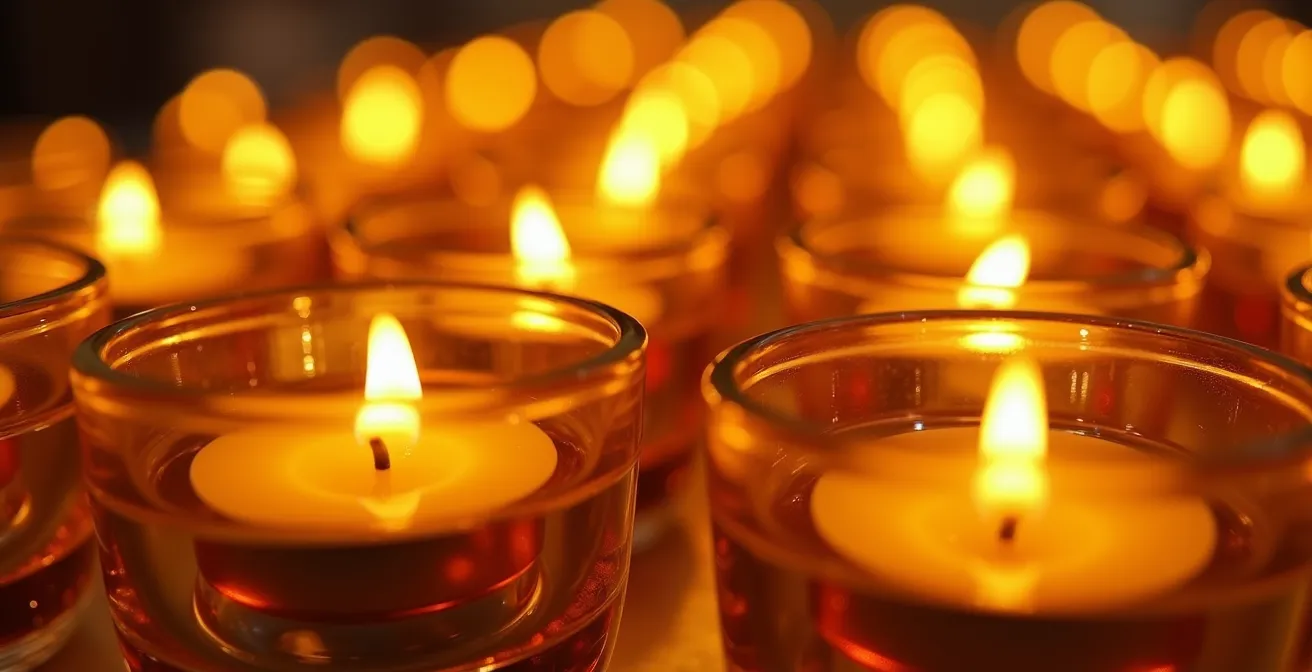
Achieving a look of opulent luxury isn’t about the price tag of individual items, but about the strategic application of design principles. With a disciplined roadmap, a mid-range budget can produce an atmosphere that feels lavish and expensive. The secret lies in two core concepts: repetition and scale. Instead of buying one expensive, statement-making piece, invest in a large quantity of a single, inexpensive element. The visual impact of abundance creates a powerful illusion of luxury.
The most effective way to deploy this strategy is with lighting. An abundance of candles is the oldest and most effective trick in the book. A room filled with hundreds of simple glass votives and pillar candles creates a dynamic, shimmering atmosphere that feels incredibly rich and romantic. The cost of 100 small candles is a fraction of a large floral installation, but the transformative effect on a room is arguably greater. The key is quantity; a few scattered candles look sparse, but a dense grouping on tables, along ledges, and clustered on the floor creates an immersive experience.
The principle of scale works similarly. Instead of small, intricate centerpieces, focus on creating one or two large-scale moments. This could be a dramatic, oversized floral installation at the entrance, a custom backdrop behind the head table, or a unique lighting projection on the dance floor. These large gestures become the primary focal points of the room, drawing the eye and setting a grand tone. Guests will remember the singular “wow” moment far more than they will a dozen small, forgettable details. By combining the power of repetition (like with candles) and the impact of scale (with one or two focal points), you create a design that feels intentional, grand, and far more luxurious than its budget would suggest.
This approach requires discipline. It means saying “no” to many small, tempting items in order to say “yes” to the quantity and scale that truly deliver a high-end feel. It is the ultimate expression of a strategic design roadmap: making deliberate, concentrated choices that amplify visual impact and create a lasting impression of effortless luxury.
Now that you have the complete strategic framework, the next step is to begin building your own Design Constitution. Start by distilling your inspiration into a clear set of rules, and use that document to guide every decision from this point forward.