In summary:
- Focus on strategic “negative space” to highlight the wood’s texture, not just cover it.
- Prioritize the guest experience by ensuring tables are clean, snag-free, and that place settings are stable.
- Use runners to create a “spine” for your decor, guiding the eye without hiding the table’s character.
- Build vertical interest with foam-free greenery techniques and varied heights to prevent a flat tablescape.
- Embrace the sustainability of using reclaimed wood, a choice that adds depth and meaning to your event.
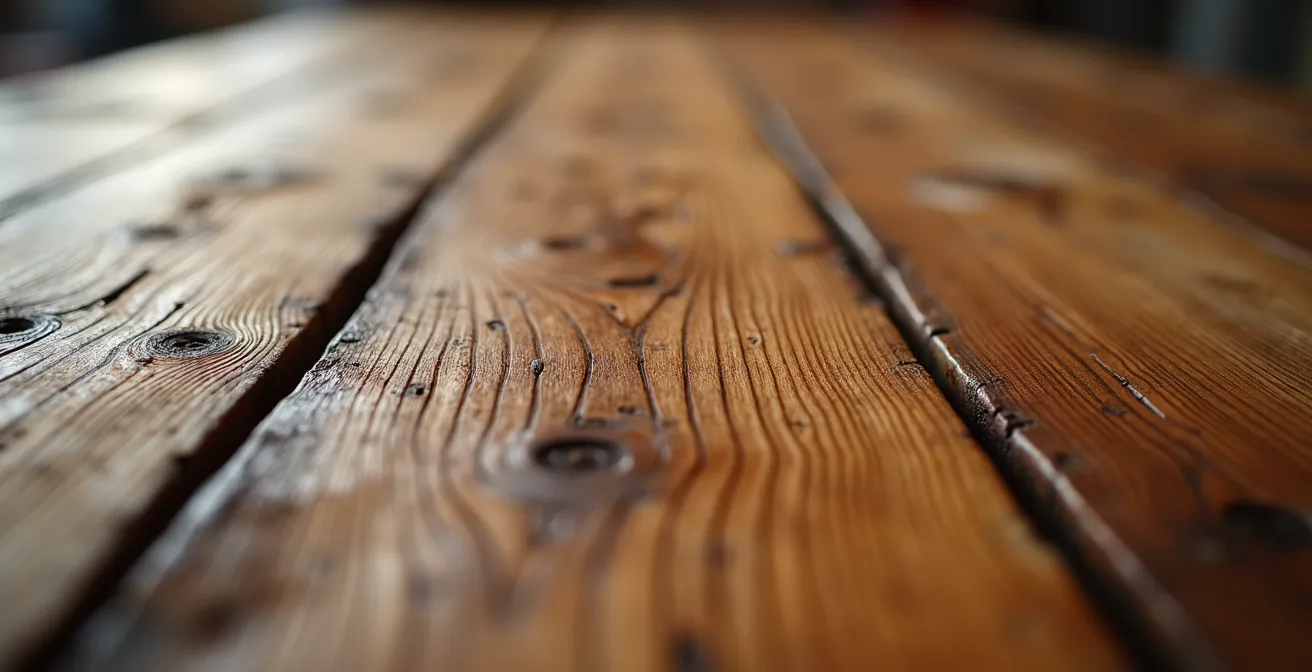
You chose them for a reason. The deep grain, the history etched into the surface, the warm, authentic character—reclaimed wood farm tables are a statement in themselves. Yet, after securing them for your wedding, a quiet panic can set in. The instinct is often to fill the space, to layer on gauze runners, dense floral garlands, and elaborate place settings, fearing the tables will otherwise look “bare” or unfinished. This approach, while common, often hides the very beauty you paid to showcase.
The secret to a truly stunning rustic-chic tablescape lies in a counter-intuitive principle: celebrating the wood by styling what’s around it. It’s an exercise in creating intentional negative space. This isn’t about leaving the table empty; it’s about a curated approach where every element, from the texture of the charger to the height of a candle, enters into a textural conversation with the wood. It’s a shift from merely decorating a surface to designing an experience, one that feels both elevated and deeply personal.
This guide moves beyond the basics. We’ll explore the practical preparations that ensure a flawless foundation, from cleaning and delivery logistics to crucial pre-event checks. Then, we’ll dive into the art of styling, dissecting how to build structure, play with fabrics, and ensure every detail contributes to a cohesive, breathtaking, and comfortable setting for your guests. Forget covering up; it’s time to let the bare beauty of the wood speak for itself.
To navigate these essential steps, this article breaks down the entire process. From the foundational preparations to the final stylistic flourishes, you’ll find a clear roadmap to achieving that effortlessly elegant look.
Summary: Bare Beauty: How to Style Reclaimed Wood Tables Without Tablecloths
- How to clean rented farm tables so they don’t feel sticky or dusty?
- Chiffon runner vs. Naked wood: which creates a better frame for centerpieces?
- Checking your rental tables: avoiding damage to guests’ expensive outfits
- Why using existing furniture lowers the carbon footprint of your event?
- Delivery timing: why farm tables need 2x the setup time of folding tables?
- Techniques for adding height to a greenery runner without using foam
- Charger, dinner, salad: ensuring the stack doesn’t wobble when cut?
- How to Style Gauze Runners So They Look Flowy, Not Messy?
How to clean rented farm tables so they don’t feel sticky or dusty?
The first step to a beautiful tablescape is ensuring the canvas itself is flawless. Rented farm tables, despite their rustic charm, can arrive with a fine layer of dust from storage or a slightly sticky finish from previous events. A quick wipe-down is essential not just for aesthetics but for your guests’ comfort. Avoid harsh chemical cleaners, as they can damage the wood’s protective finish and leave a sterile smell that clashes with the natural ambiance you’re creating. The goal is a gentle, effective clean that respects the material.
A simple solution of warm water with a few drops of mild dish soap is your best ally. Use a soft, damp microfiber cloth, always wiping in the direction of the wood grain to avoid pushing debris into the natural texture. For stubborn sticky spots, a diluted white vinegar solution can work wonders, but it’s crucial to follow up with a cloth dampened with clean water to neutralize the acid. The most important step? Dry the surface immediately and thoroughly with a clean, lint-free cloth. This prevents water spots and protects the wood from absorbing excess moisture, which can cause warping.
For the intricate parts of reclaimed wood, like deep knots or natural cracks, liquids are the enemy. Compressed air is a professional secret for dislodging dust from these crevices without risking water damage. This ensures every inch of the table feels clean and cared for, providing a perfect foundation for your place settings and decor. It’s this attention to detail that elevates the guest experience from good to exceptional.
Chiffon runner vs. Naked wood: which creates a better frame for centerpieces?
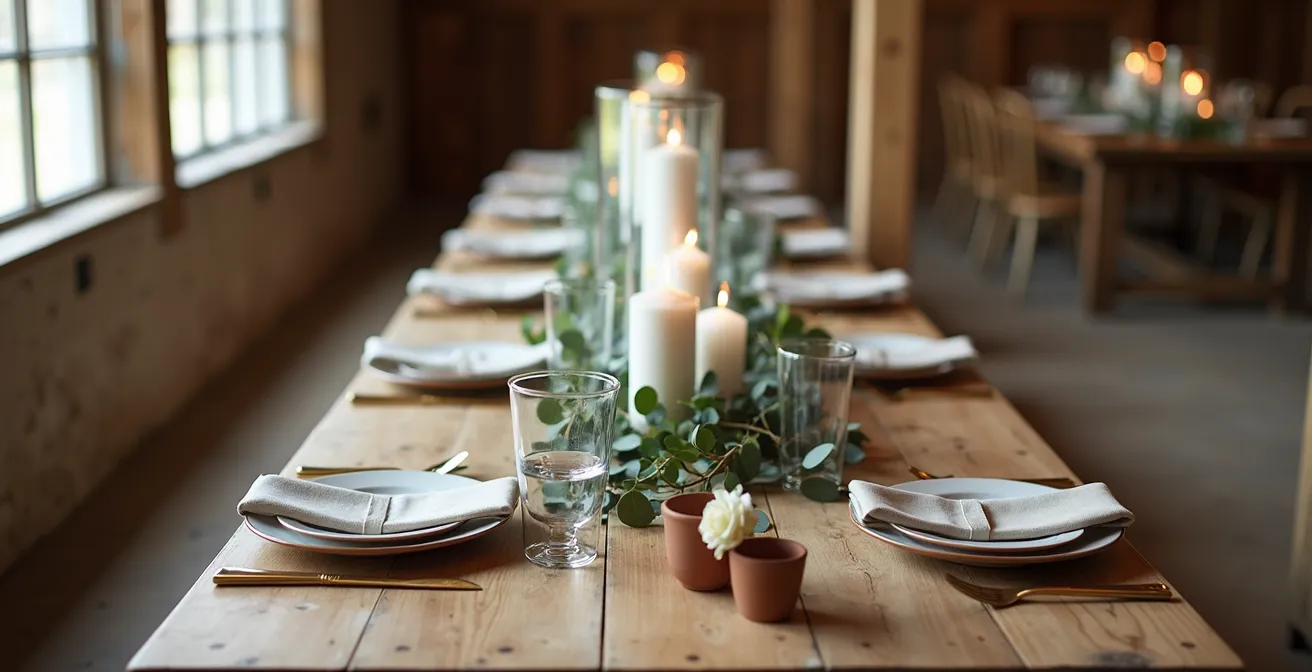
This is the central aesthetic question. A runner acts as a ‘spine’ for your tablescape, guiding your guests’ eyes down the length of the table and creating a cohesive path for your centerpieces. In contrast, leaving the wood bare creates ‘islands’ of decor, allowing for more modern, clustered arrangements of vases and candles. Neither is right or wrong, but the choice fundamentally changes the visual rhythm of your reception. A runner often lends a softer, more traditionally romantic feel, while naked wood emphasizes the table’s texture and suits a minimalist or modern-rustic style.
A flowing chiffon or gauze runner adds movement and softness, which is especially beautiful in photographs. It works best with long, continuous arrangements like greenery garlands. However, naked wood is the perfect choice to showcase a particularly beautiful table with unique grain patterns or ‘figured’ wood. It allows you to create varied groupings of bud vases, pillar candles, and other decorative objects, resulting in a tablescape with diverse points of interest. This choice depends on your centerpiece strategy and the character of the tables themselves.
The visual below perfectly illustrates this dichotomy. On one side, the runner creates a clear, linear flow. On the other, the bare wood allows the clustered centerpieces to become individual focal points, each in direct dialogue with the wood’s texture.
To help you decide, this comparison breaks down the key considerations for each approach.
| Aspect | Chiffon Runner | Naked Wood |
|---|---|---|
| Visual Effect | Creates ‘spine’ guiding the eye | Creates ‘islands’ for varied groupings |
| Photography | Adds softness and movement | Emphasizes texture and grain |
| Best For | Long garlands, romantic feel | Clustered vases, modern look |
| Wood Character | Better for uniform grain | Showcases figured wood |
Checking your rental tables: avoiding damage to guests’ expensive outfits
Beyond aesthetics, your tables have a practical job: to be a safe and comfortable place for your guests. A beautiful but splintery reclaimed wood table can easily snag a delicate dress or a pair of expensive trousers, creating an awkward and unpleasant moment. Before a single fork is set, a thorough tactile inspection is non-negotiable. This isn’t just about looking for flaws; it’s about feeling for them. Your rental company is responsible for providing safe furniture, and this quick audit ensures they’ve held up their end of the bargain.
The “white glove test” is a simple but effective protocol. Run a soft microfiber cloth (or glove) along every top edge, corner, and especially underneath the table where guests’ knees will be. This will instantly catch any rough patches or potential splinters. While you’re at it, check for any protruding nail heads or loose hardware. Finally, give the table a gentle push to test its stability. An uneven floor can make even the sturdiest table wobble, but this can often be corrected with small furniture wedges. A prepared planner will have these on hand.
This pre-emptive check is a mark of a thoughtful host. As the experts at Grain Designs emphasize in their guidelines, the standard for professional events is clear. They state:
All table surfaces and edges must be sealed and certified snag-free.
– Wedding Venue Contract Standard, Grain Designs Wedding Table Guidelines
Having an emergency kit with a small piece of fine-grit sandpaper and some clear, quick-dry wax or polish can be a lifesaver for last-minute touch-ups, but the primary responsibility lies with the rental provider.
Your Pre-Event Table Audit Checklist: The White Glove Test
- Edge & Corner Inspection: Run a microfiber glove or cloth along all table edges and corners to detect any snags or splinters.
- Under-Table Check: Carefully feel the underside of the table rim, where guests’ legs and knees will make contact, for rough spots.
- Hardware Security: Visually and manually inspect for any protruding nail heads, loose screws, or unstable hardware.
- Stability Test: Place hands on the table and apply gentle pressure to check for wobbles. Use furniture wedges to level if necessary.
- Emergency Kit Prep: Have a small kit ready with fine-grit sandpaper and clear quick-dry wood wax for any minor, last-minute fixes.
Why using existing furniture lowers the carbon footprint of your event?
Choosing reclaimed wood farm tables goes beyond aesthetics; it’s a statement of values. In an era where sustainability is increasingly important, this choice has a tangible positive impact. The very nature of “reclaimed” wood means you are giving a second life to materials that would otherwise be discarded, preventing waste and the need to harvest new trees. Furthermore, renting existing, durable furniture is inherently more sustainable than purchasing new items or using disposable options. But the environmental benefit runs even deeper, right into the grain of the wood itself.
Wood is unique among materials for its ability to act as a long-term carbon store. As a tree grows, it absorbs carbon dioxide from the atmosphere. When that wood is harvested and turned into a piece of furniture like a table, that carbon remains locked away for the entire lifespan of the product. An analysis from PEFC highlights that a wooden table or chair effectively acts as a carbon sink for decades. This, combined with the fact that wooden products have a significantly lower carbon footprint in their production compared to steel, aluminum, or plastic, makes them a powerful tool for reducing an event’s environmental impact.
This powerful combination of low-emissions manufacturing and long-term carbon storage makes wood uniquely sustainable. By choosing to feature these tables, you are not only creating a beautiful atmosphere but also making a choice that is kinder to the planet. It’s a detail that adds an invisible but meaningful layer to your celebration, especially when you consider that recent wedding statistics show that 45% of couples are prioritizing eco-friendly options for their big day.
Delivery timing: why farm tables need 2x the setup time of folding tables?
One of the most common logistical mistakes when working with farm tables is underestimating the time required for setup. It’s not as simple as unfolding legs and throwing on a linen. These are heavy, substantial pieces of furniture that require careful handling and precise placement. A critical piece of data from event professionals confirms that farm tables require at least 2x longer setup time than standard folding tables. Factoring this into your day-of timeline is essential to avoid a stressful rush for your setup crew and florist.
Several factors contribute to this extended timeline. First, their weight and bulk mean they often require a specialized delivery team and equipment, not just two people. Second, their placement is an aesthetic decision. Unlike tables that will be hidden by cloths, farm tables must be perfectly aligned and spaced to create the desired visual effect in the room. This involves careful measurement and deliberation. Third, leveling these tables on uneven ground—a common issue at outdoor or tented venues—is a meticulous process that takes time.
Finally, as we’ve discussed, these tables require on-site cleaning and inspection before they can be styled. This entire process—from placement and leveling to cleaning and final prep—is what contributes to the extended setup duration. Communicating this timeline clearly with your venue coordinator and rental company will ensure a smooth, unhurried setup, allowing every other vendor, especially your florist, the time they need to work their magic on a perfectly prepared canvas.
- Weight & Manpower: Farm tables are significantly heavier, requiring a larger, more specialized crew for safe handling and placement.
- Precise Placement: Unlike hidden tables, farm tables are a visual element requiring careful measurement and aesthetic alignment within the space.
- Leveling on Site: Adjusting for uneven ground at venues (especially outdoors) is a time-consuming but crucial step for stability.
- Surface Preparation: Each table must be individually wiped down and inspected on-site before any decor can be placed.
- Aesthetic Deliberation: The final arrangement is a design choice, often requiring adjustments to achieve the perfect layout.
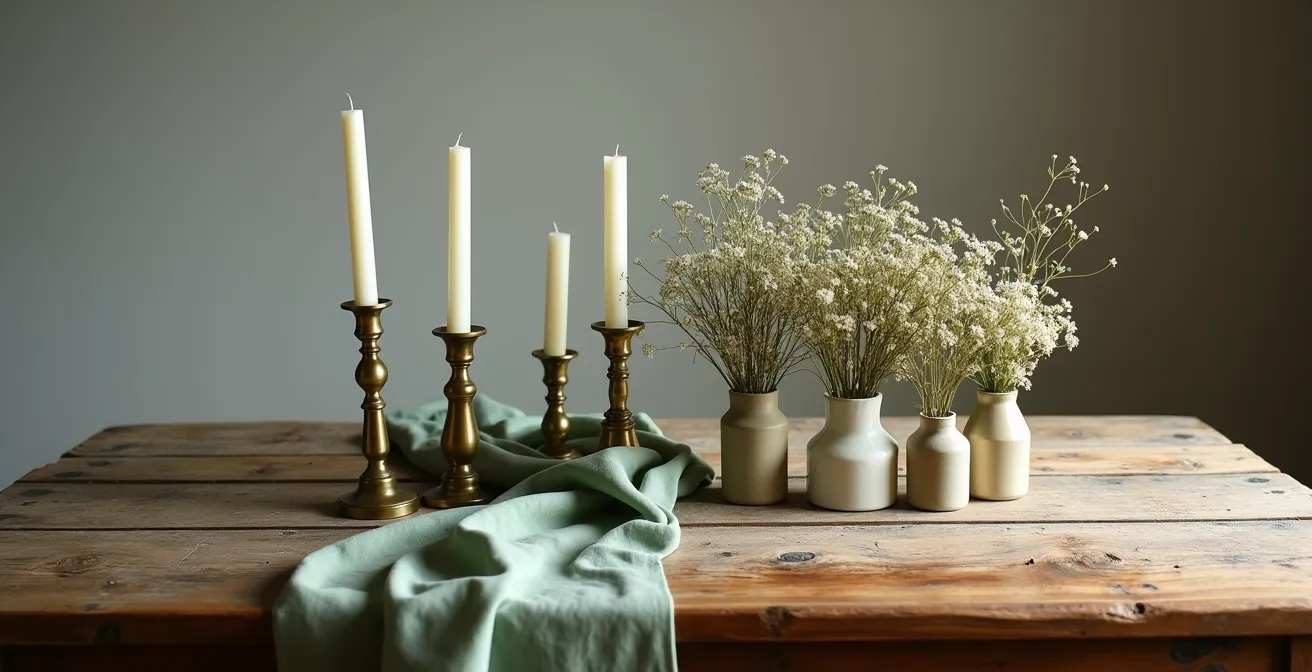
Techniques for adding height to a greenery runner without using foam
A flat greenery runner can look a bit one-dimensional on a long farm table. Creating varied heights is key to a dynamic, professional-looking tablescape, but that doesn’t mean you need to resort to environmentally unfriendly floral foam. The secret is to build an organic, self-supporting structure using natural materials. This approach not only aligns with the sustainable ethos of using reclaimed wood but also adds to the authentic, textural quality of the design. The technique lies in creating a hidden framework that lifts the greenery in strategic places.
Professional florists often start by creating a base with sturdy, woody branches like eucalyptus or olive branches. By crisscrossing these branches, you can form a stable, elevated structure that can support more delicate greenery and flowers woven into it. This creates natural peaks and valleys along the runner. Another technique is to use small, dark-painted wood blocks or even sturdy fruits like pomegranates or apples as hidden pedestals, tucking them under dense sections of the runner to create “strategic mounding” that appears to rise organically from the center.
Layering candle holders of varying heights is another powerful, foam-free method. Groupings of tall brass taper holders, medium black metal pillars, and low glass votives can be interspersed within the greenery. They not only provide ambient light but also act as structural elements, creating vertical lines that break up the horizontal plane of the table. This method allows you to build a centerpiece with depth and dimension, all while remaining true to the natural, rustic-chic aesthetic.
Charger, dinner, salad: ensuring the stack doesn’t wobble when cut?
The place setting is a key component of your tablescape, but its function is just as important as its form. A beautifully stacked set of plates—charger, dinner, and salad—can look stunning, but if it wobbles precariously the moment a guest tries to cut into their food, the elegance is lost. The structural integrity of your place setting is a detail that directly impacts guest experience. The culprit is usually a combination of a smooth, slick charger and a dinner plate with a small, pedestal-like base, creating an unstable pivot point.
The solution starts with the charger. Instead of a perfectly smooth, flat ceramic or glass charger, opt for one with texture. Rattan, wood, or even a charger with a slightly concave surface provides more grip for the dinner plate that sits atop it. Next, consider the dinner plate itself. A plate with a wide, flat base will always be more stable than one that rests on a narrow foot. When selecting your rentals, this is a practical detail to look out for.
For absolute peace of mind, there’s a professional trick: a tiny, pea-sized ball of museum putty (or “quake hold” putty) placed discreetly under the dinner plate. It’s completely invisible but provides just enough adhesion to prevent any slipping or wobbling. The final step is to perform a “cut test” on a sample place setting before the event, using a real knife to ensure everything stays put. This table breaks down the key factors for a wobble-free stack.
| Component | Stability Factor | Recommended Choice |
|---|---|---|
| Charger | Base grip | Textured surface (rattan, wood) |
| Dinner Plate | Weight distribution | Wide, flat base (avoid pedestal) |
| Stabilizer | Anti-wobble | Museum putty under plate |
| Testing | Pre-event check | Cut test with steak knife |
Key Takeaways
- Styling farm tables is about accentuating the wood’s character with “negative space,” not covering it.
- Guest experience is paramount: ensure tables are clean, snag-free, and place settings are stable.
- Choosing reclaimed wood is a sustainable choice that adds meaning by acting as a long-term carbon store.
How to Style Gauze Runners So They Look Flowy, Not Messy?
Gauze or cheesecloth runners are beloved for their ethereal, romantic quality, but there’s a fine line between looking artfully “flowy” and unintentionally “messy.” The secret to achieving that effortless, editorial look lies in preparation and strategic anchoring. A runner pulled straight from the package will have sharp, unnatural creases. To get soft, organic wrinkles, you need to prep the fabric at least a day in advance. The best method is to wash the runner, then twist it tightly while it’s still damp and let it dry in that state. This creates the gentle, all-over crinkle that is the signature of this style.
When styling on the table, avoid pulling the fabric taut. Instead, create a soft central gather by hand-scrunching it along the length of the table. This creates volume and texture. You then have a choice between two main styles: ‘puddling’ or ‘draping’. Puddling involves letting a generous amount of fabric pool elegantly on the floor at each end of the table for a very romantic, dramatic look. Draping is more controlled, with the fabric just kissing the floor or ending at the edge of the table. Your choice depends on the overall formality of your event.
To keep the runner’s shape and prevent it from looking like a heap of laundry, use your centerpieces as anchor points. The weight of a few bud vases, candle holders, or a heavier part of a greenery arrangement placed strategically along the runner will hold the soft folds in place. The interplay between the delicate, light fabric and the solid, natural wood creates a beautiful textural contrast that is the heart of the rustic-chic aesthetic.
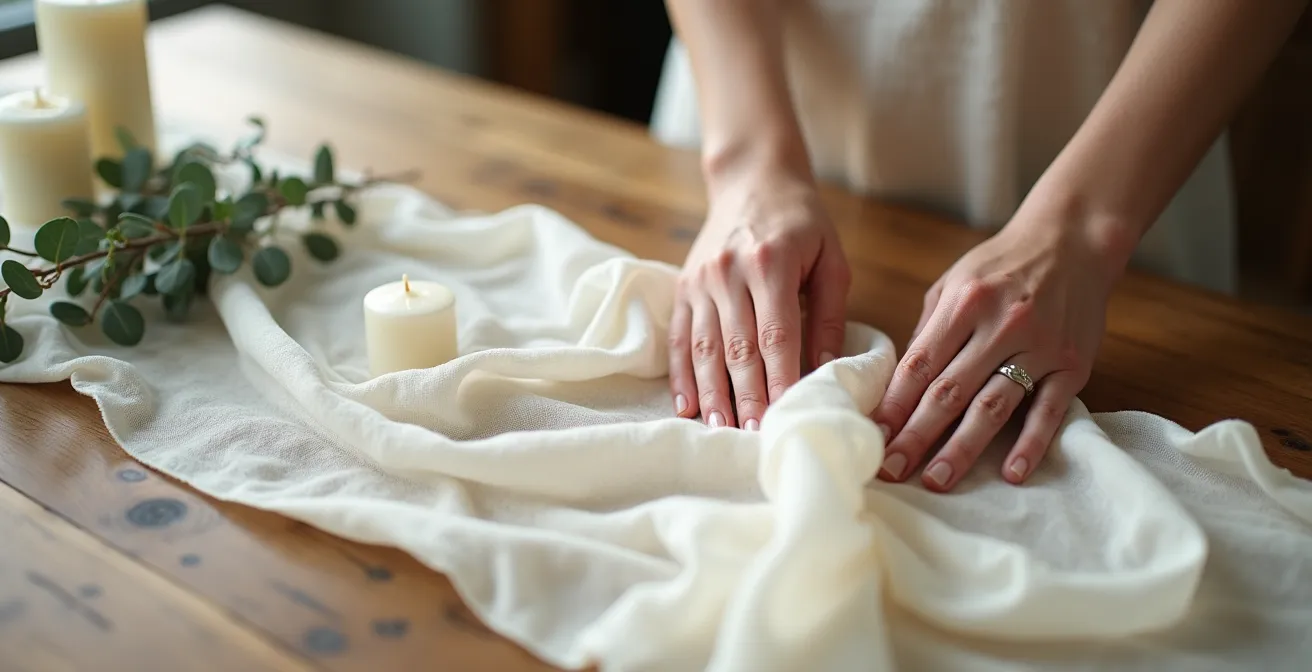
The pre-wrinkle method is the essential first step to achieving this look. By preparing the fabric correctly, you set the stage for a runner that embodies an organic, flowing atmosphere rather than a wrinkled mess.
Now that you have the stylist’s secrets for everything from table prep to centerpiece structure, you are equipped to create a tablescape that is both beautiful and thoughtful. The next step is to begin sketching your own table design and discussing these specific details with your florist, planner, and rental company to bring your vision to life.